Clutch Change-How-To.
Posted: Sat May 09, 2009 9:20 pm
Before you attempt the job, make sure you have a decent sized trolly jack, axle stands, a scissor jack, a couple of blocks of wood and a good sized tool kit, including a full set of metric spanners and sockets, a big socket (35mm, I think) for the hub nuts, a couple of big, flat blade screwdrivers, a pair of mole grips, a wire brush (electric or otherwise) and an allen key for the anti-roll bar link rods (4mm or 4.5mm). A long socket bar or a T bar with a section of pipe to help undo the driveshaft nuts, a torque wrench if you want to do the job by the book in terms of tightening bolts.A can of WD40, a 2lb hammer and maybe a ball joint splitter, but it's not essential.A clutch alignment tool or follow my instructions for lining the clutch up, a container to drain the oil into.Oh, and something comfortable to lie on and a dust mask for the clutch dust.
Before starting work, follow all health and safety guidelines and if you follow any of my instructions, do so at your own risk.
To save time with rusted nuts, use the wire brush on the ends of the anti-roll bar link rod mounting nuts, shock absorber bolts, and any rusty nuts that look like they may need removing, then let them soak in WD40, might be useful to do this a few days before you intend to start the job.
If you want to keep the car's electrics energised to avoid losing radio codes and such, plug in one of those tools with a battery fitted, into the cigar lighter, then remove the battery, and if it can be removed, the battery tray.
Under the bonnet......
Remove the air filter box and connected pipework completely, then remove all electrical connections connected to the gearbox, (reverse light switch, speed sensor, etc.).
Remove the clutch slave cylinder or cable if yours has a cable, keep the hydraulic pipe connected and use an elastic band to hold the operating rod into the cylinder.
Remove all the bolts connecting the gearbox to the engine, including the starter motor bolts and any earthing wires.
Lever off any gear linkage parts that you can see under the bonnet, they may be tight, and remove any brackets that may be fitted to the gearbox under the bonnet for the gear linkages or cables.
When you are convinced that there are no more bolts to undo or parts to remove from under the bonnet, move on to undoing the driveshaft nuts.
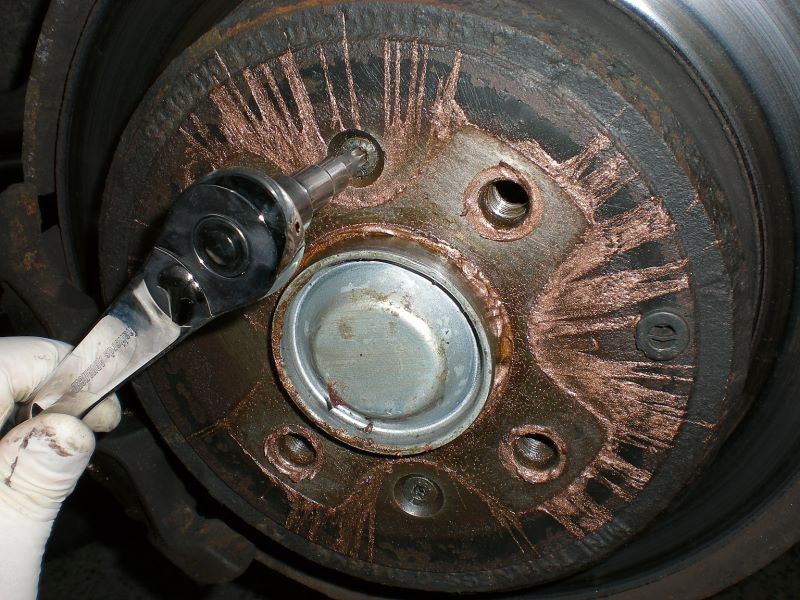
With the car on the ground, (steel wheels), take out the locking pins from the driveshaft nuts and using the long socket bar or T bar with a piece of pipe, undo the driveshaft nuts, (you may need to stand on the socket bar and force your weight onto the socket bar to undo the nut, hence the piece of pipe to extend the socket bar.Once undone, remove the nuts and tap lightly on the end of the driveshaft to make sure it moves freely, (dont hammer it hard or you will damage the thread, ideally, put the nut back on a couple of threads to try to avoid damage).
With alloy wheels, undo the wheel nuts, jack up the car and remove a wheel, if you have a steel spare, fit it and follow the above, otherwise, screw back in the wheel bolts and use a crowbar or something to fit behind the bolts and wedge it on the floor, now you can undo the big nut because the crowbar stops the hub from turning.
With the driveshaft nuts undone, jack up the car and fit some axle stands, be sure they are safely mounted.
Remove the undertray and fit your scissor jack, mounted on the wooden blocks, under the sump or something solid like the exhaust, be sure no damage will occur to the exhaust, fit the scissor jack near the gearbox side of the sump.
Drain off the gearbox oil.
Next remove one nut from the anti-roll bar link rods (each side) and remove the link rod away from the shock absorber.
To remove the shock absorber on the 406, my preffered method is to take out the bolt at the bottom of the shock absorber tube (16mm nut with a square on the other bolt side), squirt WD40 around the bottom of the shocker tube and where the bolt came from, taking care not to damage the abs or brake pad warning wires, hit the top of the hub carrier (behind the brake disc on the solid ledge), keep knocking downward until the shock absorber tube can be removed, (you may need to lever down on the bottom suspension arm).With the shocker tube removed, take out the driveshaft from the back of the hub and pull the driveshaft out of the gearbox, this applies to both sides and both driveshafts.
Some may prefer to undo the bottom ball joint nut and remove the bottom ball joint, I find removing the shocker tube easier.When you refit the tube, line up the peg that sticks out from the tube, with the slot where the bolt fits in.
With the driveshafts removed, go under the car and remove anything else connected to the gearbox or between the engine and gearbox, like the tin plate behind the flywheel or gearbox to engine bolts, gear linkages etc.
Jack up the gearbox until it is just being lifted by the jack and remove the gearbox mounting completely.
If all the bits connected to the gearbox are removed, lower the scissor jack a little and lower the trolley jack a little, you may need to clear the passengers side inner wing with the gearbox, by lowering it.
Using a large flat blade screwdriver, carefully lever the gearbox away from the engine, then wheel it back on the trolley jack until it is able to be lowered away from the engine.
Remove the clutch from the flywheel by undoing the 6 bolts holding the pressure plate to the flywheel.(If changing the flywheel, remove it now).
Part 2 tomorrow.
I hope this isn't too long winded.
Before starting work, follow all health and safety guidelines and if you follow any of my instructions, do so at your own risk.
To save time with rusted nuts, use the wire brush on the ends of the anti-roll bar link rod mounting nuts, shock absorber bolts, and any rusty nuts that look like they may need removing, then let them soak in WD40, might be useful to do this a few days before you intend to start the job.
If you want to keep the car's electrics energised to avoid losing radio codes and such, plug in one of those tools with a battery fitted, into the cigar lighter, then remove the battery, and if it can be removed, the battery tray.
Under the bonnet......
Remove the air filter box and connected pipework completely, then remove all electrical connections connected to the gearbox, (reverse light switch, speed sensor, etc.).
Remove the clutch slave cylinder or cable if yours has a cable, keep the hydraulic pipe connected and use an elastic band to hold the operating rod into the cylinder.
Remove all the bolts connecting the gearbox to the engine, including the starter motor bolts and any earthing wires.
Lever off any gear linkage parts that you can see under the bonnet, they may be tight, and remove any brackets that may be fitted to the gearbox under the bonnet for the gear linkages or cables.
When you are convinced that there are no more bolts to undo or parts to remove from under the bonnet, move on to undoing the driveshaft nuts.
With the car on the ground, (steel wheels), take out the locking pins from the driveshaft nuts and using the long socket bar or T bar with a piece of pipe, undo the driveshaft nuts, (you may need to stand on the socket bar and force your weight onto the socket bar to undo the nut, hence the piece of pipe to extend the socket bar.Once undone, remove the nuts and tap lightly on the end of the driveshaft to make sure it moves freely, (dont hammer it hard or you will damage the thread, ideally, put the nut back on a couple of threads to try to avoid damage).
With alloy wheels, undo the wheel nuts, jack up the car and remove a wheel, if you have a steel spare, fit it and follow the above, otherwise, screw back in the wheel bolts and use a crowbar or something to fit behind the bolts and wedge it on the floor, now you can undo the big nut because the crowbar stops the hub from turning.
With the driveshaft nuts undone, jack up the car and fit some axle stands, be sure they are safely mounted.
Remove the undertray and fit your scissor jack, mounted on the wooden blocks, under the sump or something solid like the exhaust, be sure no damage will occur to the exhaust, fit the scissor jack near the gearbox side of the sump.
Drain off the gearbox oil.
Next remove one nut from the anti-roll bar link rods (each side) and remove the link rod away from the shock absorber.
To remove the shock absorber on the 406, my preffered method is to take out the bolt at the bottom of the shock absorber tube (16mm nut with a square on the other bolt side), squirt WD40 around the bottom of the shocker tube and where the bolt came from, taking care not to damage the abs or brake pad warning wires, hit the top of the hub carrier (behind the brake disc on the solid ledge), keep knocking downward until the shock absorber tube can be removed, (you may need to lever down on the bottom suspension arm).With the shocker tube removed, take out the driveshaft from the back of the hub and pull the driveshaft out of the gearbox, this applies to both sides and both driveshafts.
Some may prefer to undo the bottom ball joint nut and remove the bottom ball joint, I find removing the shocker tube easier.When you refit the tube, line up the peg that sticks out from the tube, with the slot where the bolt fits in.
With the driveshafts removed, go under the car and remove anything else connected to the gearbox or between the engine and gearbox, like the tin plate behind the flywheel or gearbox to engine bolts, gear linkages etc.
Jack up the gearbox until it is just being lifted by the jack and remove the gearbox mounting completely.
If all the bits connected to the gearbox are removed, lower the scissor jack a little and lower the trolley jack a little, you may need to clear the passengers side inner wing with the gearbox, by lowering it.
Using a large flat blade screwdriver, carefully lever the gearbox away from the engine, then wheel it back on the trolley jack until it is able to be lowered away from the engine.
Remove the clutch from the flywheel by undoing the 6 bolts holding the pressure plate to the flywheel.(If changing the flywheel, remove it now).
Part 2 tomorrow.
I hope this isn't too long winded.