Belt:
String/wire
10+13mm sockets, wrench and longish extension bar (10" or so is fine)
21mm spanner. 22mm will do at a push but isn't ideal
A new belt's also helpful
Bottom pulley:
Wheel removal tools
Torx screwdriver, mole grips/chainsaw/etc for removing the wheelarch screws
Tensioner:
16mm (I think) socket
Hammer + makeshift chisel
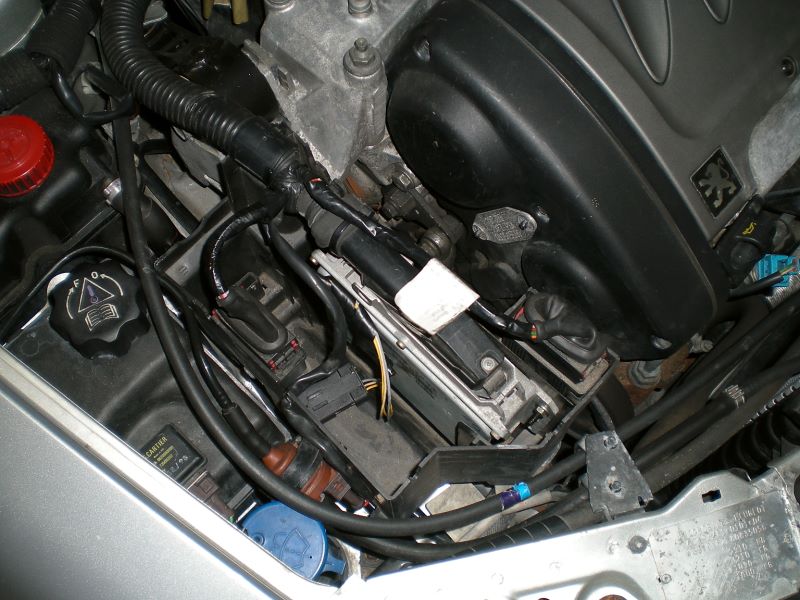
1. First of all, the ECU box needs to come out. Lift the lid and you should see this:
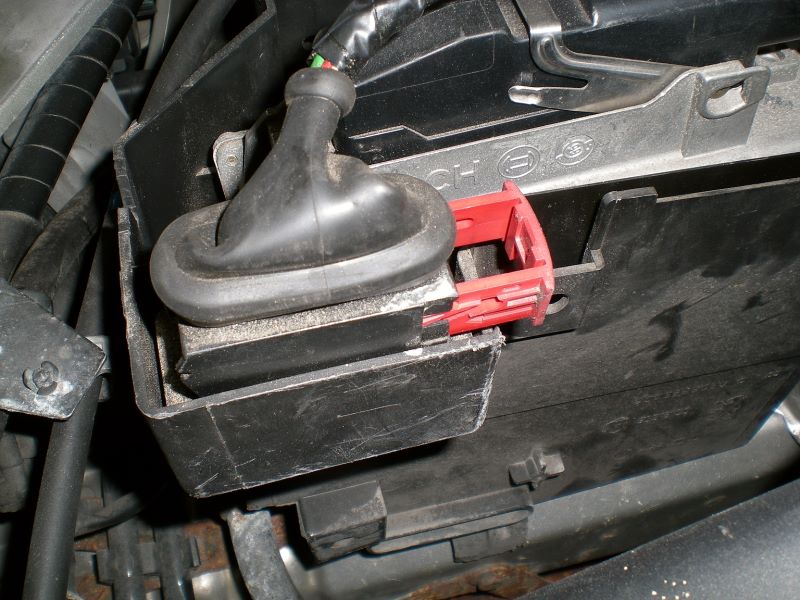
2. The relay boxes disconnect by pulling the red bit out like so:
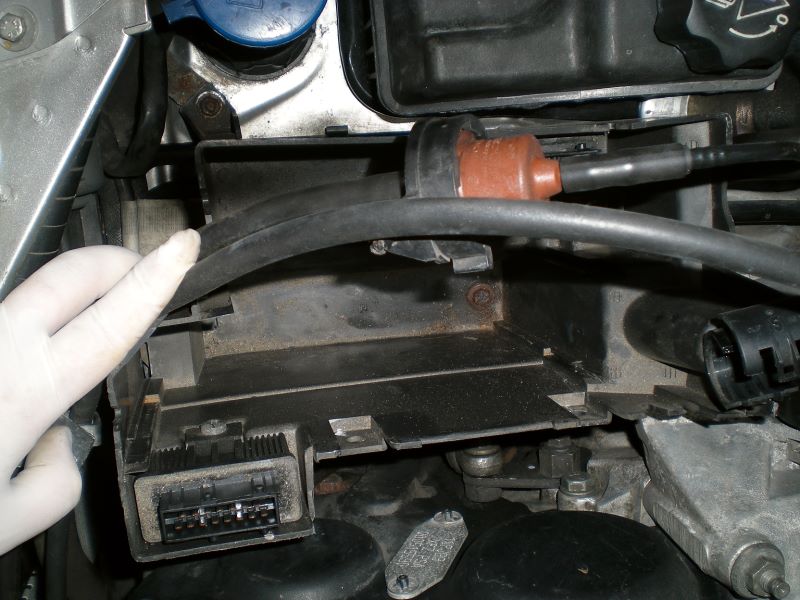
3. See the valve attached to the ECU box? That needs to come out. Grab something pointy and from the inside, push the middle of the stud. Once the stud's about flush with the ECU box you can pull the valve and holder away
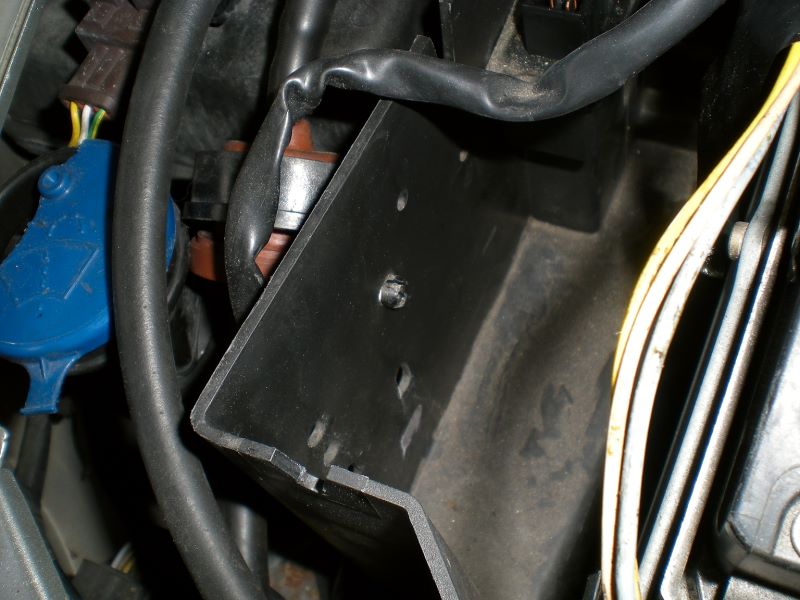
4. Disconnect the plug on the valve

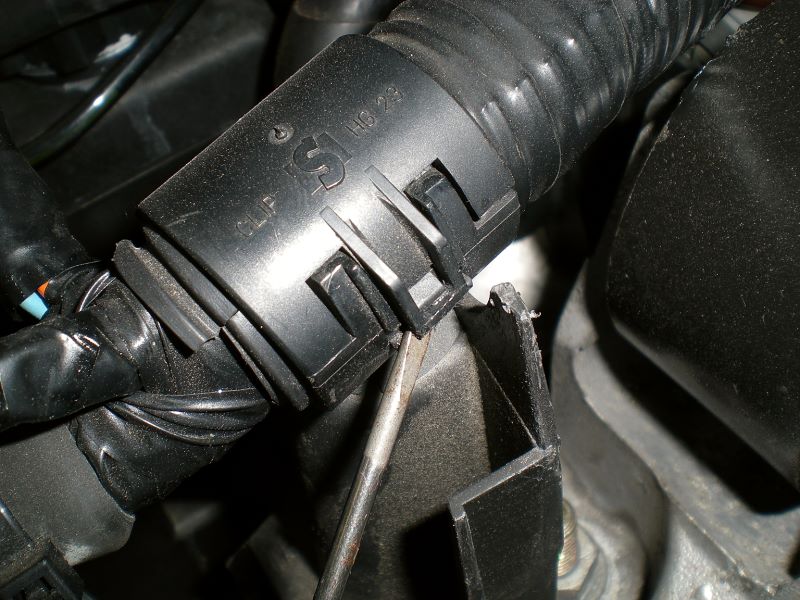
5. Here's how to open up the clip securing the ECU loom. Use a small screwdriver and be very gentle levering the clip up as the plastic's very brittle
6. Now you can just lift the ECU up. Get some string or wire and tie it out of the way over the engine somewhere
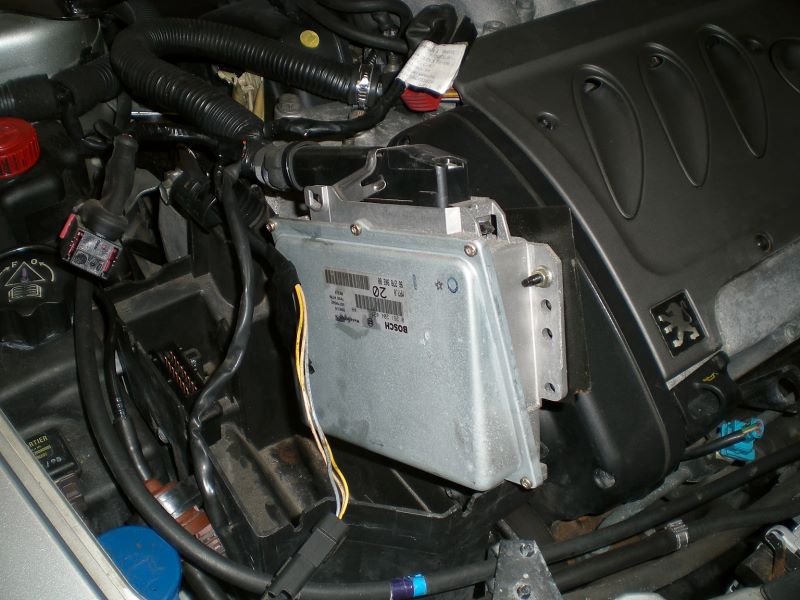
7. Here you can see the 2 10mm nuts (well, the one in the box is a screw) that are holding the ECU box in. In case you can't see, in my picture one's in the box to the bottom left and the other's just above the box to the left.
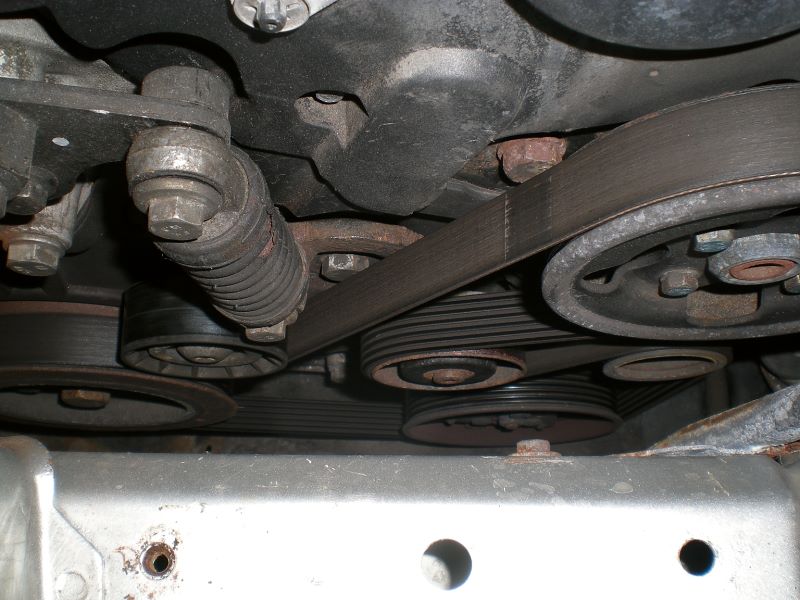
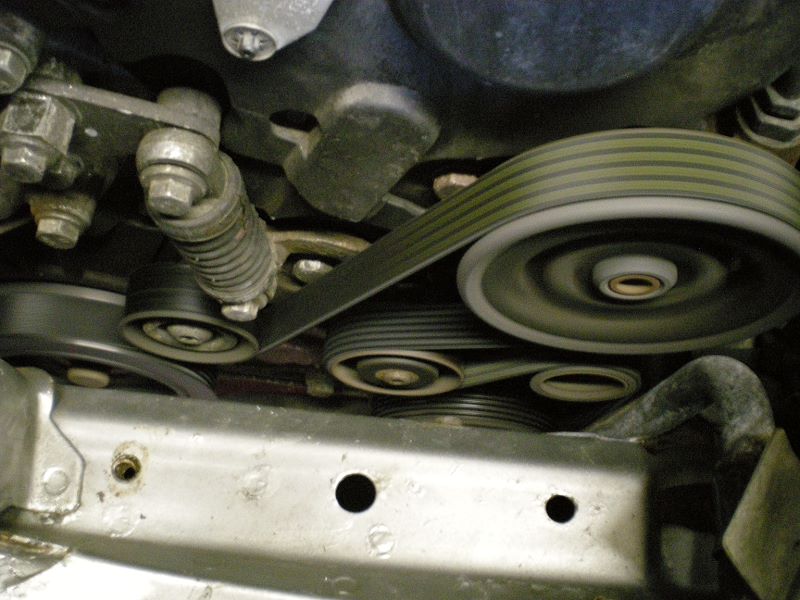
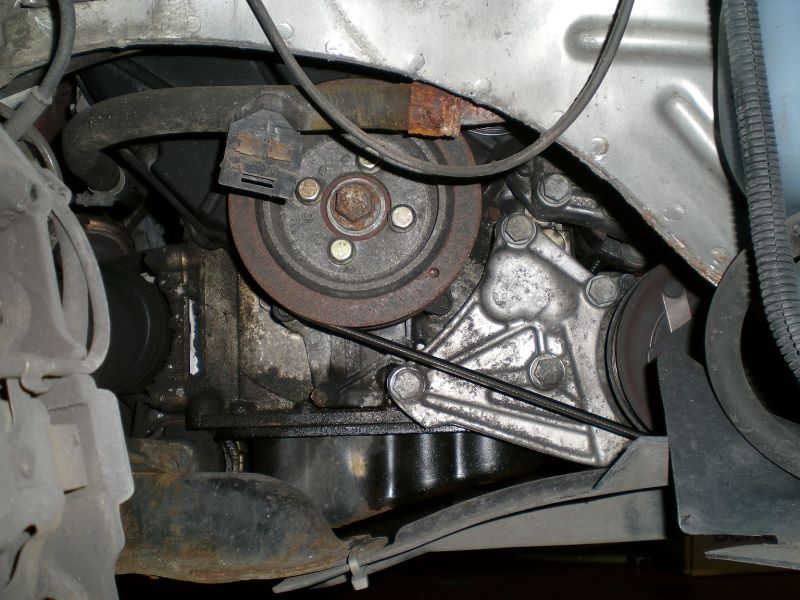
8. Now pay attention; this is how the belt runs. Memorise this, print it out, or do a little drawing!
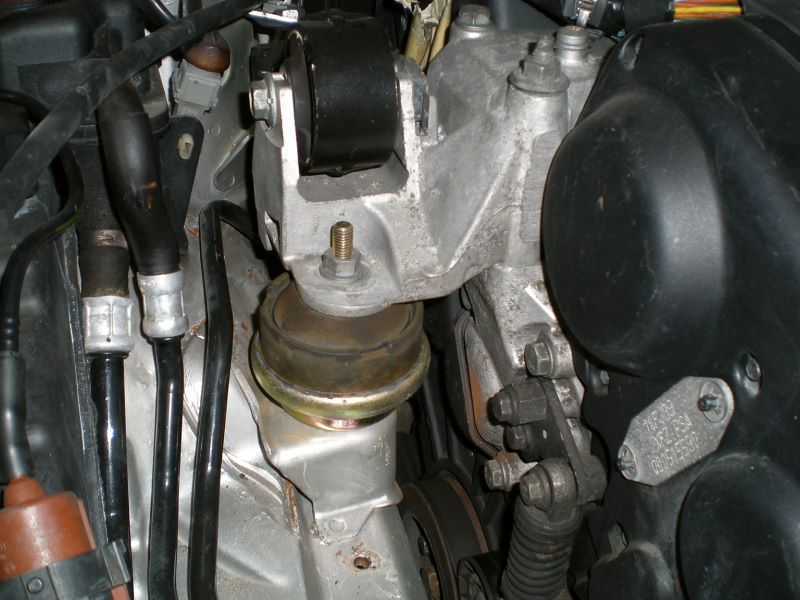
9. May as well check the condition of (and replace if necessary) your top engine mount while you're here. Believe it or not, this one is only a few months old
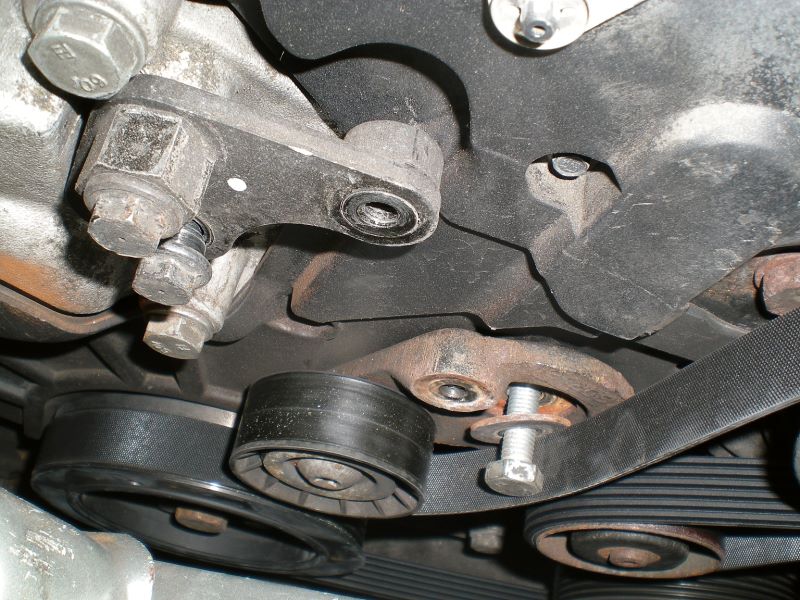
10. Right. This is where you set the tensioner. Slacken off the top and right-hand screws (13mm irrc). Note the top screw goes through a 21mm hexagonal bit which is part of the bracket
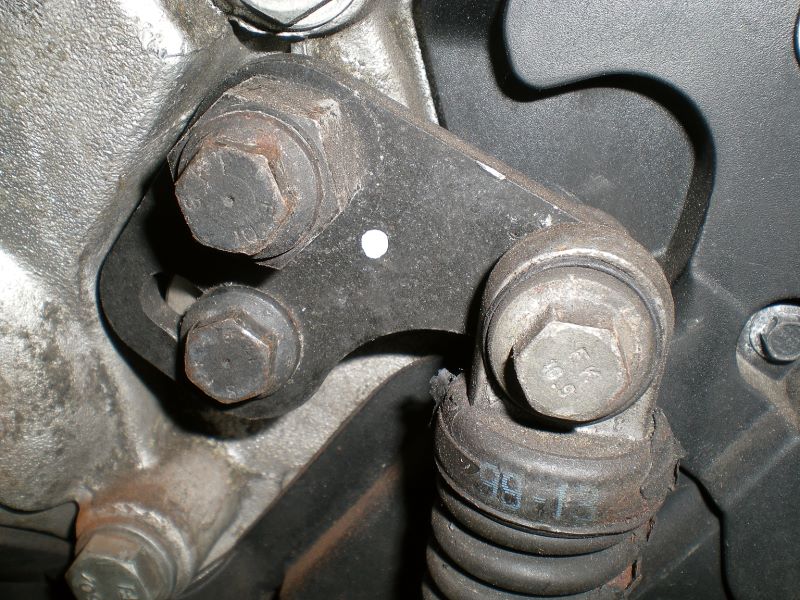
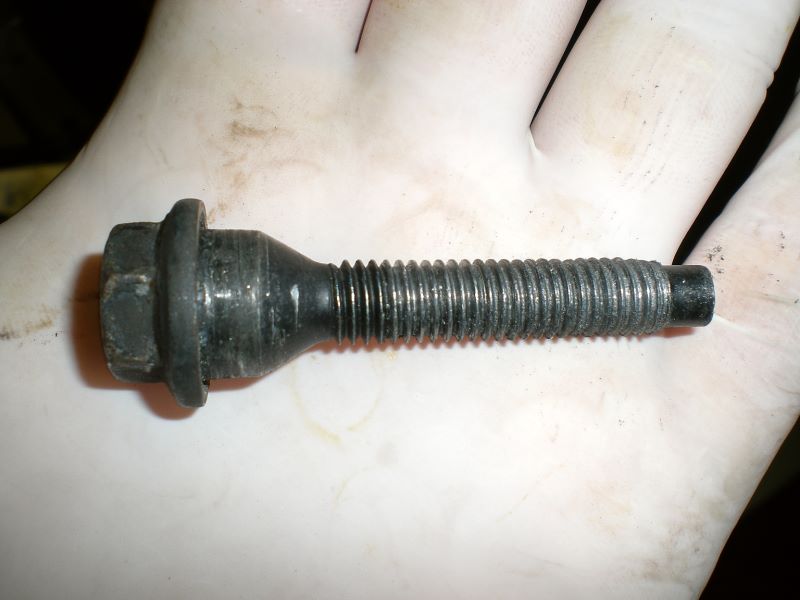
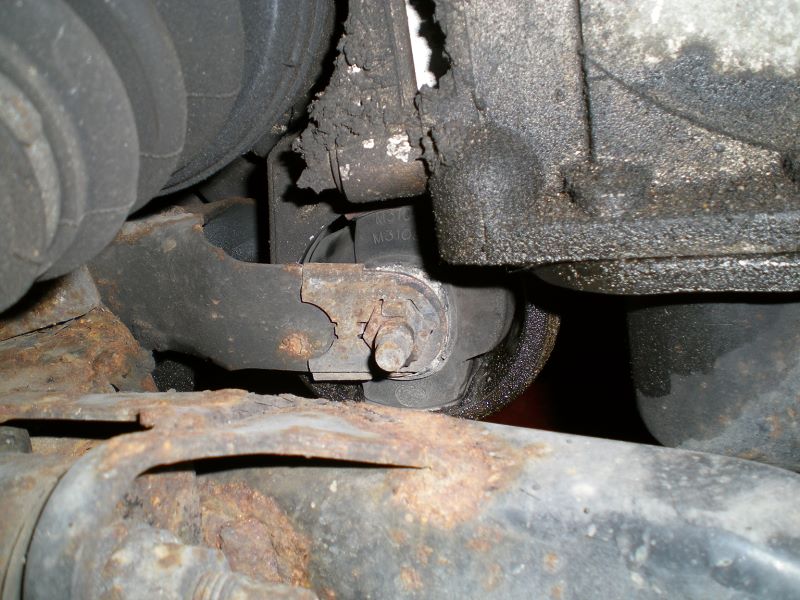
The bottom left screw (don't remove it yet) looks like this:
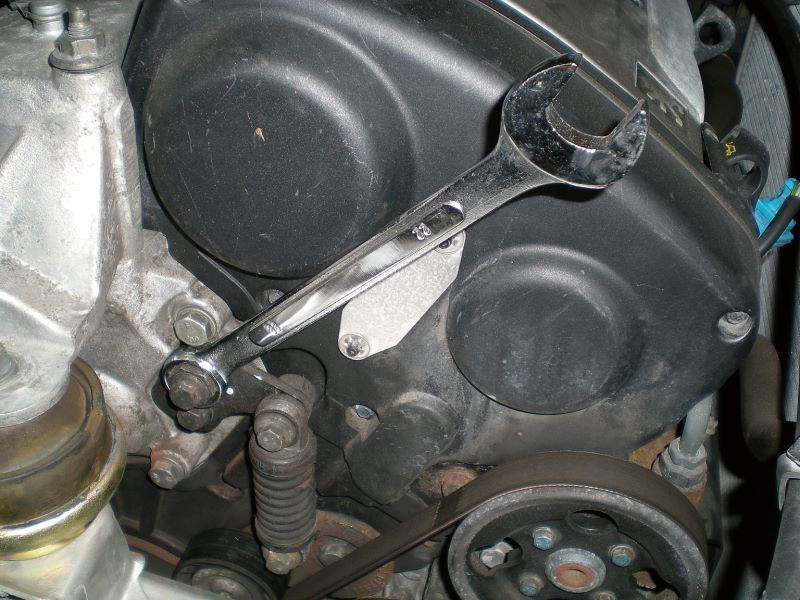
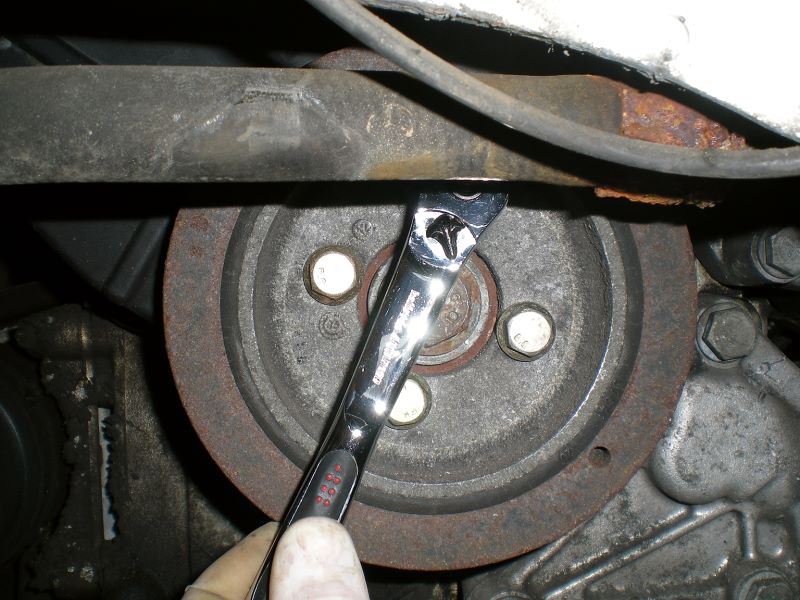
Shove your spanner over the 21mm hexagonal bit and apply moderate pressure clockwise (down) while pulling the bottom screw out. When it's out enough, you should feel the tensioner push against the spanner. Let it come up.
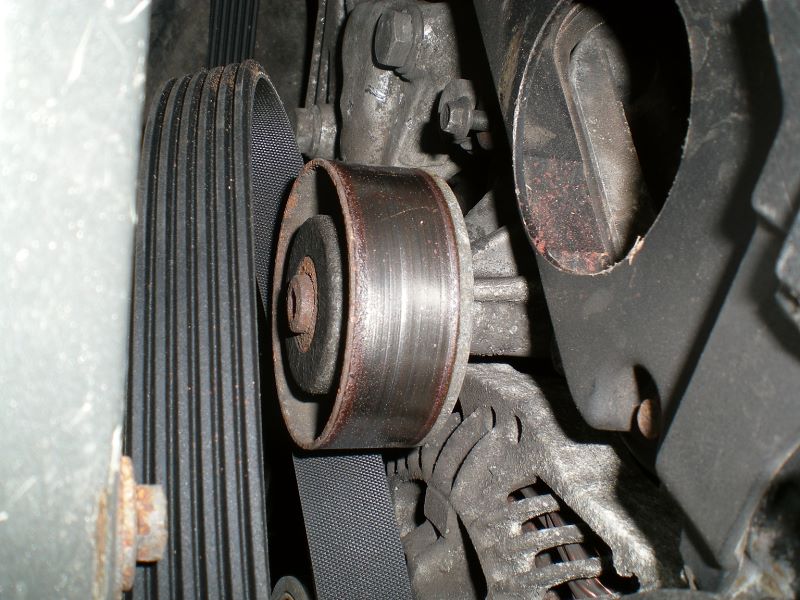
If there's no movement of the tensioner pulley, you need a new tensioner (£106, part 575140). You could TRY to recon your existing one, but if the main bit's seized your pulley's bearings are probably on their last legs. You do not want your belt snapping. Likewise, check the condition of the idler:
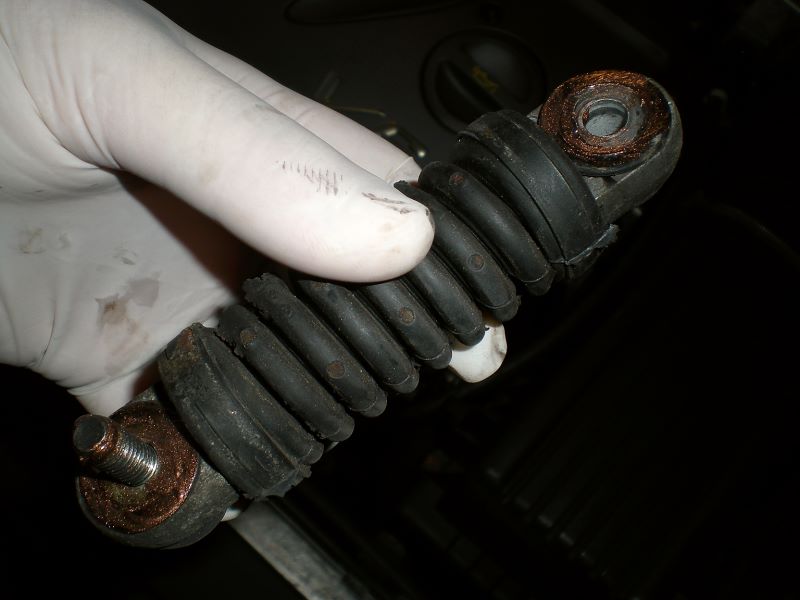
11. Take the tensioner spring off by undoing both screws and give it a bit of lube (note, i wiped a load off after this picture was taken). This just helps the tensioner tension using the spring instead of rust. Be careful not to get any on the screw threads, unlike the muppet pictured
12. Reattach the spring then change the belt over, working from the bottom up. You should be able to turn the spanner without much effort and move the tensioner up and down. If this isn't the case, stop now and work out what's sticking.
13. Push down hard on your spanner while tightening up all 3 screws, put the ECU in the ECU box (while still resting on the engine), connect the relay boxes up then give the engine a turn
14. Providing you're not removing bits of rubber from your eyeballs, put the ECU box where it should be and...
JOB DONE!!!
---------------------
Now for the optional bits.
Changing the bottom pulley
1. The enemy. The wheelarch liner needs to come off I'm afraid. Buy new screws (6924K1 26p each) and a pile of washers before you begin. Seriously.
This is what you'll see.
This is your lower engine mount. Give it a bit of a visual inspection, but it's not easy to replace! I'd give your CV boot a check for splits too...
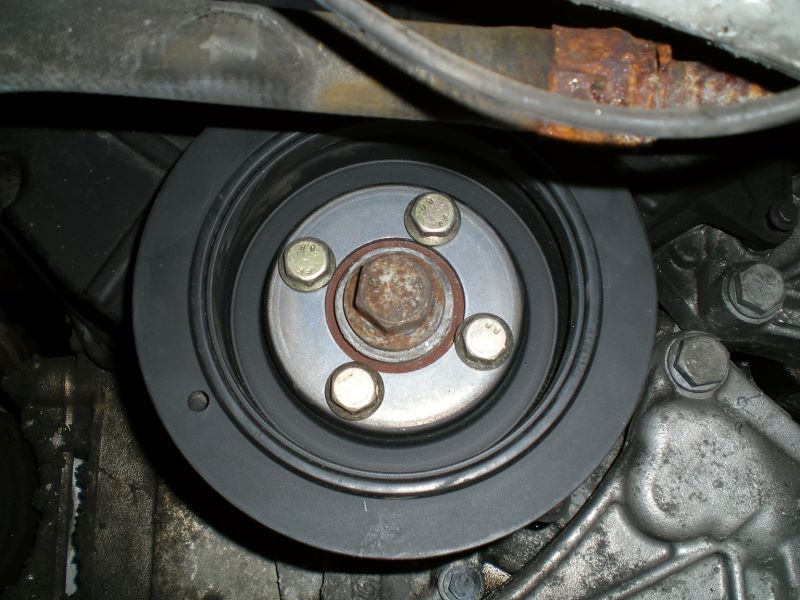
2. With the belt off (as above), you can undo the 4 13mm bolts holding it on. It might need a gentle whack to come off, but given even my one fell off I think it's safe to say that won't be needed! I used a small Halfords Advanced "Extreme" 1/4" ratchet to remove these as my 1/2" won't fit under the pipe. They weren't on too tight...
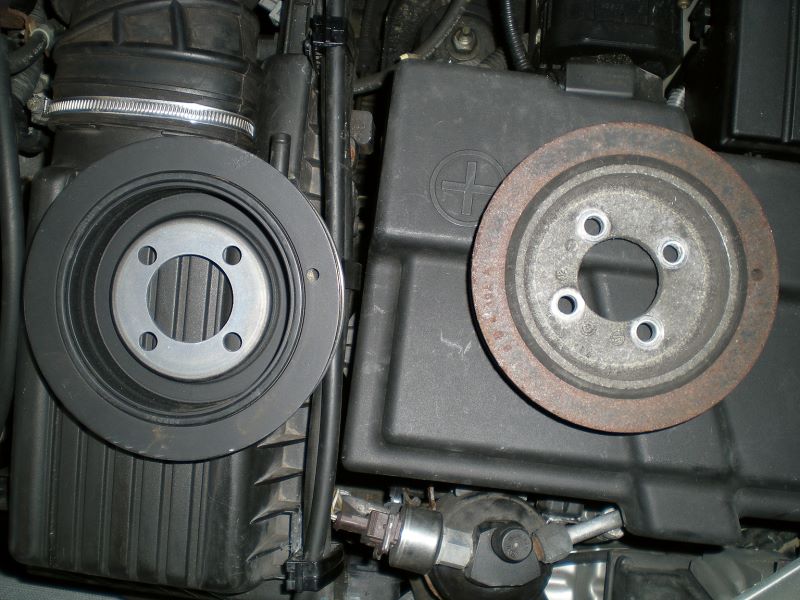
Old and new - guess which one's which!
3. Do you need a step 3?
JOB DONE!!!
---------------------
Changing the tensioner
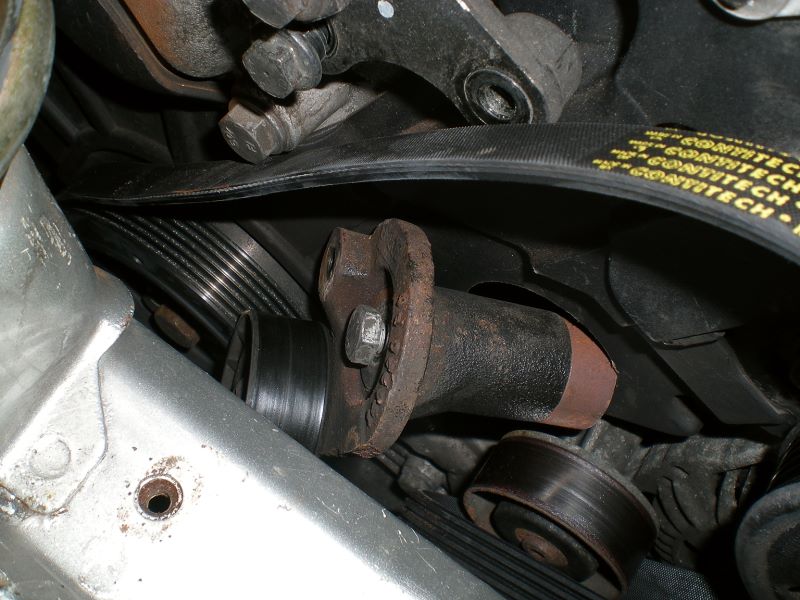
Bit of a pig, this. With the hefty spring removed, first undo the retaining screw. I think it's 16mm. Your tensioner should now literally fall out. Mine needed some extreme persuasion though
Now you need to manoeuvre the tensioner out so it's sitting at an angle like this. It won't come out any other way!
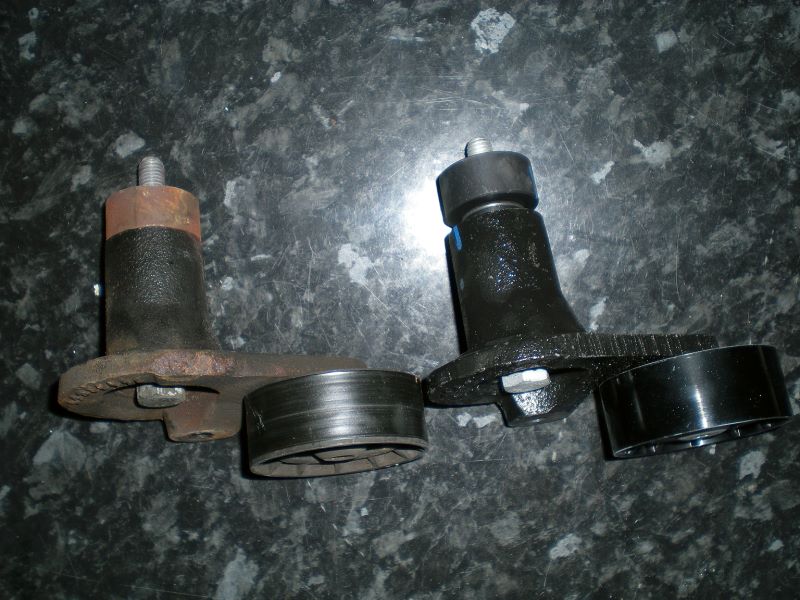
Here's the old one next to the new. Note how the centre section (seems to be some low friction material/coating) is falling out of the outer bit. The old one was seized solid
The aim when replacing it is to do the retaining bolt loose enough that the tensioner is free to move, but not so loose that it falls out