The aim of this HOWTO is to help you understand what you're doing, so you don't take as long to do this as I did.
Required items:
Clutch kit
2 foot minimum breaker bar. STRONG!
35mm impact socket (36mm will do and is more readily available)
Brake bleed kit (one-way valve)
2lb hammer
Fork-type ball joint separator
Spanners, 1/2" sockets, 1/4" sockets (all metric)
Brake cleaner
Mole grips
Wheelarch liner screws+washers
Flathead screwdrivers
Wire brush
Decent trolley jack
2nd trolley jack, or an engine bar
Oil drain pan
8mm square oil drain plug key
WD40
Gearbox oil (1.9 litres)
Recommended items:
Strong degreaser
Diff oil seals
Nitrile gloves
Drill-fit wire brush
Primer+rust-resistant paint
One ESSENTIAL tip I'll offer before you start is that when you unbolt something, put the bolt back in the hole if you can, otherwise make sure you put it somewhere you won't forget, perhaps on a piece of paper saying what it is. You don't want to be putting your subframe back on with wheel nuts
Another ESSENTIAL tip is to read ahead and use PLENTY of WD40 on the suspension joints WELL in advance. I cannot stress this enough.
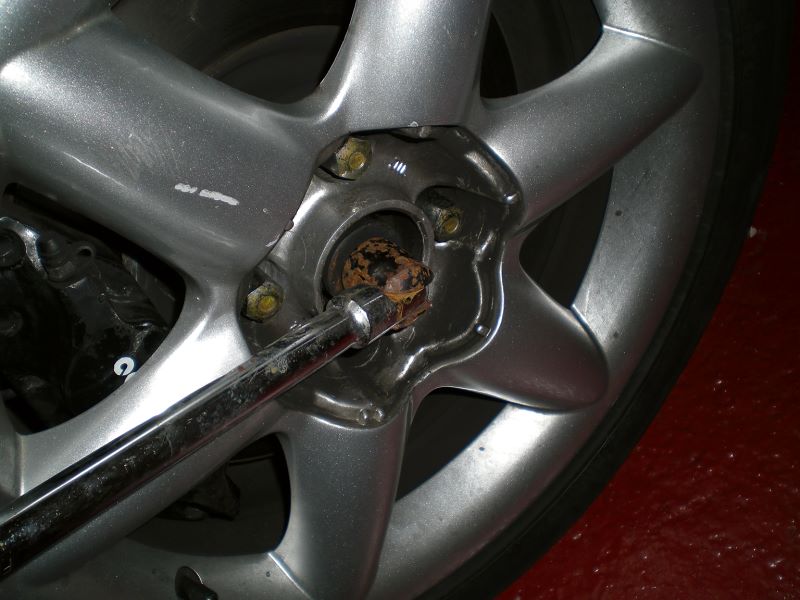
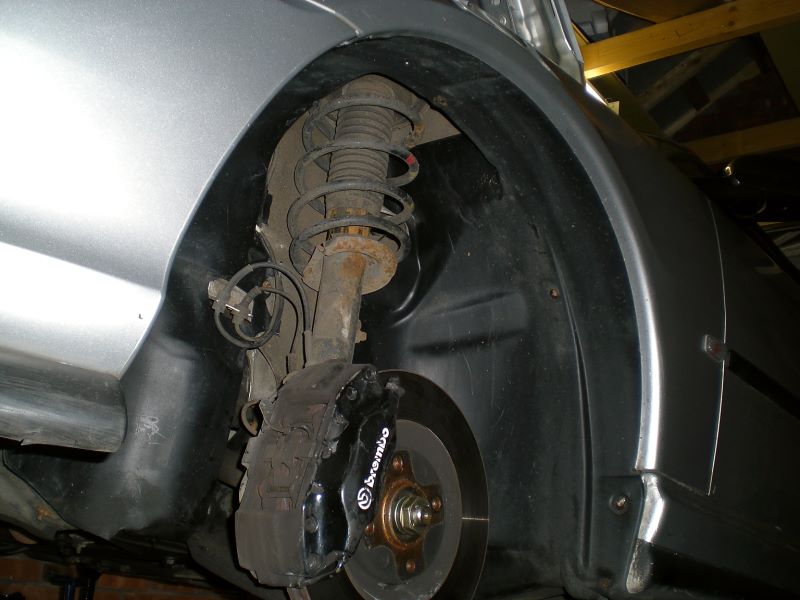
First, take the front wheels off one at a time. See the cotter pin in the middle of the disc? Pull it out, and the little bi-hex cap should fall off revealing the wheel nut.
Put the wheels back on (don't bother with the locking wheel nuts), put the car back on the floor and use your 35mm socket and breaker bar to take the paint off your alloys
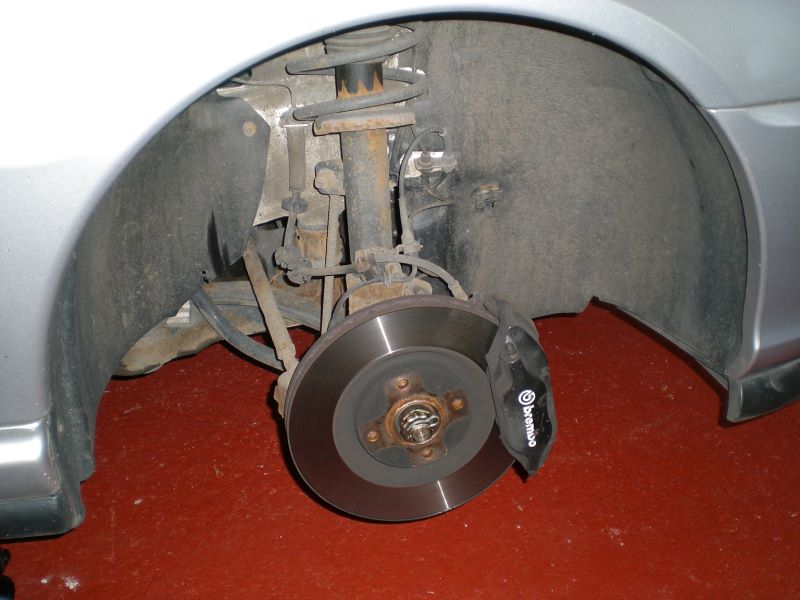
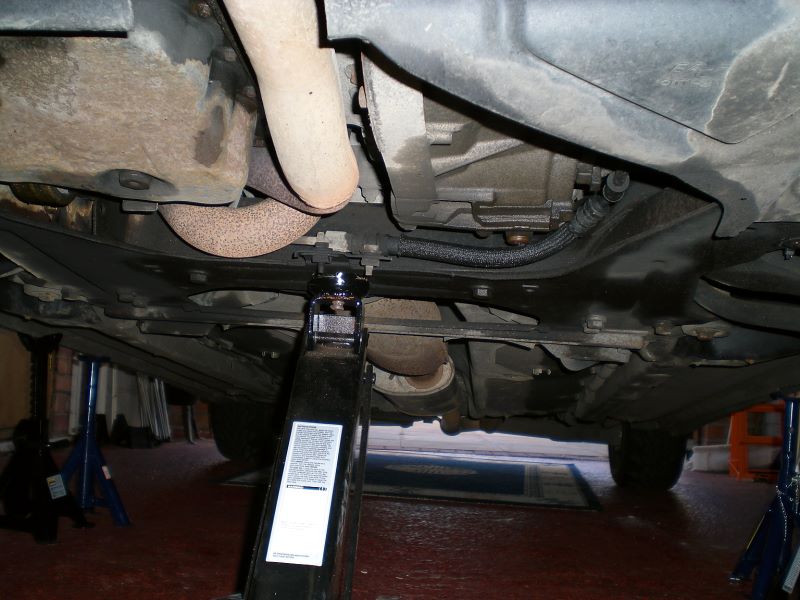
Lift the car up and put it on axle stands at the sill jacking points. Here I'm jacking it on the subframe, which is strong enough to support the weight of the car for short periods. Note the 2 bolts either side of the jack head - these hold the steering rack to the subframe. You'll be undoing them later. You'll see blue jacks in the pictures. They're next to useless, but I feel safer with extra protection under there
Take the wheels off again and stash them under the sills to they limit the damage the car will do if it falls with you under it. Now you've got to take off the wheelarch liners. If you've not done it before, be prepared for a fight. This is where the molegrips will come in handy!
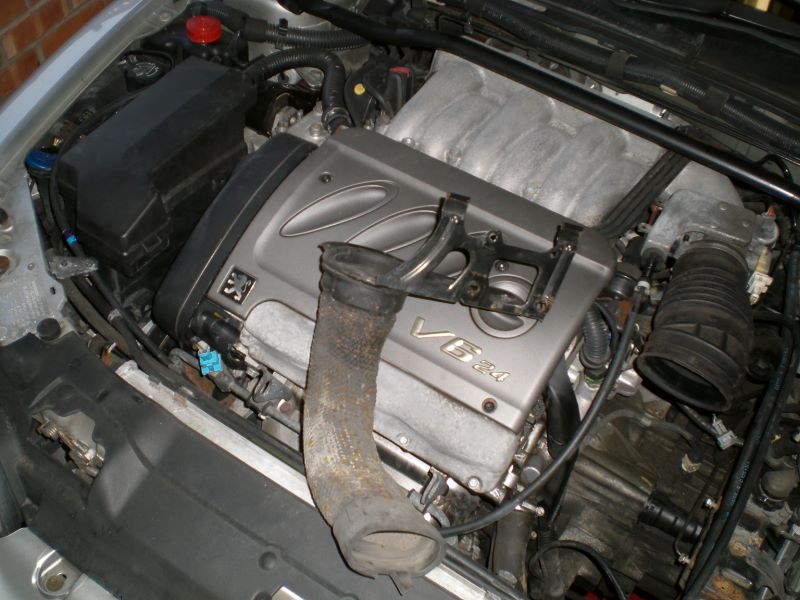
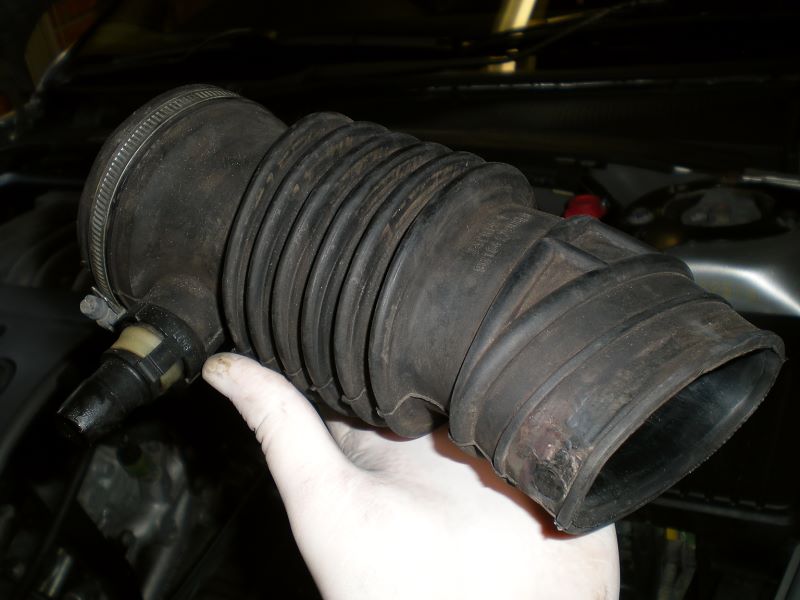
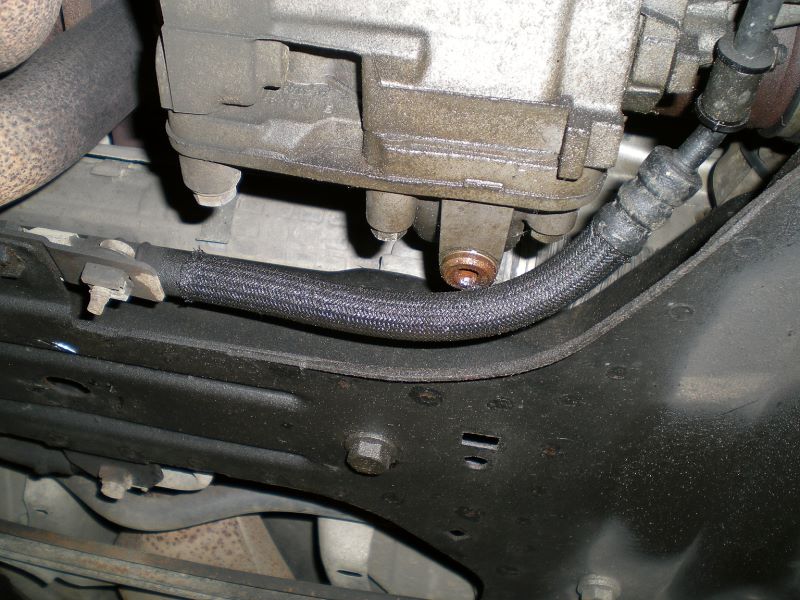
Check out the nearside wheelarch. If yours looks like this, throw away the hose immediately and think about ordering a new one from the dealers (£35). You'll want to remove the triangular bottom plastic panel, but it's not essential
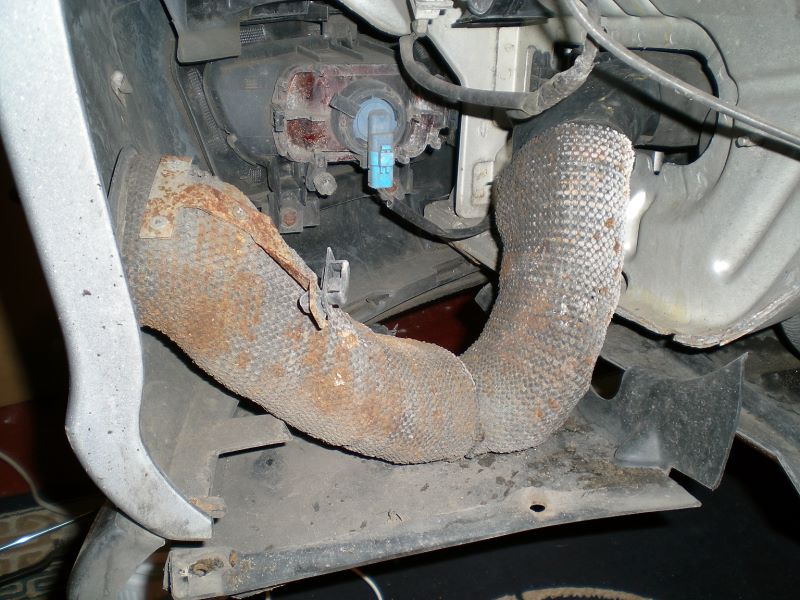
You'll want to remove the air hose in any case...
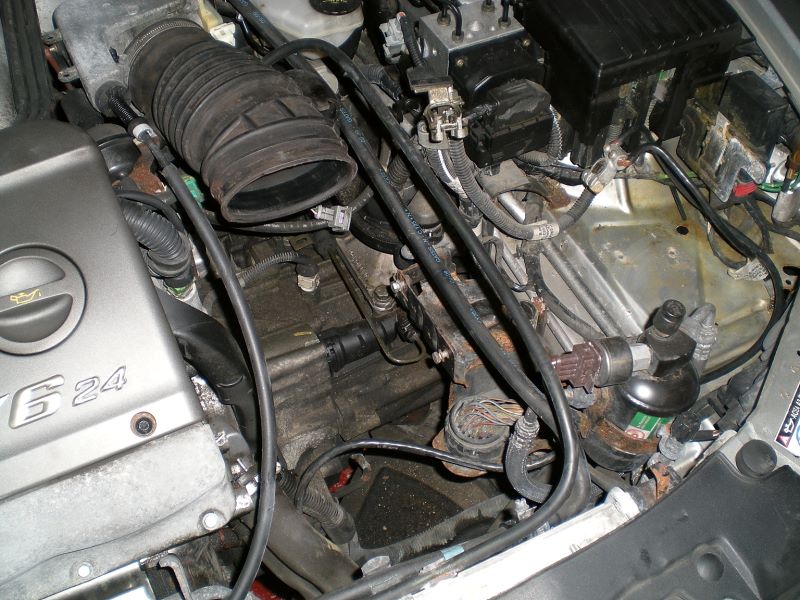
Up top, Remove the battery then disconnect the idle air temperature sensor - the grey plug at the back of the air filter box, and remove whatever clip's holding the bent pipe (roughly 1" diameter) to the airbox.
Unclip the hoses from the air filter box along with the large rubber hose...
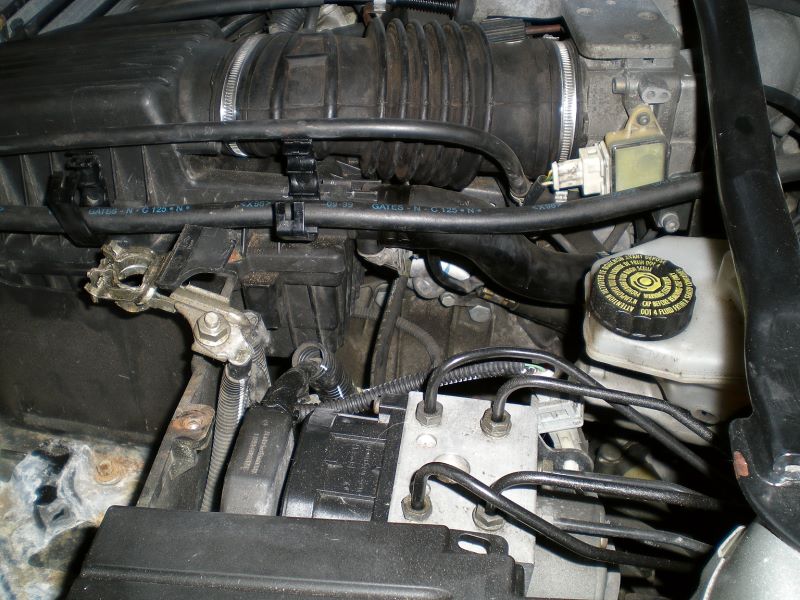
...and lift the air filter box out. There's 3 bolts holding this metal frame to the battery box. Remove them
and pull out the top half of the air hose. Put the 3 bolts back in the battery box.
Not strictly required, but it can make the job easier if you remove the battery box. Use a ratchet with torx bit to undo the clip holding this aircon thing to it
then pull the unit out slightly before sliding it to the right to unclip it. There's some wiring behind here you'll need to unclip
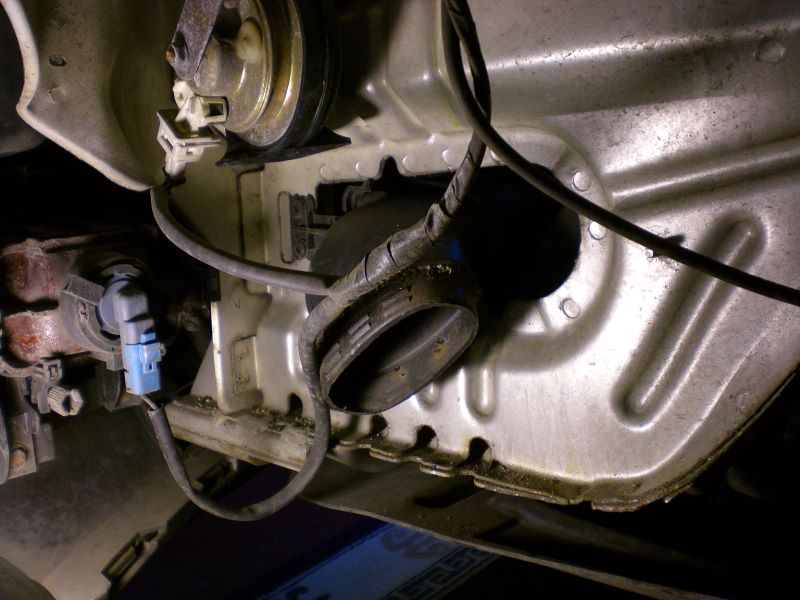
With the battery box out the way you can do some preventative maintenance if you want. Remove and clean up the main earth connection (shown to the right of the picture under the light connector), and check the wires are un-corroded and firmly in the battery clamp. I ended up cutting, stripping and re-attaching both wires.
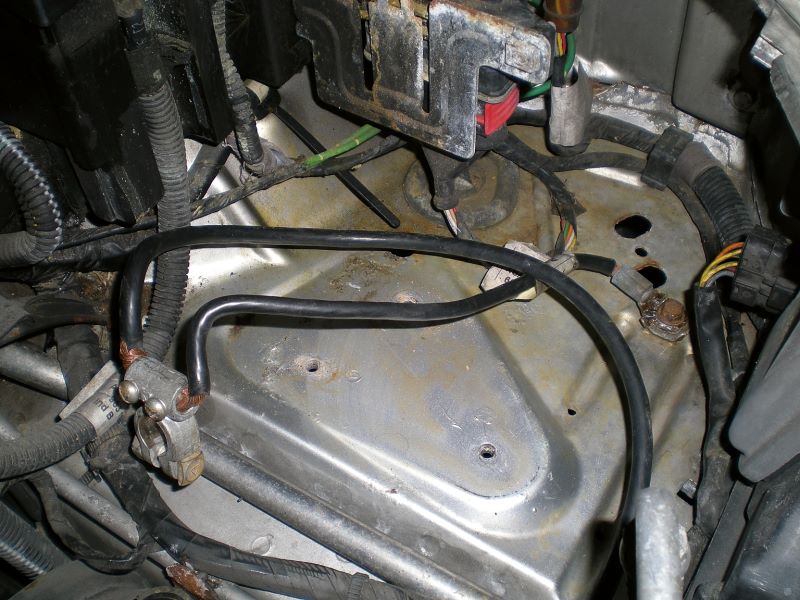
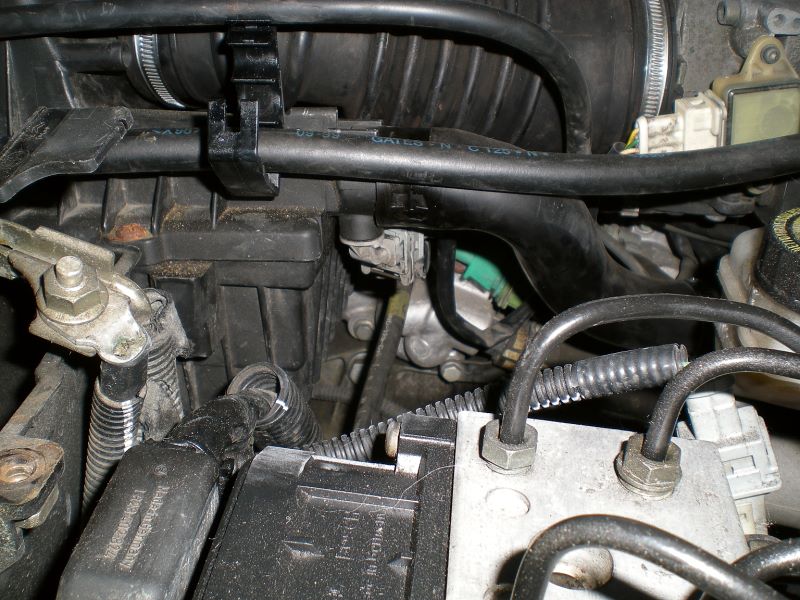
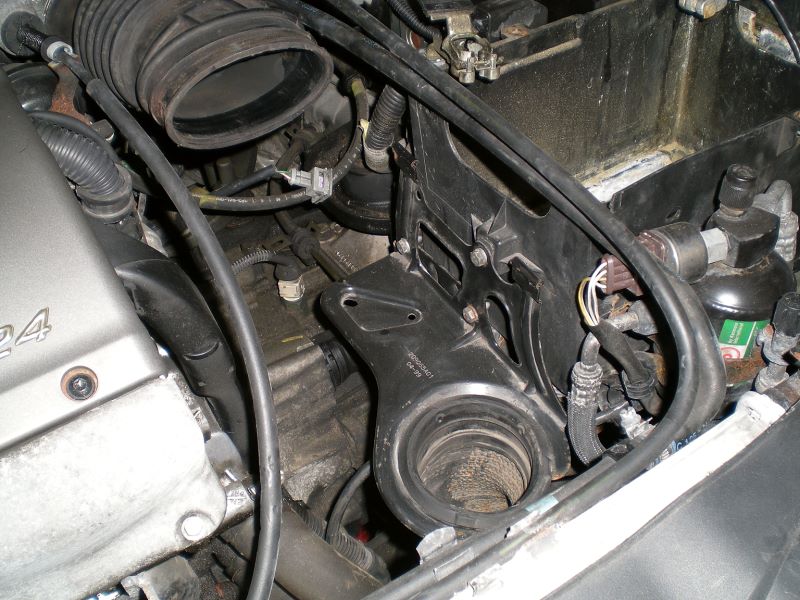
You should now have something that looks like this:
You want to remove the main air hose now by unscrewing the huge jubilee clip then pulling it out. Be careful as there's a push-fit joint into the engine on the left hand side as you're looking at it
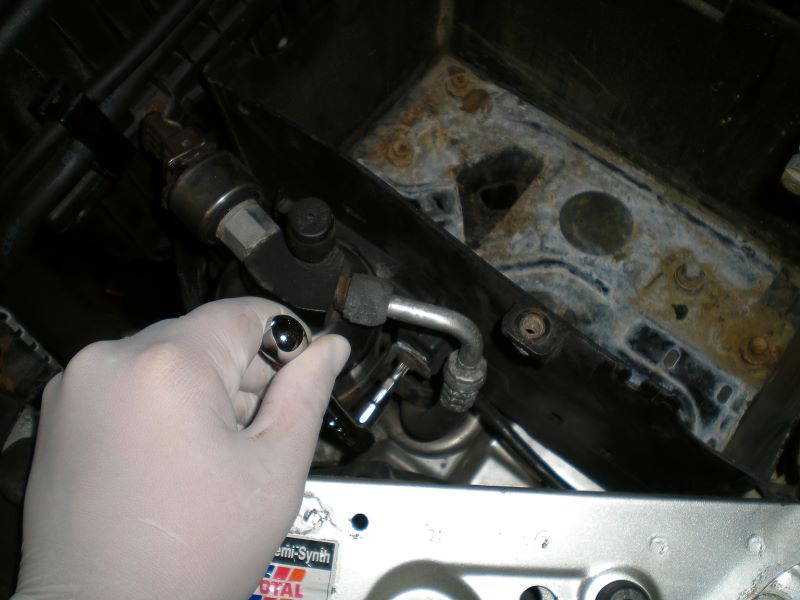
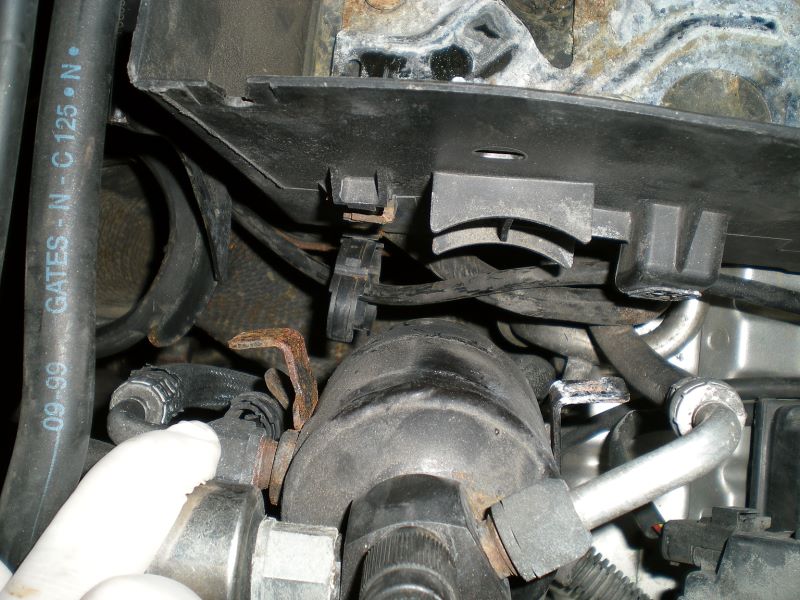
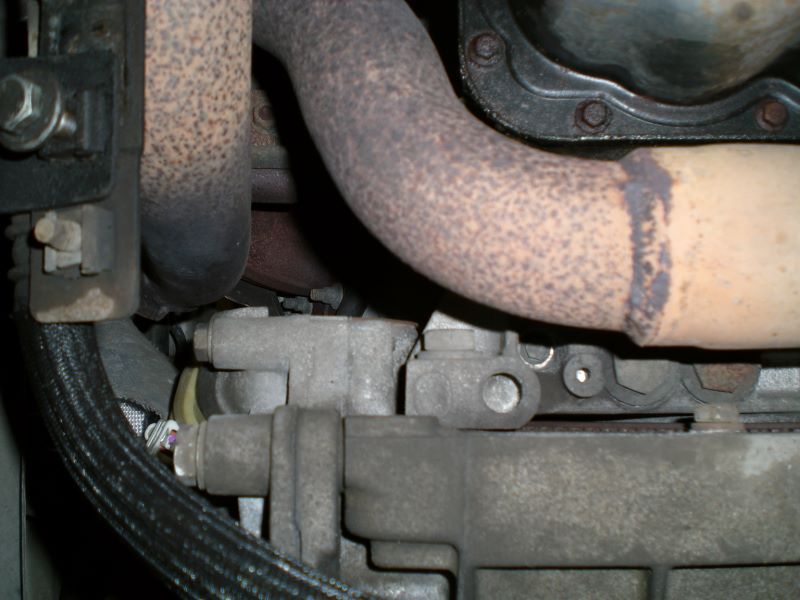
Right. Time to get back under now. Unbolt the one on the left here which holds the PAS high pressure pipe to the subframe
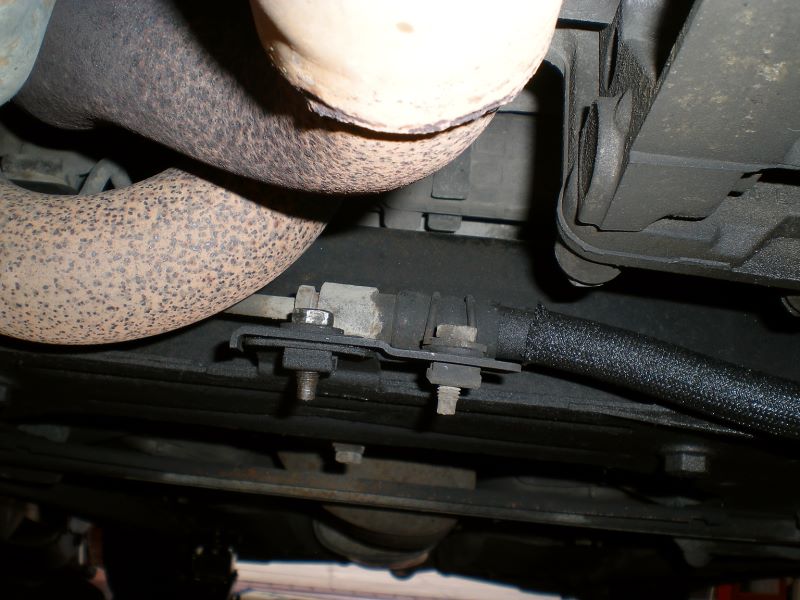
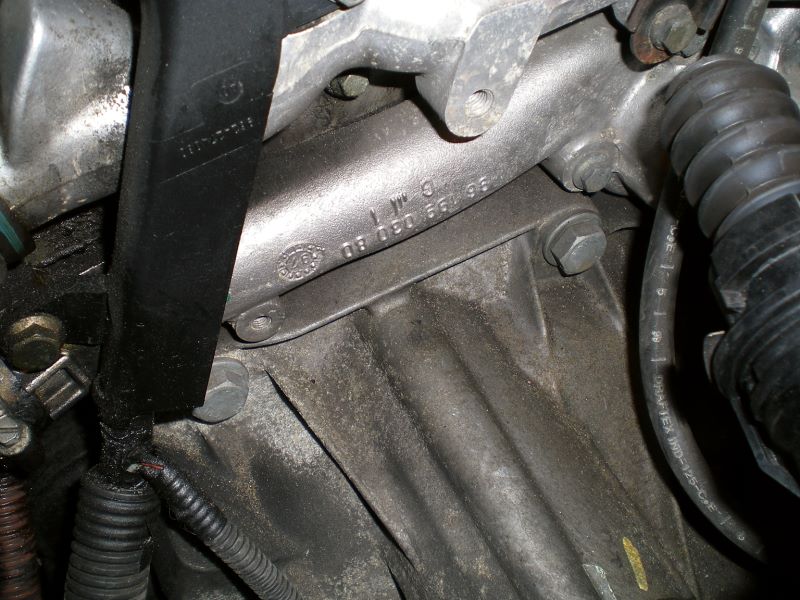
Unbolt the pipe from the gearbox too. There's 2 bolts to undo, the one at the front I've already removed in this picture.
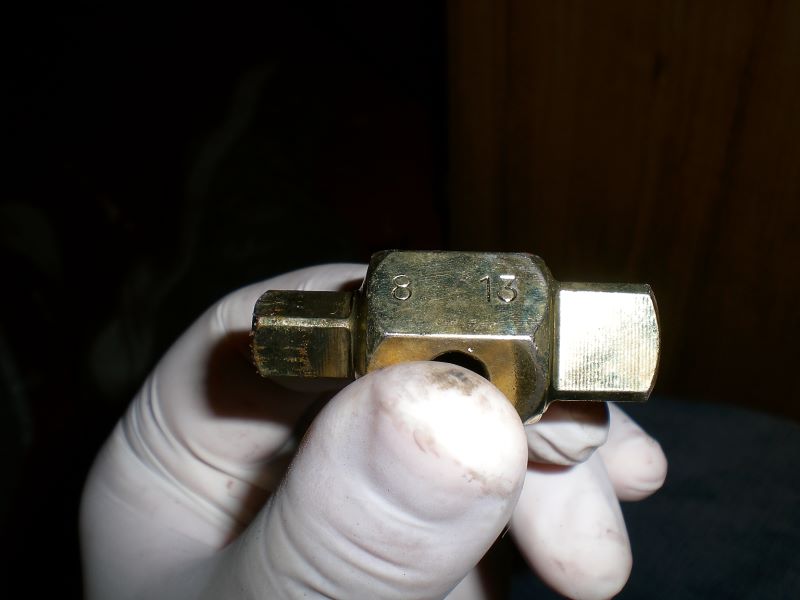
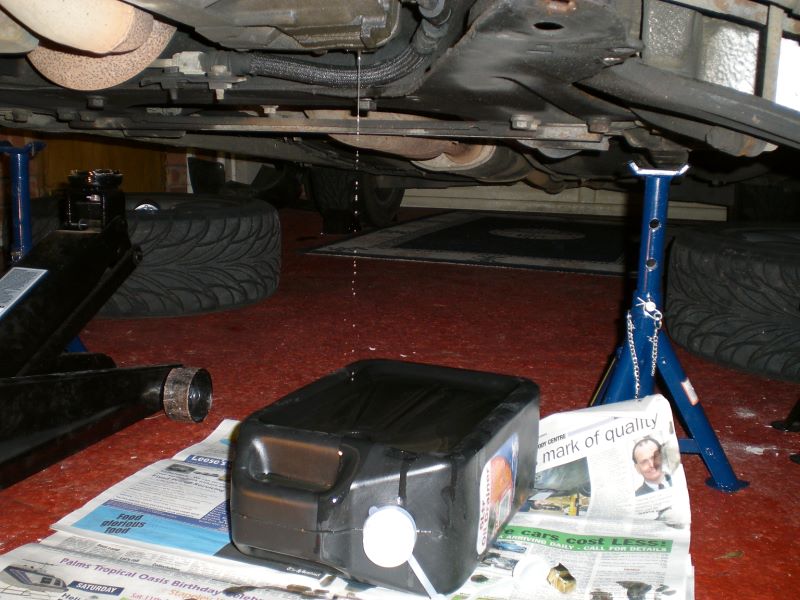
Here's the gearbox oil drain plug.
Here's the key you'll need to undo it with. 8mm square. I find it best to ignore the hole going through it and slap a ring spanner on the other end.
Don't forget the newspaper!
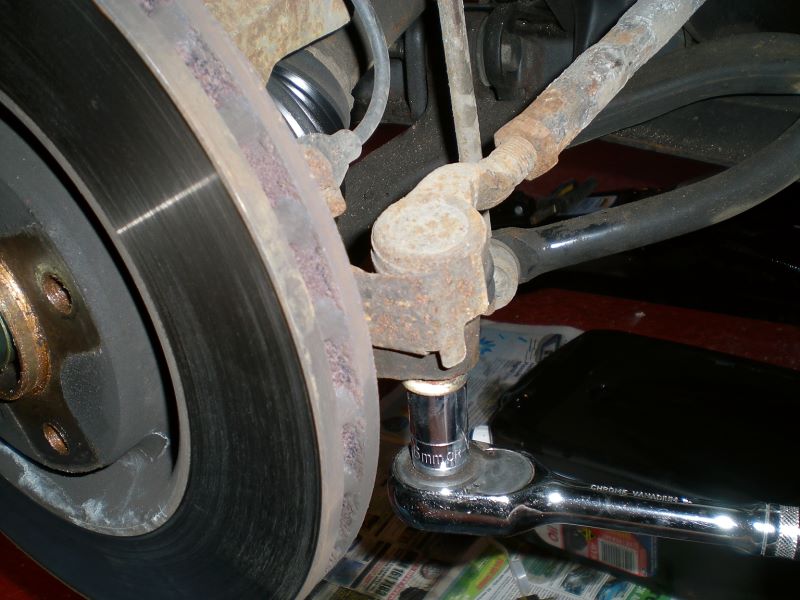
While that's draining, lets get on with splitting the suspension so we can free the driveshafts. The first and easiest part is the steering balljoint. 16mm socket and when the nut's off, just pull the arm up while wiggling the disc. Be aware if the nut's particularly seized, you'll need to put pressure between the hub carrier and the arm else the ball will just spin. It's a pain, but just hammer your ball joint splitter fork in there
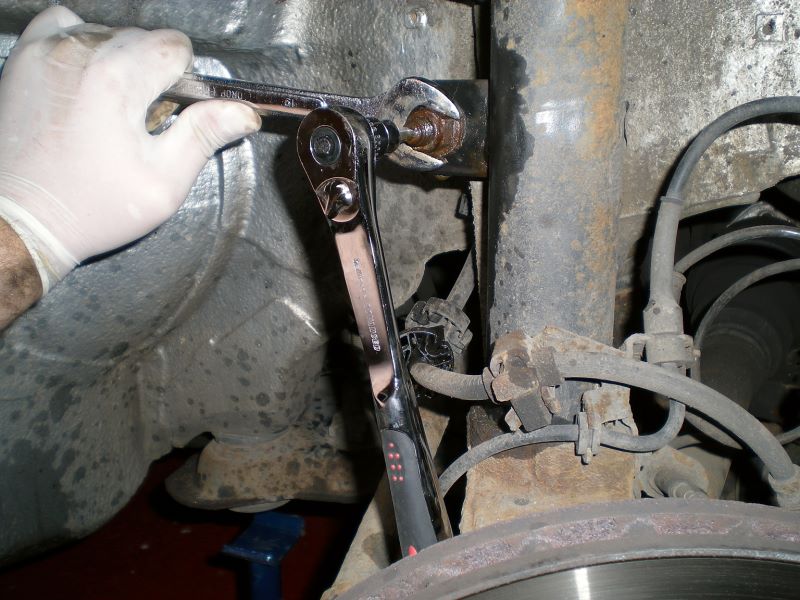
Next is the drop links. You can remove them at either end, but the top's easier to work with. The middle bit is attached to the ball joint and the 19mm nut holds it on, so hold the centre part still with an allen socket (I recommend hammering it in before you fit the wrench!) and turn the spanner. If the allen hole rounds, buy a new drop link and use an angle grinder to take the old one off. I spent a whole night failing to drill it out and ended up using a hacksaw through the tiny gap I had loosened it off by. NOT fun. Buy an angle grinder if this happens.
Now for the painful one
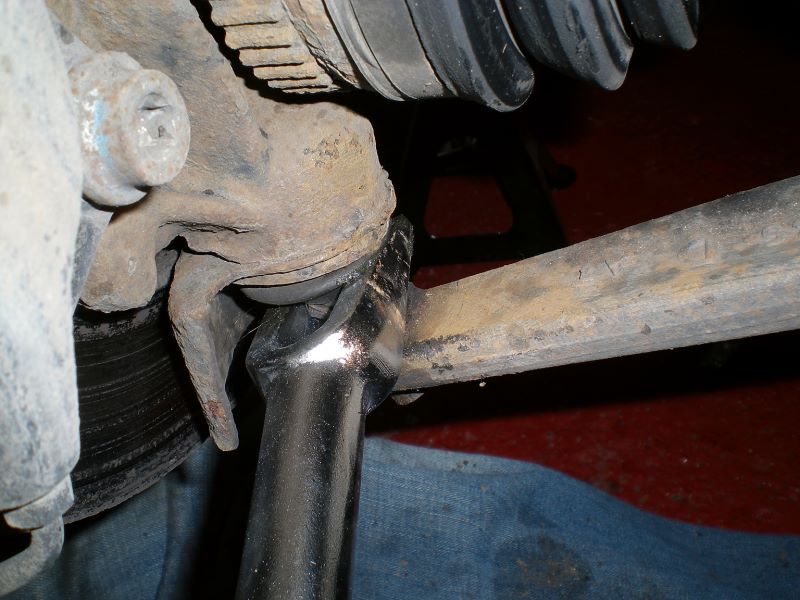
Congratulations! Now you just need to do it all over again on the other side!
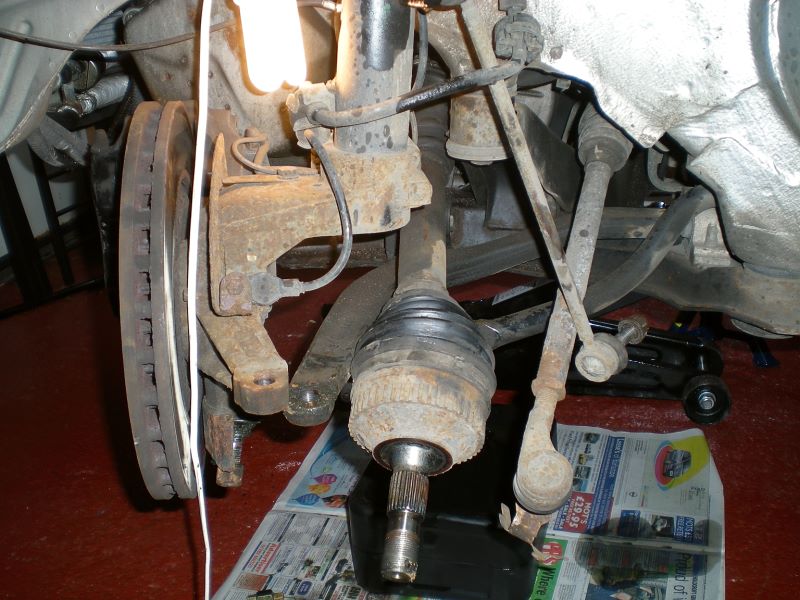
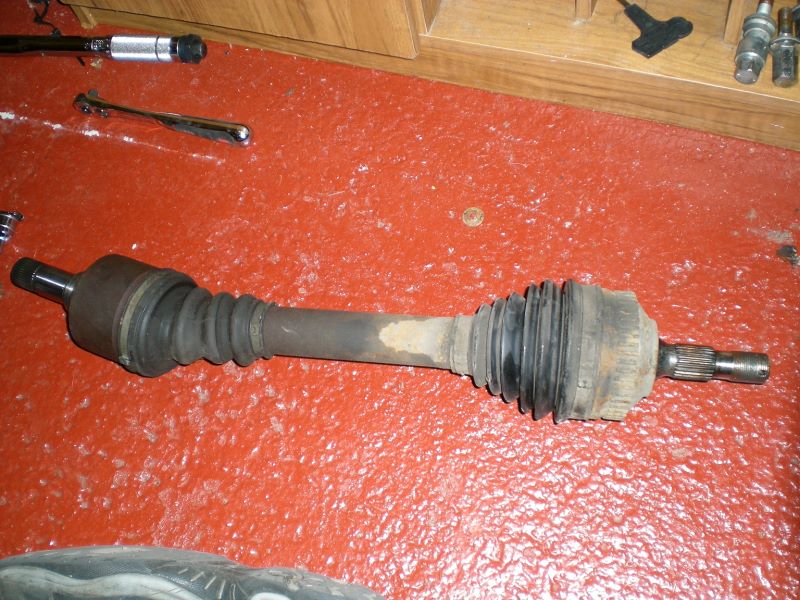
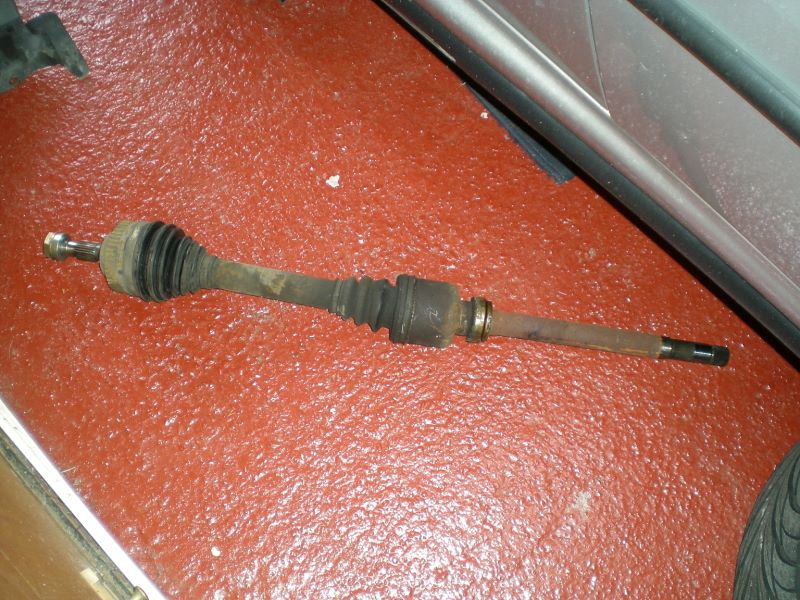
Take a well-earned break then remove the n/s driveshaft by simply pulling it. Inspect the gaiters for splits as they're MOT failure points
We can't remove the o/s driveshaft yet because it's held into the intermediate bearing (part of the lower engine mount), and the nuts to remove it are as good as inaccessible on the ES9J4 due to the 3 exhaust pipes in the way (may not be the case on the ES9J4S). So considering the subframe needs to come out to get the gearbox out, lets take it off.
To the back of the main subframe bit (behind the steering rack) are these pipes held on by a nut+bolt. Undo to free the pipes.
Remember the bolts under the steering rack? Undo them now. There's large ceramic washers between the rack and subframe, so catch these before they end up falling in your gob
IMPORTANT!!!! Support the engine NOW with a bit of wood on a jack but don't raise the engine.
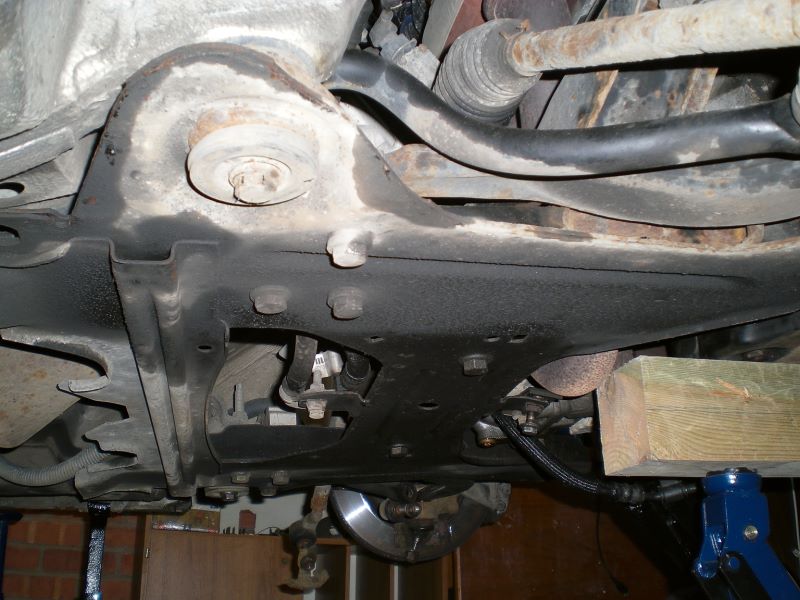
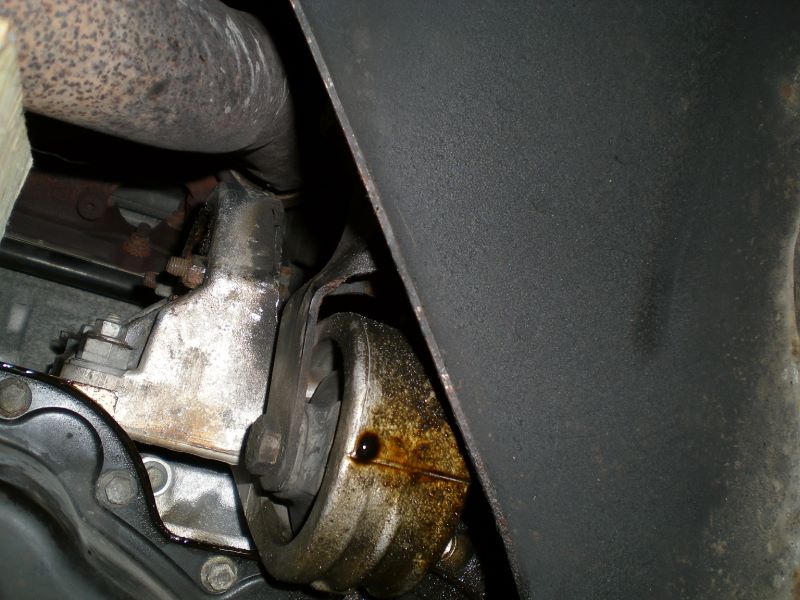
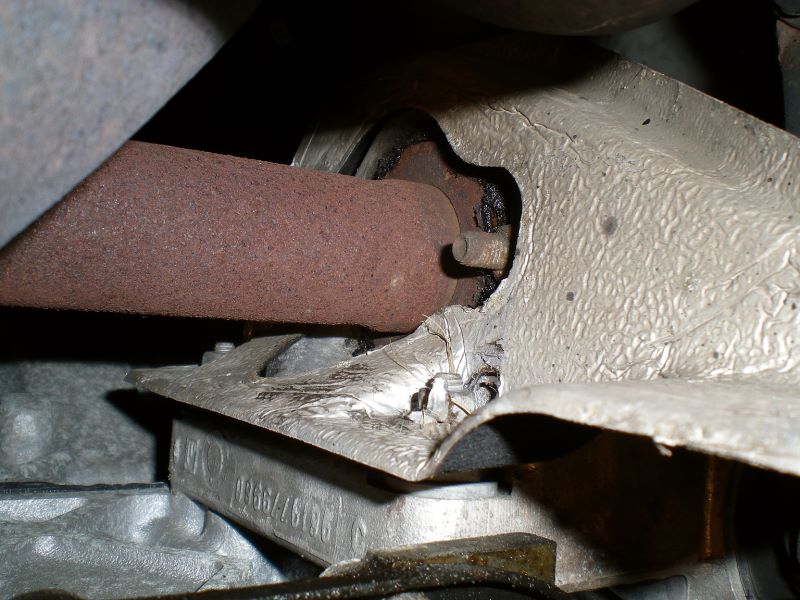
Here's the bottom engine mount (shown with the heat shield and driveshaft removed). See the 2 rusty little 11mm nuts around where the driveshaft would go? The top one is why the subframe's coming off now
Now you can remove the subframe. It is HEAVY - much heavier than it looks - so stick a jack under it if you can, otherwise use a couple of axle stands to take the weight. DON'T think you can easily lie under it while you're taking it off. You'll hurt yourself
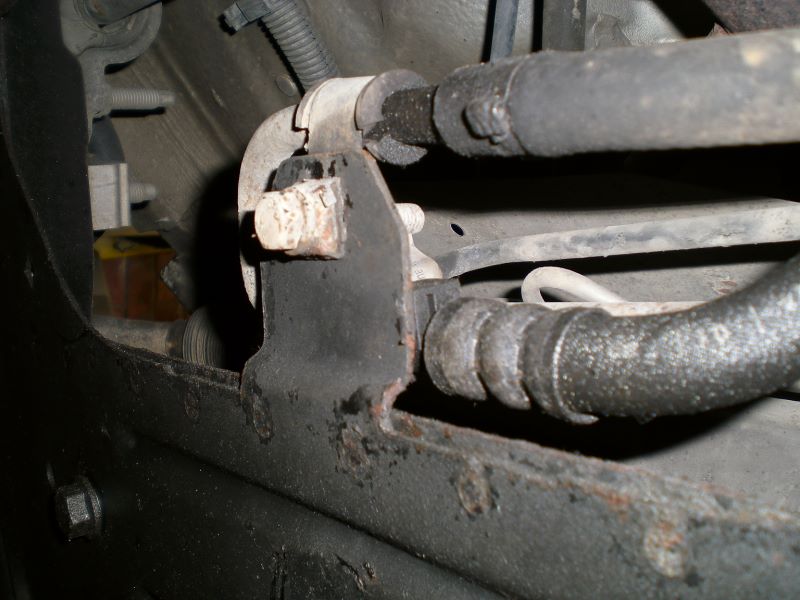
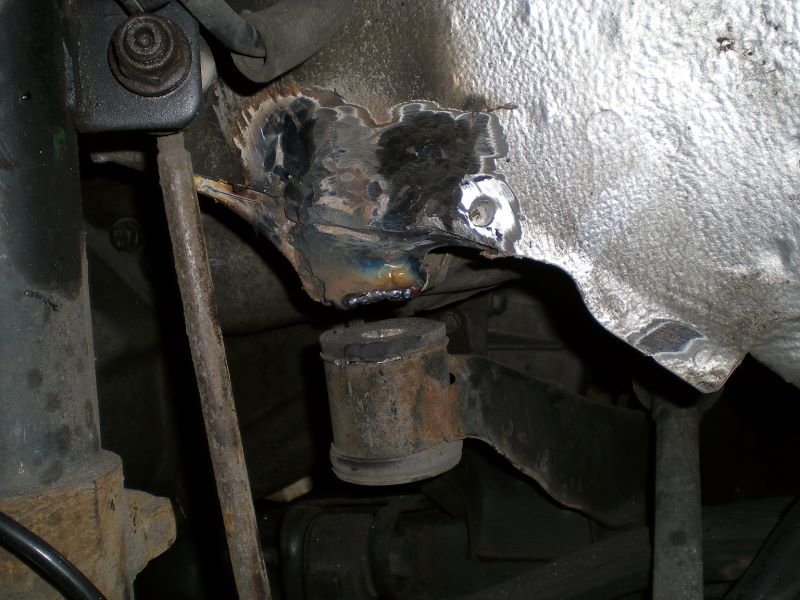
There's 4 large bolts holding it on to captive nuts inside the body, but beware that they may be corroded. This is a picture of one of mine after I had to get someone to cut open the body, weld up the nut, then weld the cut shut. If I were doing this on a similarly old (10 years old, 170,000 miles) coupe, I'd drill a small hole above the subframe mount and flood it with WD40!
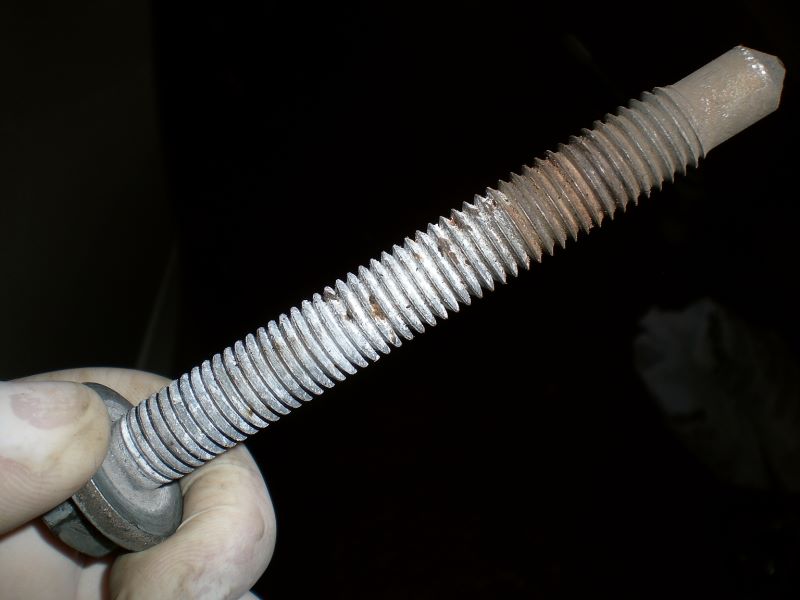
You probably want to know this, so this is how big all 4 bolts are. This is the one removed from the above mess. The gearbox bolts are about the same size.
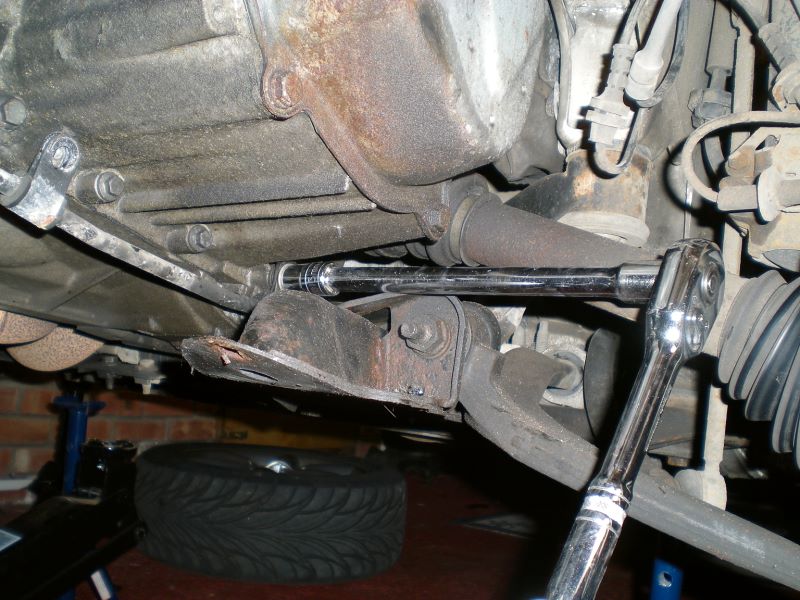
With the subframe removed, you can get access to free the o/s driveshaft. See the ovals to the top and bottom? You need to slacken off the nuts on the inside and turn the ovals 90 degrees.
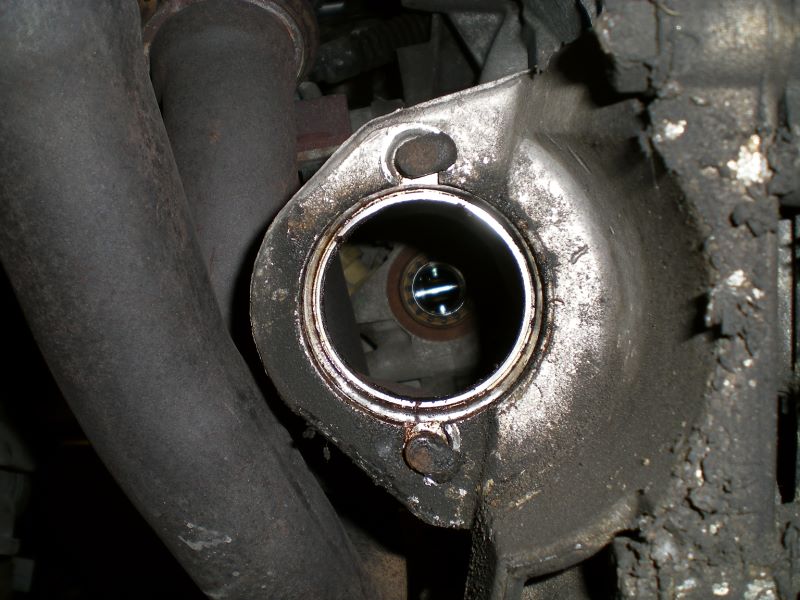
This is what you're fighting here, and without the subframe in the way a small 1/4" ratchet should have no problems getting in. Try not to damage the heat shield. It may be an idea to order a new one first since it's pretty brittle, but I put my old one back on later with a few big washers...
The o/s driveshaft should now pull out. Again, check for splits.
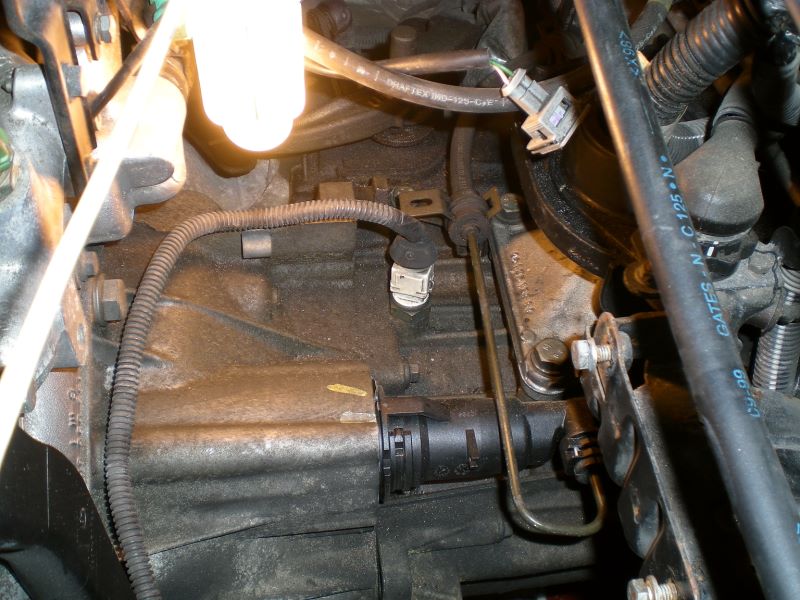
Lets go back on top now for a bit of light work. See the plug in the middle? That's the reverse gear switch. Unplug it. You'll notice it has a hexagonal base - that's because it screws into the gearbox. This is where you want to refill your gearbox oil. I'll show you why later!
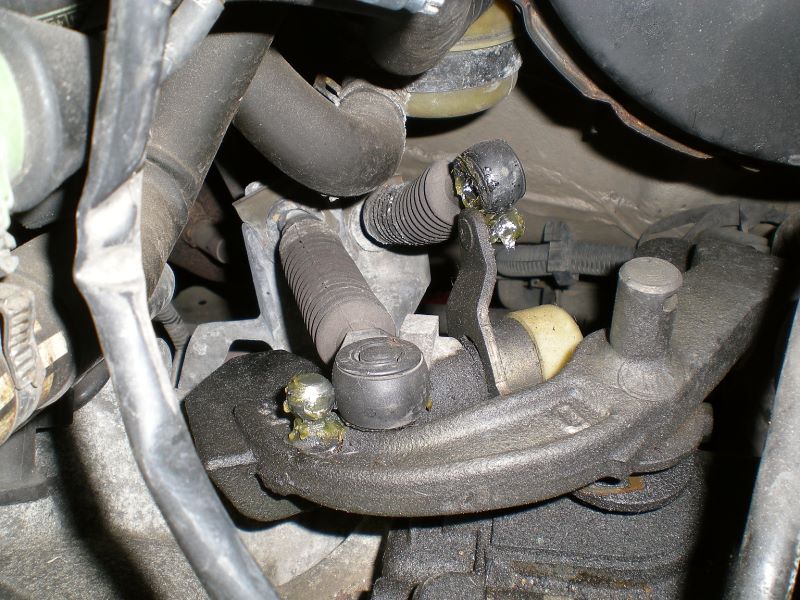
Here's the gear linkage balljoints. Just get a flat screwdriver under them and pop 'em off.
One 10mm bolt is all that's holding the flywheel sensor in. I strongly recommend you tie it up somewhere as it has a habit of falling around and catching on stuff

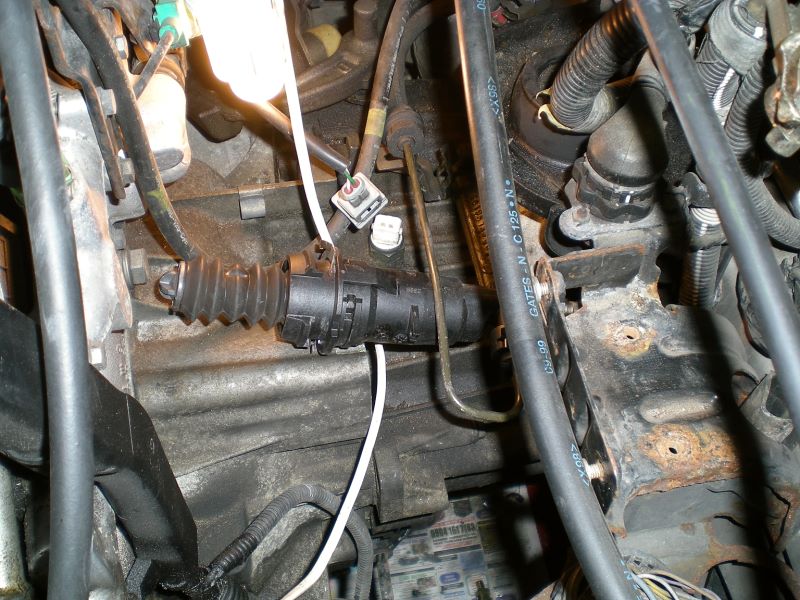
D9: The clutch slave cylinder has to come out now. This is not fun. Firstly free up as much of the pipework as you can. To remove it, you push it inwards and turn about 45 degrees anticlockwise. As you can see, I bent my pipe a bit
D8: You have a different design of clutch hydraulics and your slave cylinder will look different as it's a sealed setup. If memory serves, the pipework on D8s can rotate so you just need to push in and twist
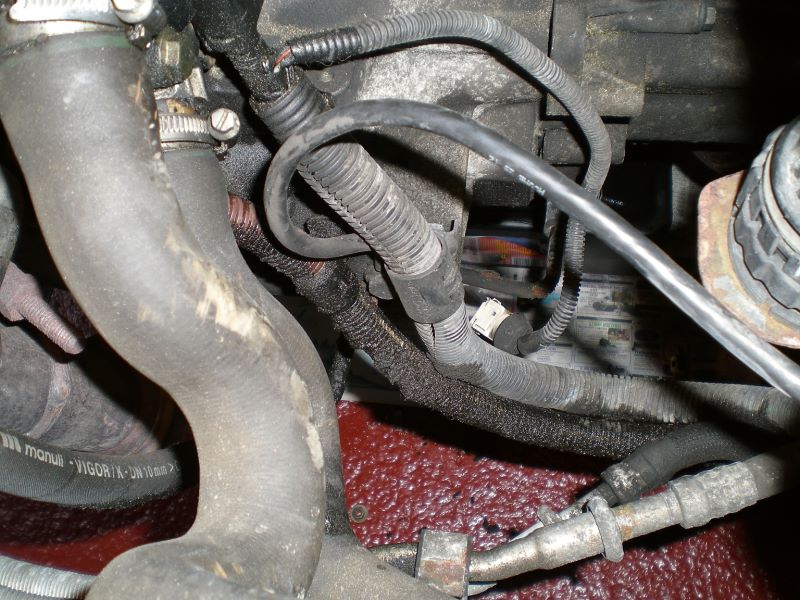
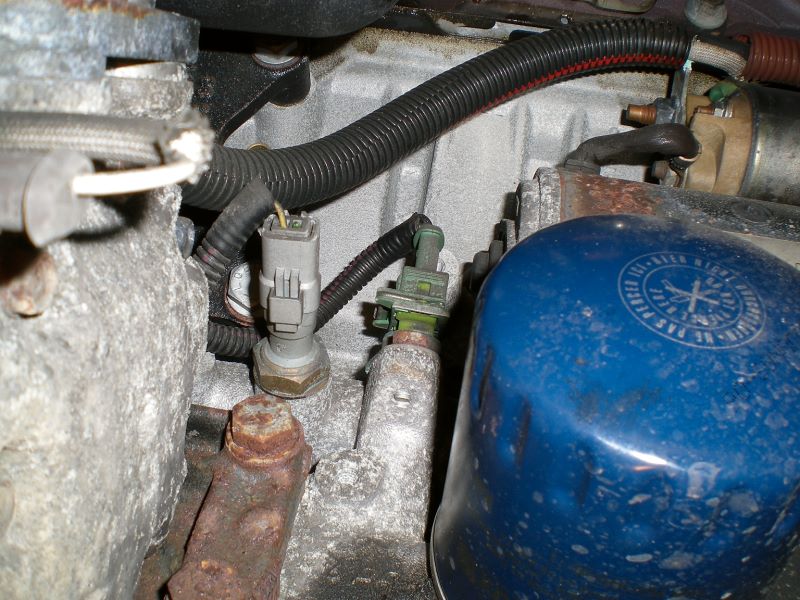
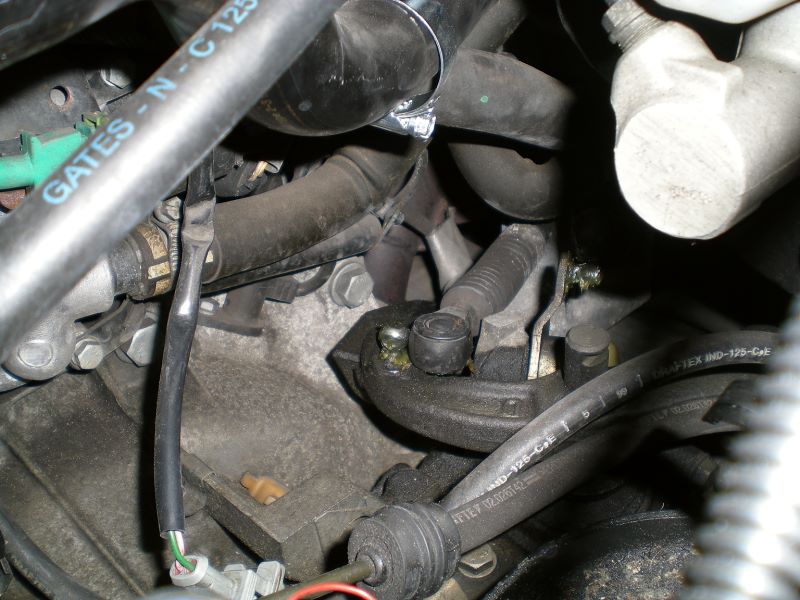
If you get back under the car and look behind the gearbox you should see something like this. Under the heat-resistant "bag" is the connector for the speed sensor. Pull him out.
Up top, you should be able to see some wiring looms on a plate attached to the side of the gearbox by a big bolt right in the middle of this picture. This is the engine earth, and you'll want to clean up the plate, starter earth, and (once the box is out) the gearbox here.
Move round the front of the engine and look up. You should see something like this - the blue thing is my engine oil filter. See the barcode? That's the starter motor you need to slide out of the way.
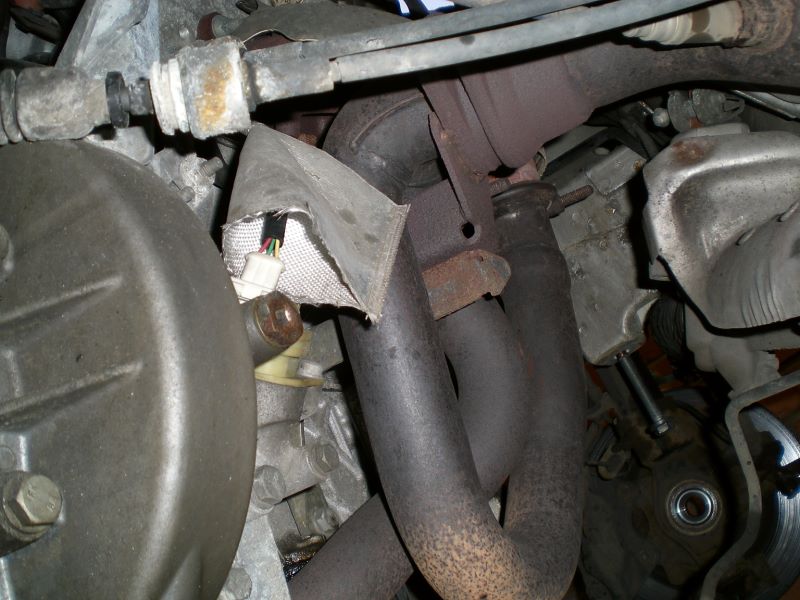
Getting to it isn't obvious. First, if your exhaust pipe clip's in a dumb place like mine was, slacken it, move it round the front, then re-tighten it. The 2 smaller bolts you can see at the top hold the heat shield on. Get 'em out.
Without the shield, you can see the 3 bolts holding the starter in place - 1 at the top, 2 at the bottom.
Before you can slide the starter out of the way, look round the back of it and you'll see this green plug which needs disconnecting
You can then use a flathead screwdriver to get the starter clear of the bell housing.
While you're down here, there's 3 small bolts holding a little cover onto the bottom of the bell housing next to the exhaust pipe.

Remove the cover and you get your first glimpse of the flywheel.
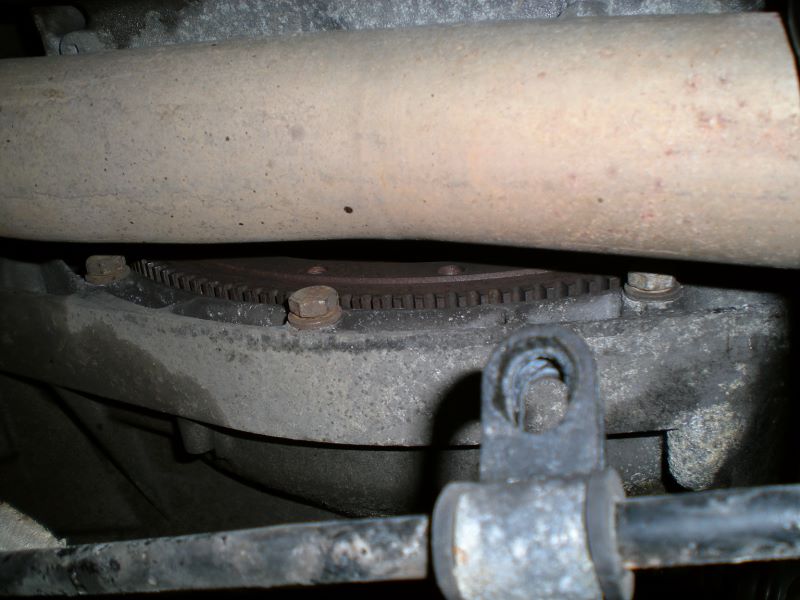
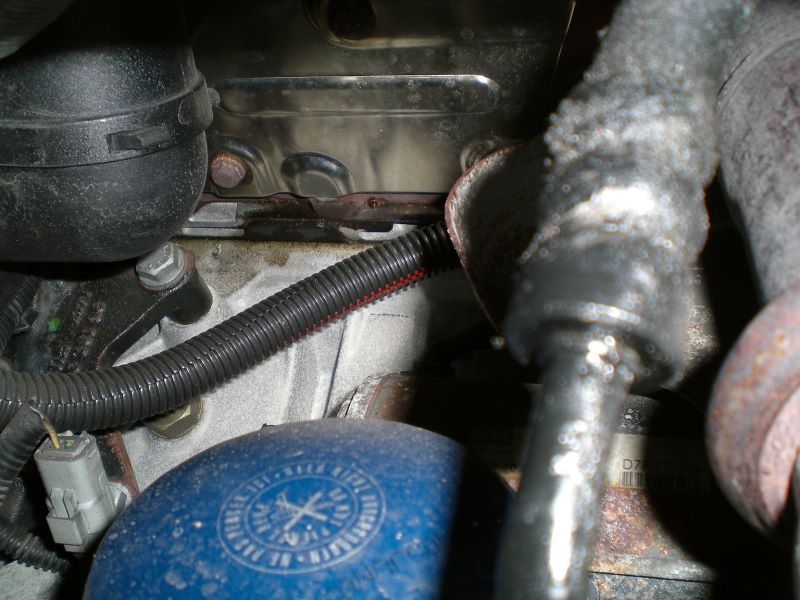
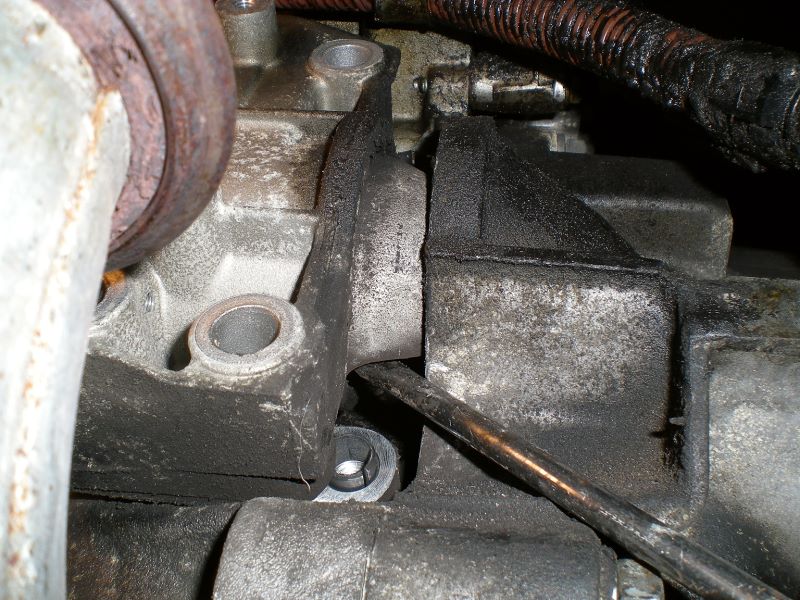
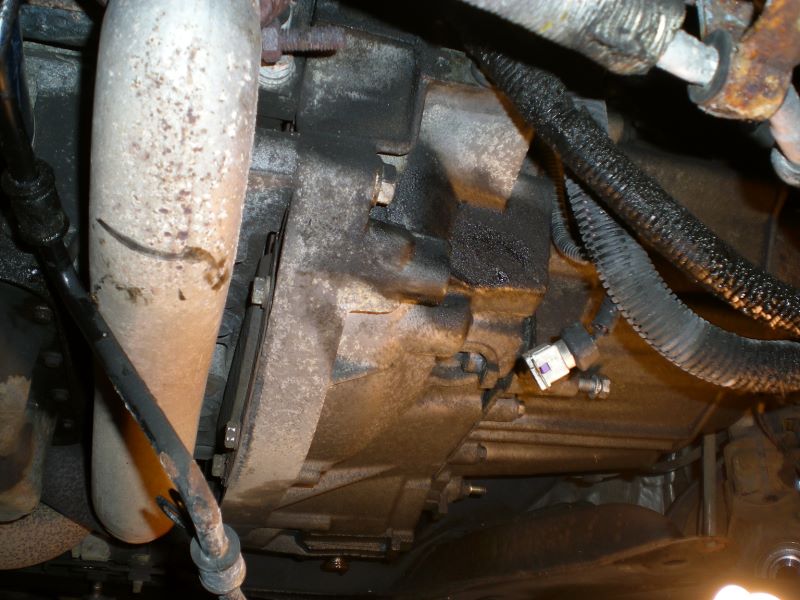
While you're under here, I'm going to show you the hidden gearbox bolt. It's in the middle of the picture, with the gearbox at the bottom and the sump visible at the top. This one isn't obvious because it goes from the engine into the gearbox whereas the others are the other way around. Don't undo it yet.
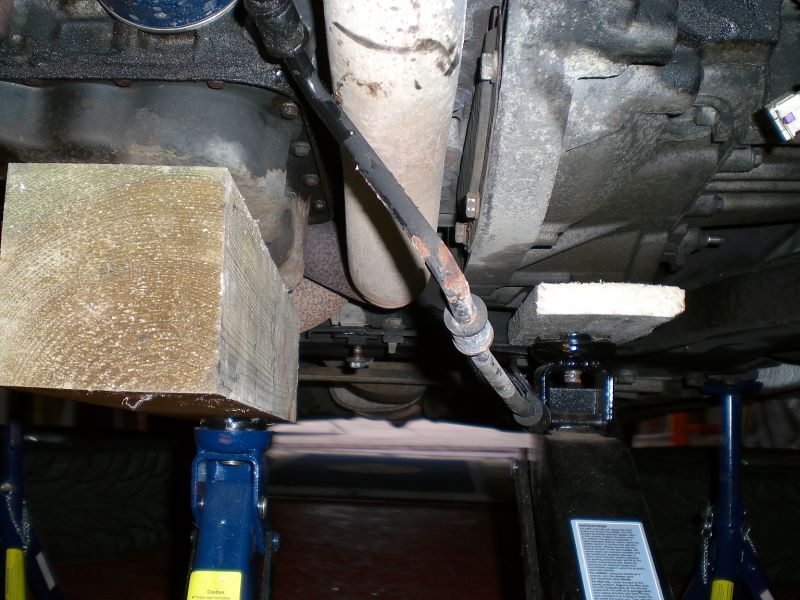
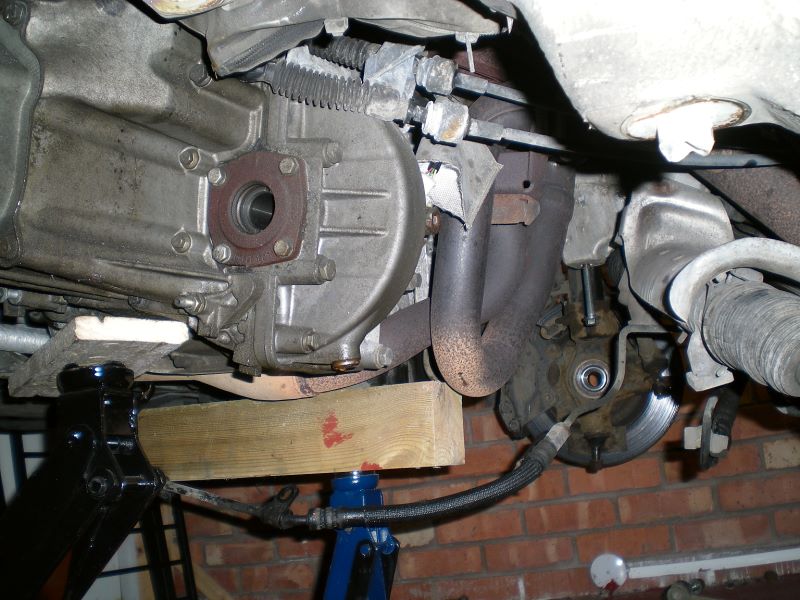
Now you want stuff to be supported. Don't jack stuff up directly, use a piece of wood to spread the load. You want to support the engine close to the exhaust pipe and the gearbox roughly where I'm showing here, but you want the jack pointing out of the wheelarch. Dunno why I had it like that in the picture
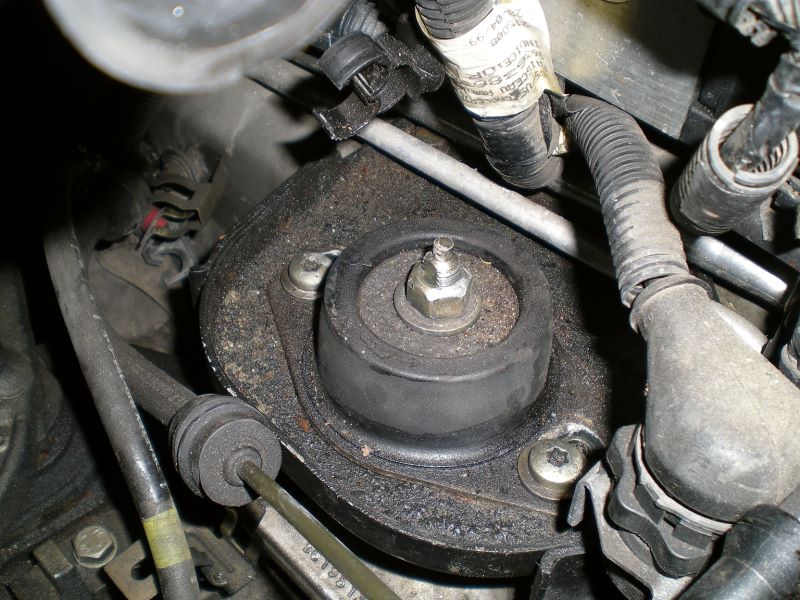
Up on top is the gearbox mounting. Take the large nut off then undo the 2 torx bolts to get the mount free.
Here's my old one to the right and a new one on the left. You can see how much the old one has compressed under the weight. This should be a good warning that you're not dealing with lightweight stuff now. If you do something stupid you could end up very hurt.
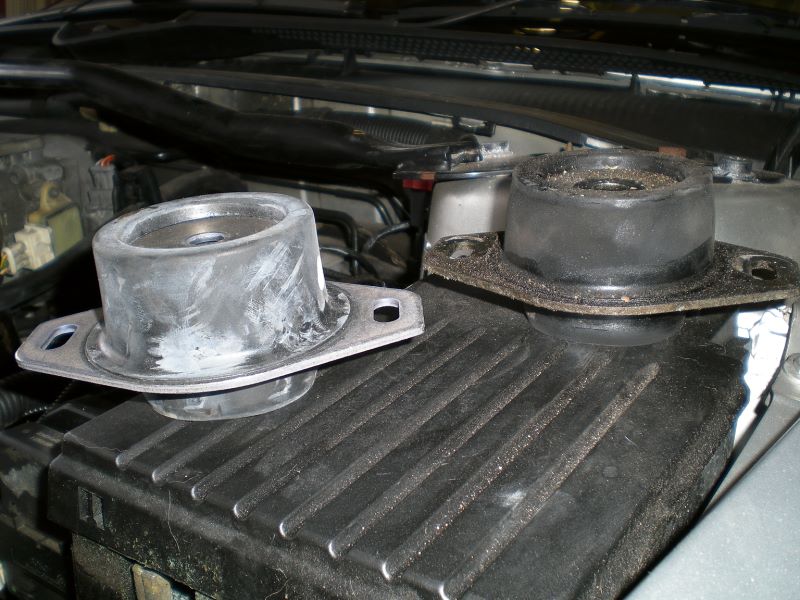
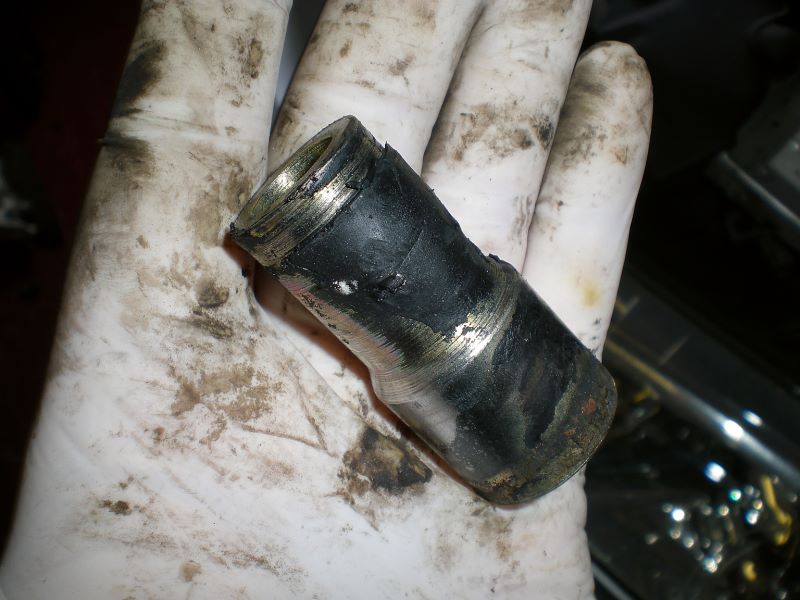
Inside the mount you should see this collar. You'll want it when re-fitting. Might be an idea to clean it up...
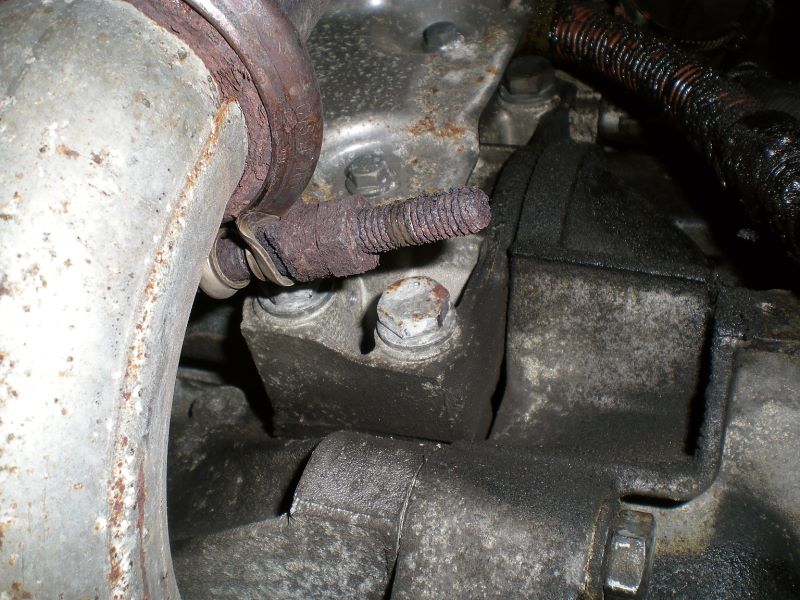
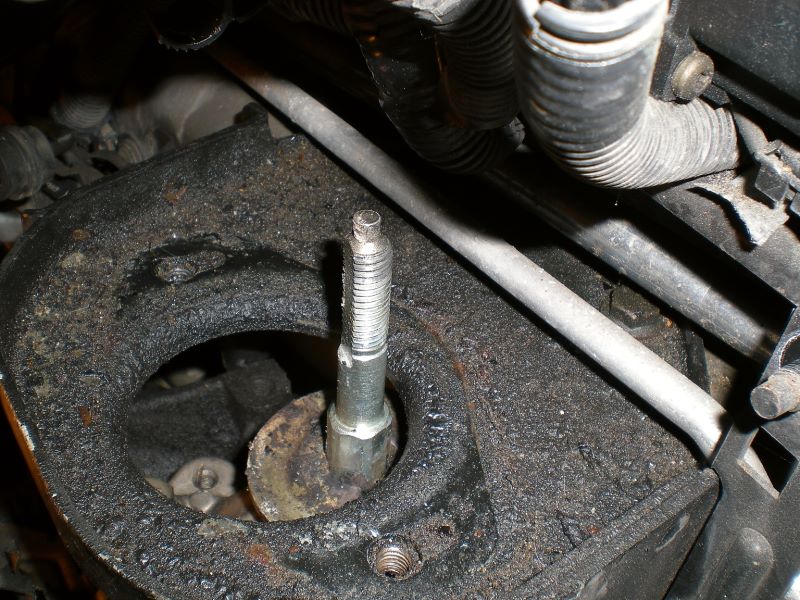
This is the enemy. This is pain. This is hate. This is your worst nightmare. It needs to be removed unless you want to play engine gymnastics. There's a rounded hex section at its base, but you probably won't be able to unscrew it. Ger on the coupe club forum has reported it's possible to get the rear bolt holding this pin undone enabling him to remove it that way, but I couldn't see a way.
If you can't remove it you'll have to use the top engine mount to lower the engine as much as possible, then use your jack to drop the centre even more, then try to take the gearbox out at an angle. It's not fun. Alternatively you could use an engine carrying bar thing to lower the lot, but remember the engine's still connected to stuff
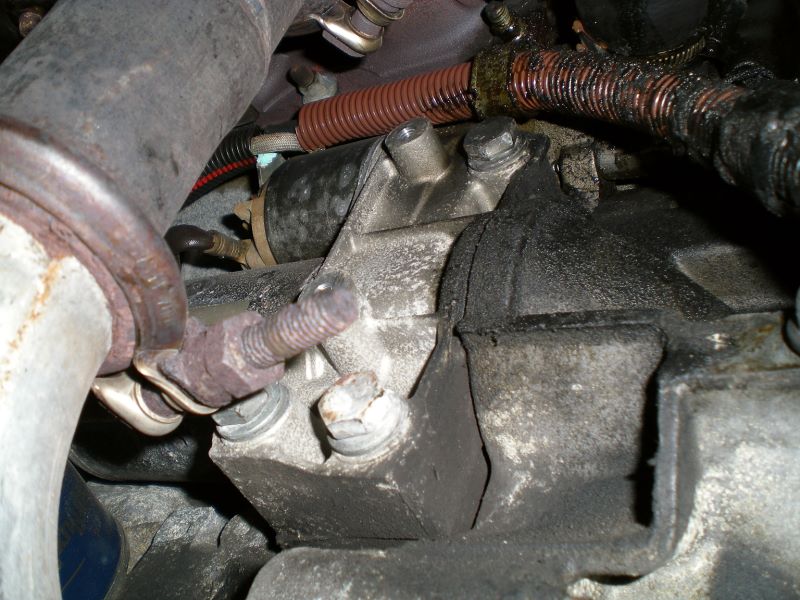
Lets presume you've got the Pin Of Evil out. Here's the front bottom gearbox bolt.
There's these 2 bolts here
And one hard-to-reach one here in the centre of the picture. Don't forget there's also the backwards one underneath.
WEAR A DUST MASK!!!!! Friction material will do VERY BAD THINGS to your lungs!
Undo the bolts (bottom first!) then pry the gearbox off the engine.

Expect the engine to want to rotate. This can lead to whoopsies like this. Also note that the holder for the Pin Of Evil makes a nice carrying handle if you wedge the handle of a breaker bar in it!!! Just be careful not to pull your brake wear cable like this. You can see how the gearbox has caused the jack to put a hole in my garage floor
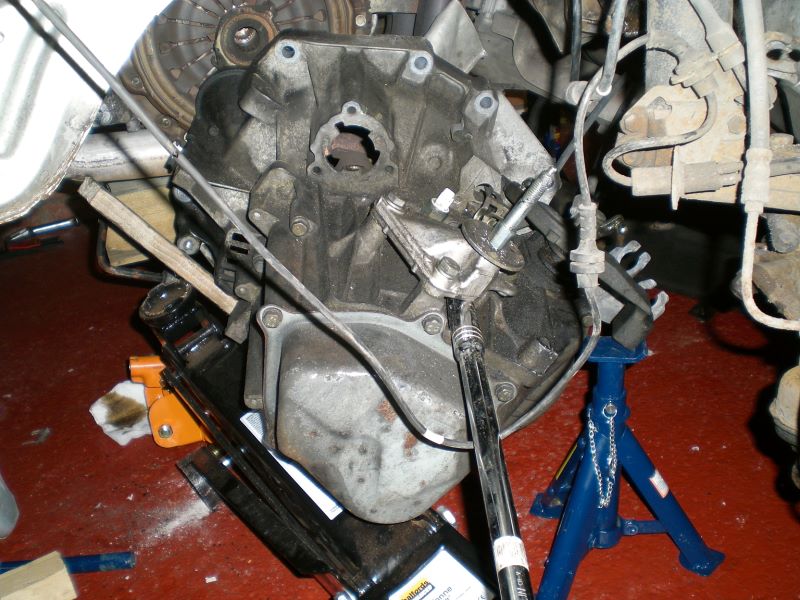
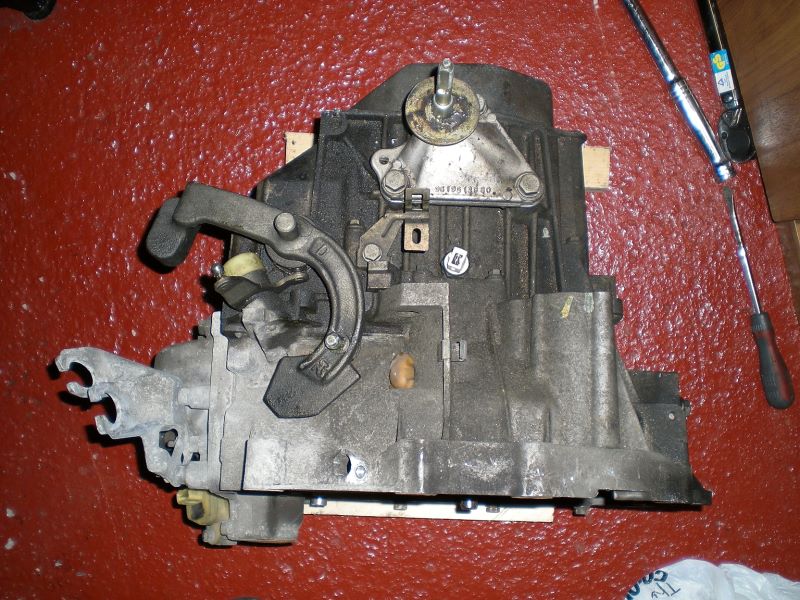
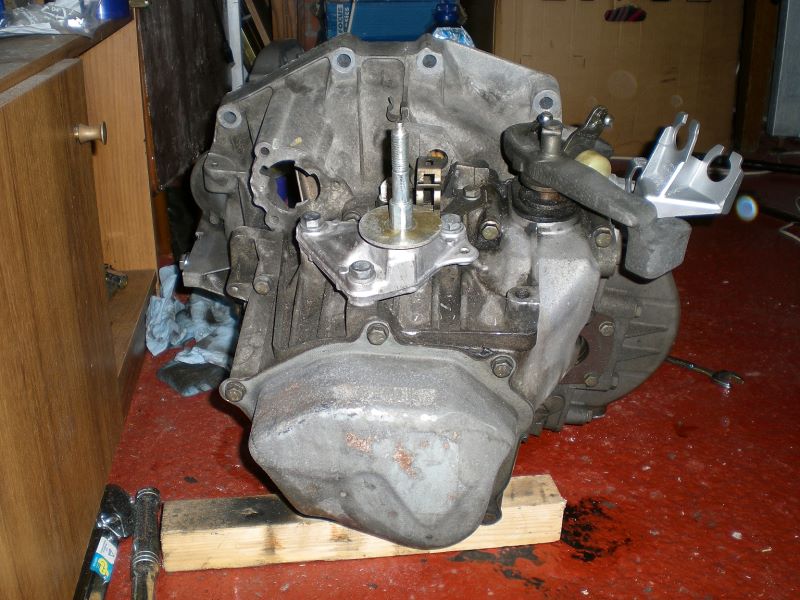
It's heavy, but one person can lug it about short distances. Here it is off the car

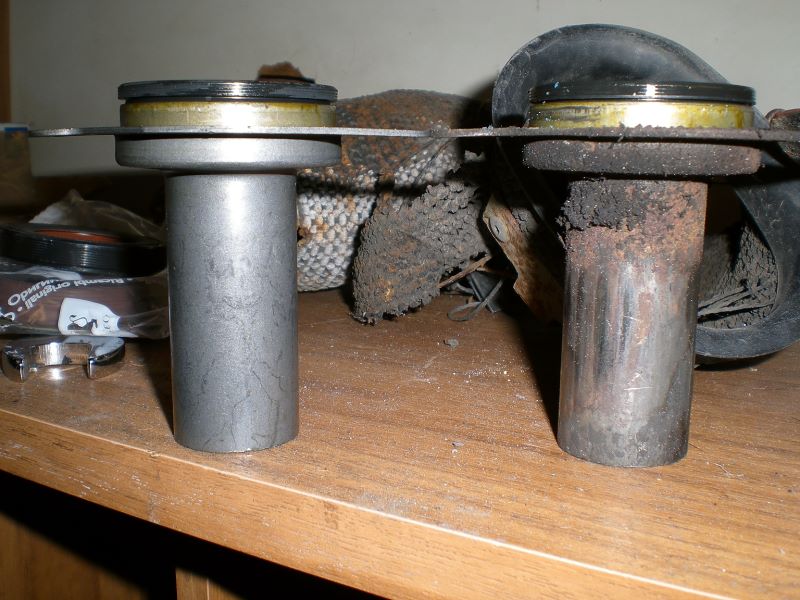
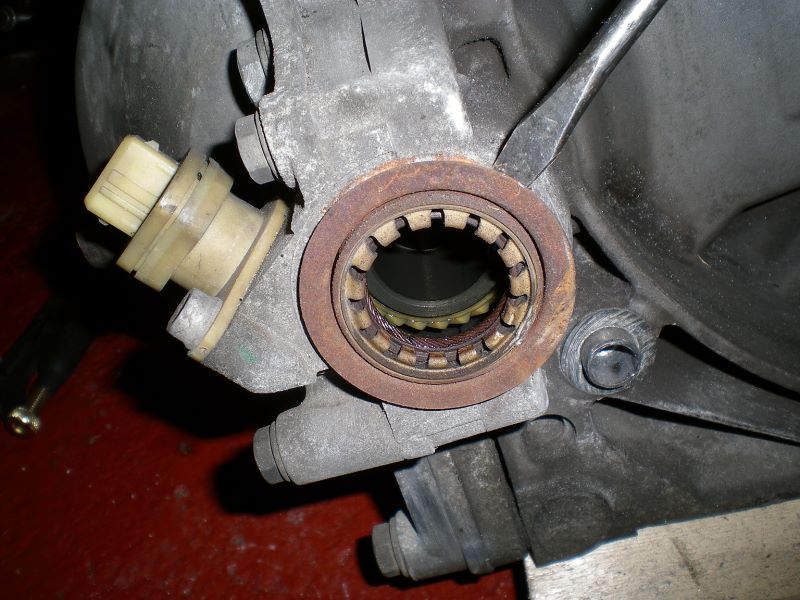
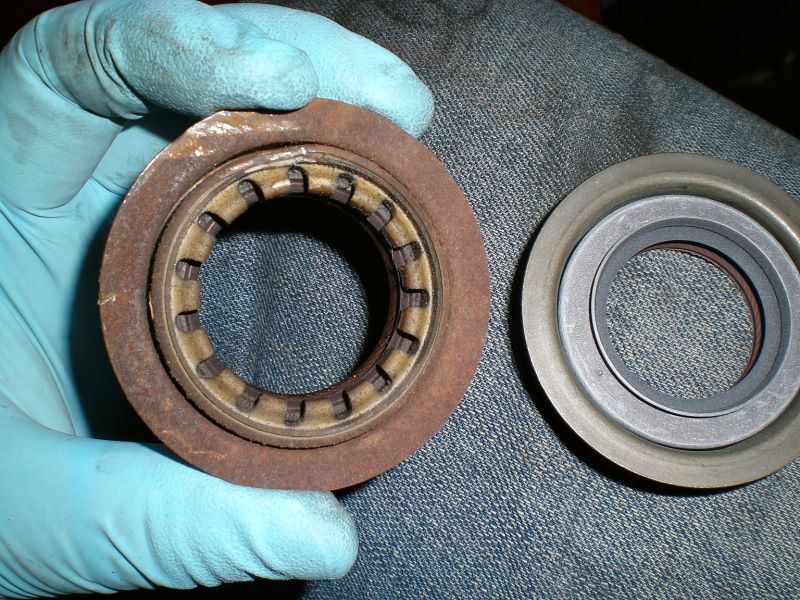
First job on the gearbox is to change this collar which the release bearing moves along.
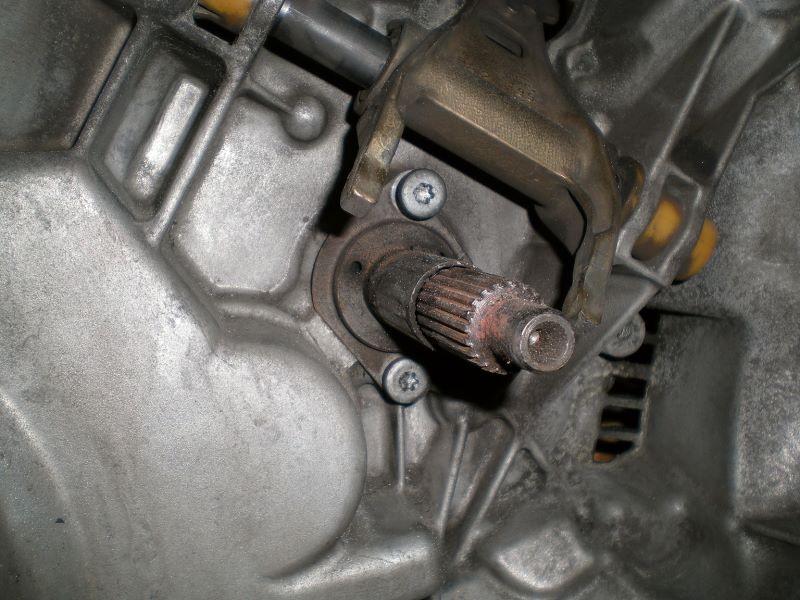
Here's the obligatory old+new shot. As you can see, it's also an oil seal, so best change it!
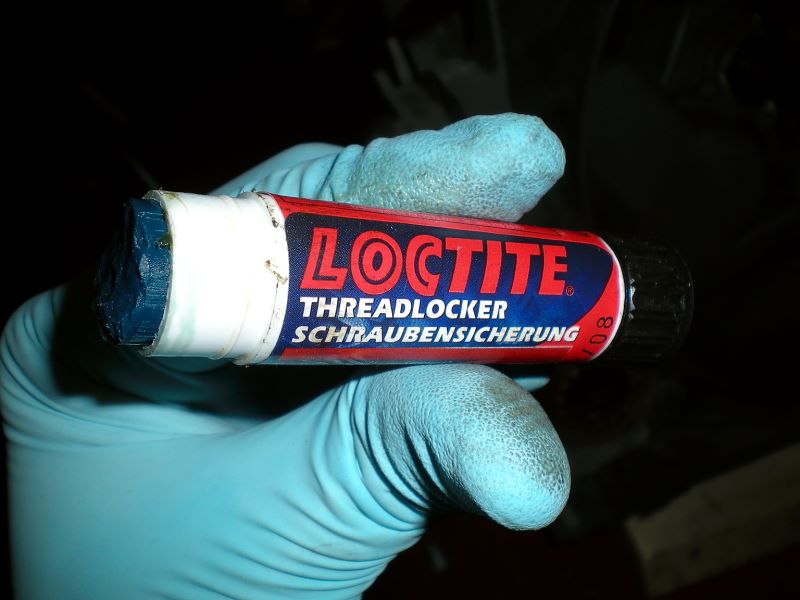
When you put the new one in, be sure to use threadlocker on the threads of the screws:
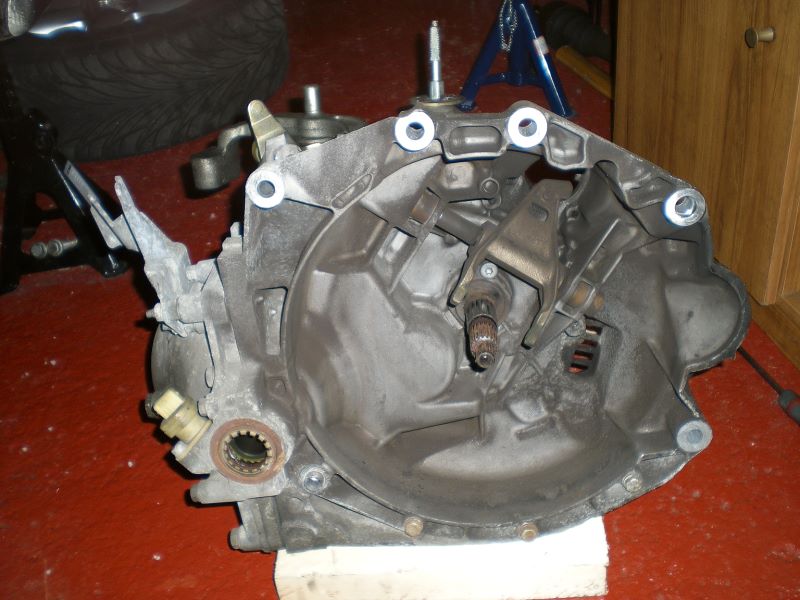
Give the bell housing a good clean out with brake cleaner. Not an essential job, but you may as well do it. Lets clean up and lubricate the release fork. Lever the and cap in here.
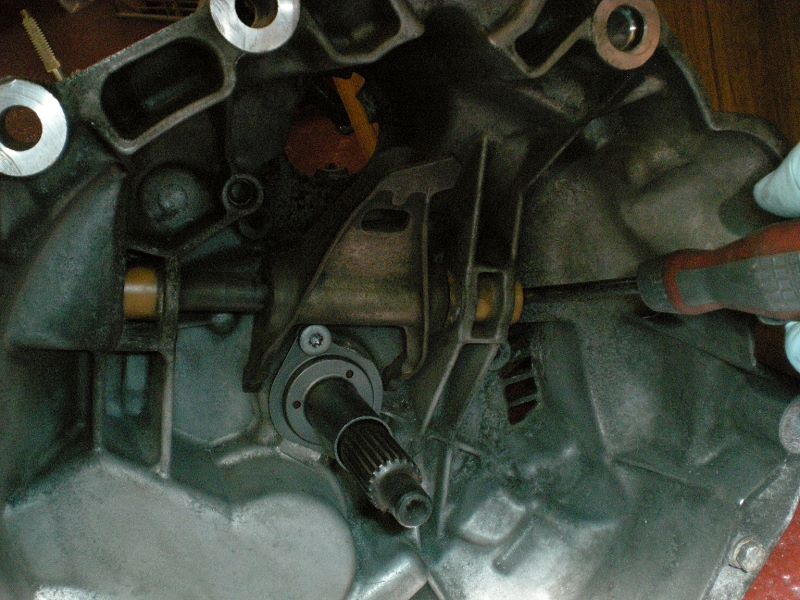
Give the other end some "persuasion". When it's all out, clean it up and put it back. You want to lubricate the end caps and the inside of the fork using normal grease. You don't want any grease exposed though, otherwise it'll clump up with clutch dust

Right. Pop the o/s diff seal out of the diff
and replace it with the superseding part
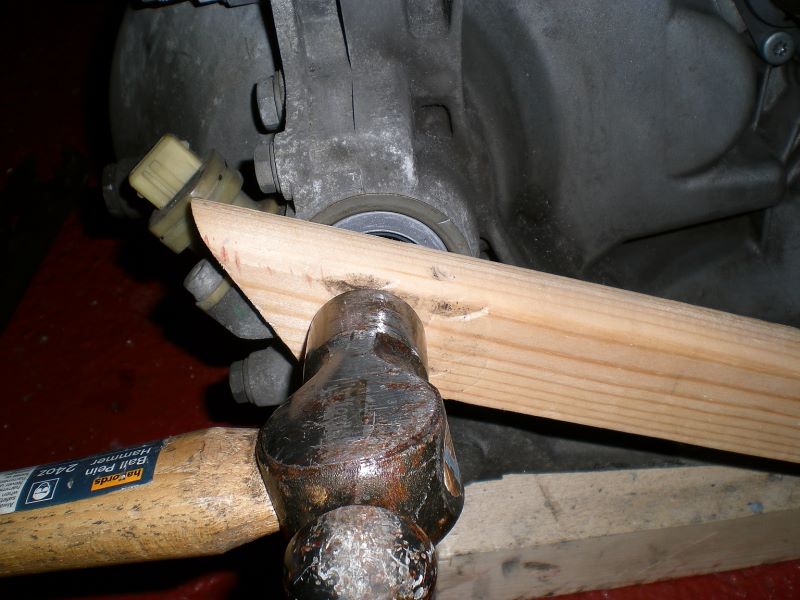
Using a bit of wood, tap the new one in
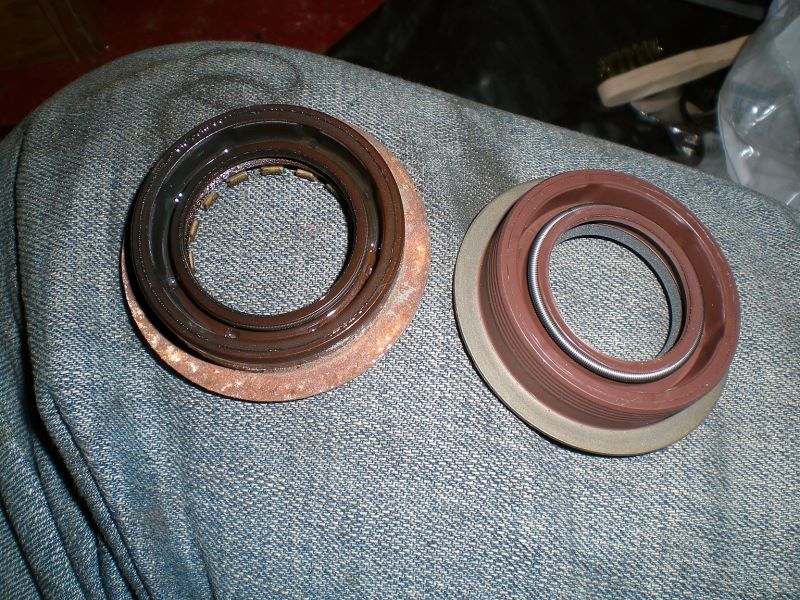
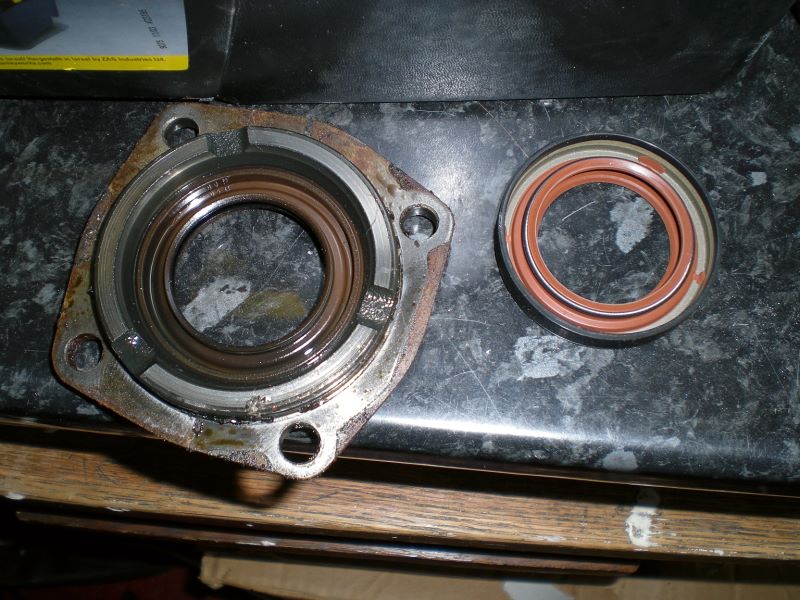
Unbolt the n/s diff seal holder (the red bit) from the other side of the diff. (sorry, didn't take a picture of this with the box off the car
Here's the new part next to the old one.
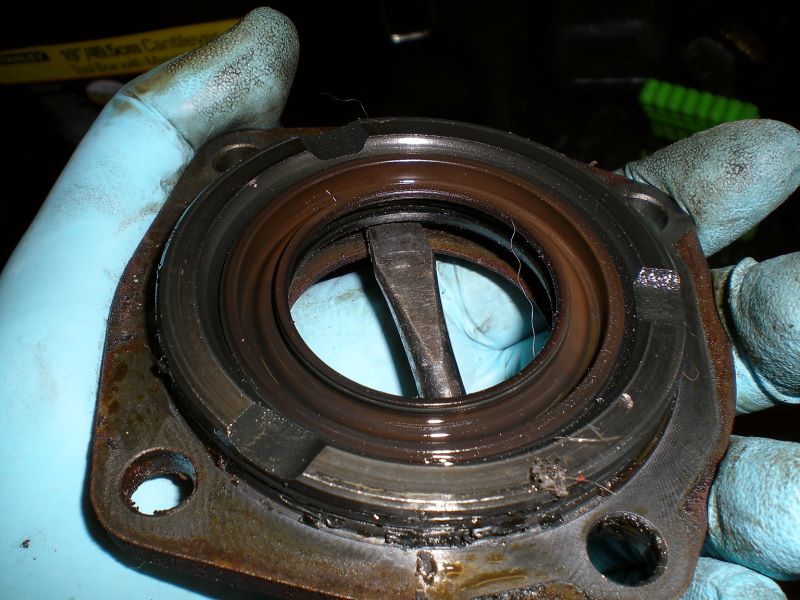
Here's how you get the old one out. I don't think I've actually unscrewed anything with this screwdriver...
May as well clean up some of the muck from the gearbox while you can using some heavy duty engine degreaser. Note I've not gone mad with it, I've avoided seams and I've DEFINITELY avoided the gear selector's moving bits! You do not want degreaser inside your gearbox!
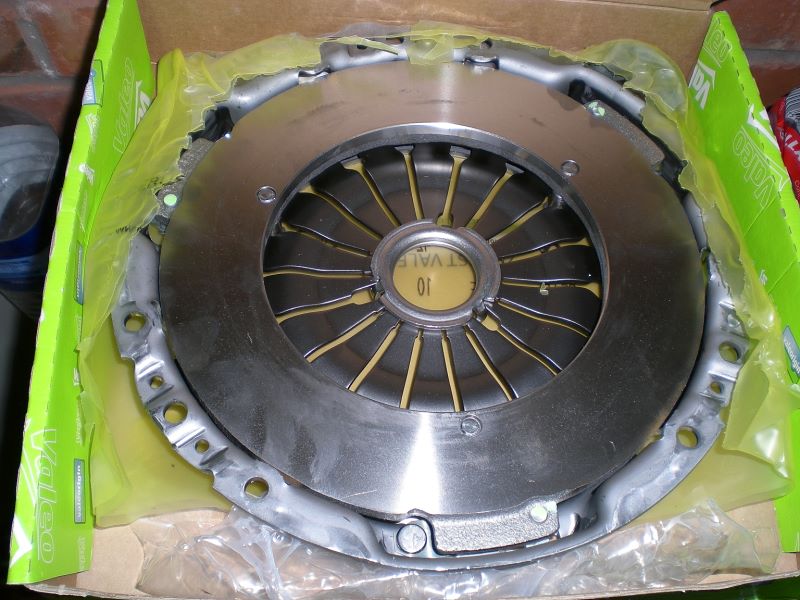
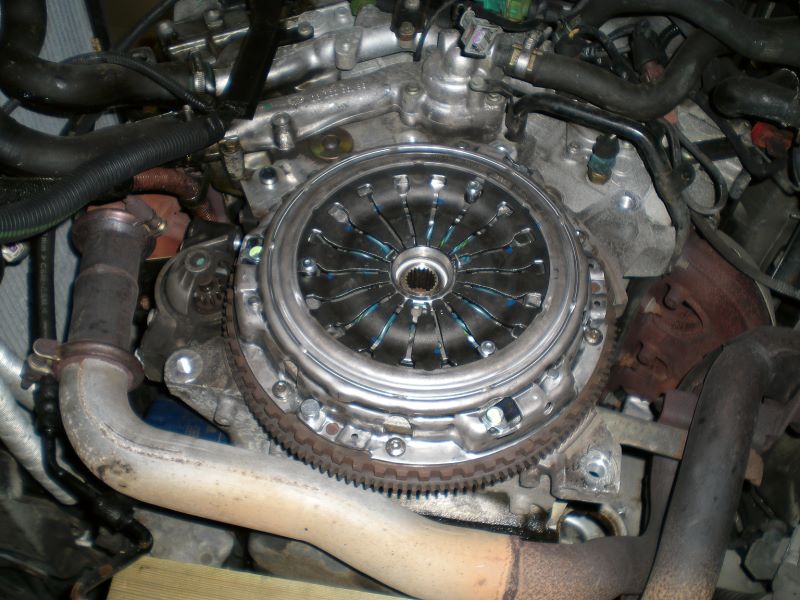
New clutch!
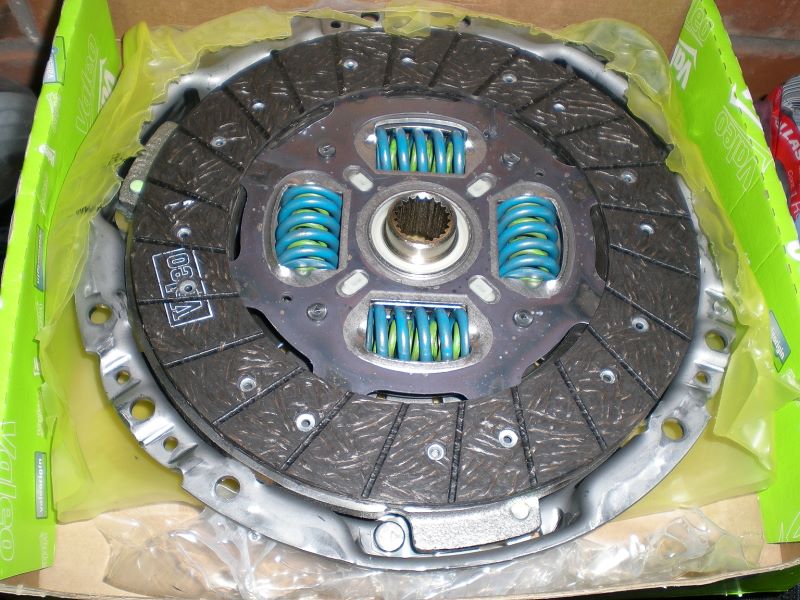
Before you do anything, make sure the friction plate fits...
Worrying, but it works...
This is the friction plate
...and the release bearing
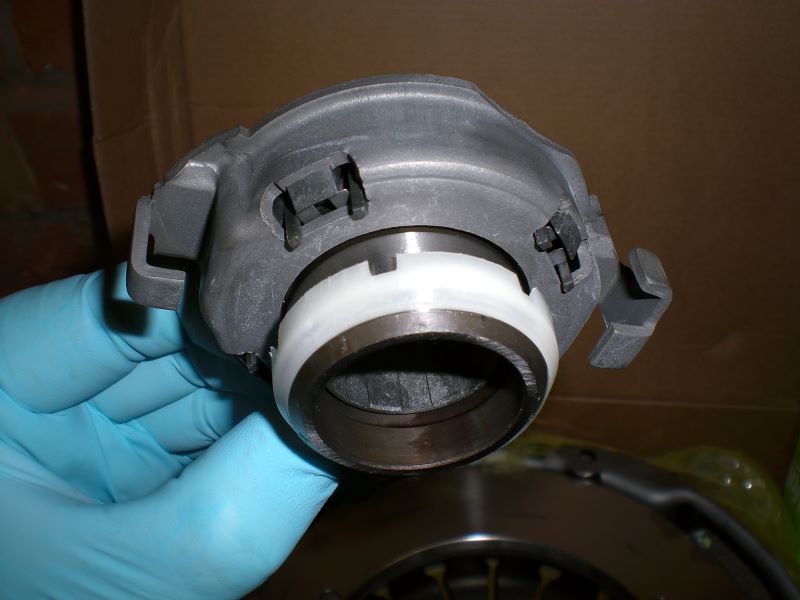
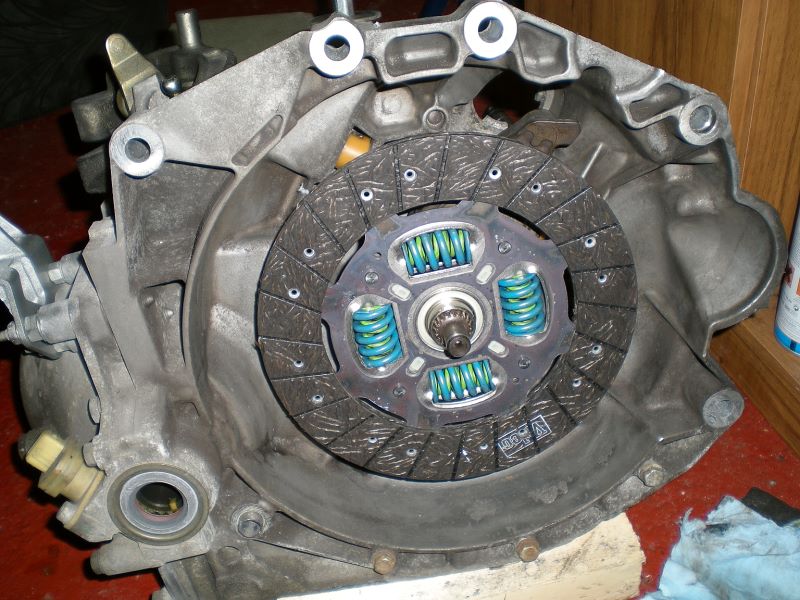
... and this is how they fit together. The friction plate is between the pressure plate and the flywheel.
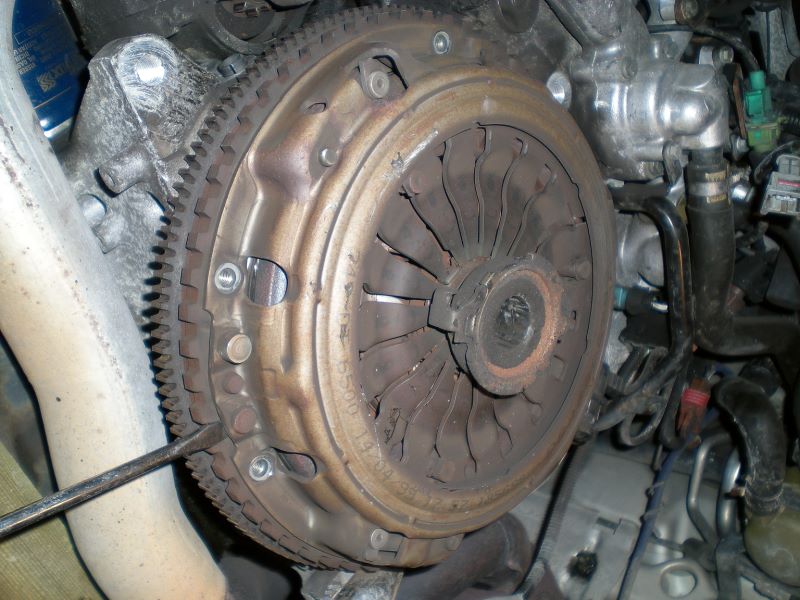
Right. Take the old clutch off WHILE STILL WEARING THE DUST MASK! There's a few bolts round the edge of the engine. Align your ratchet so you're pulling/pushing it towards the centre of the flywheel and you won't have to worry about it turning
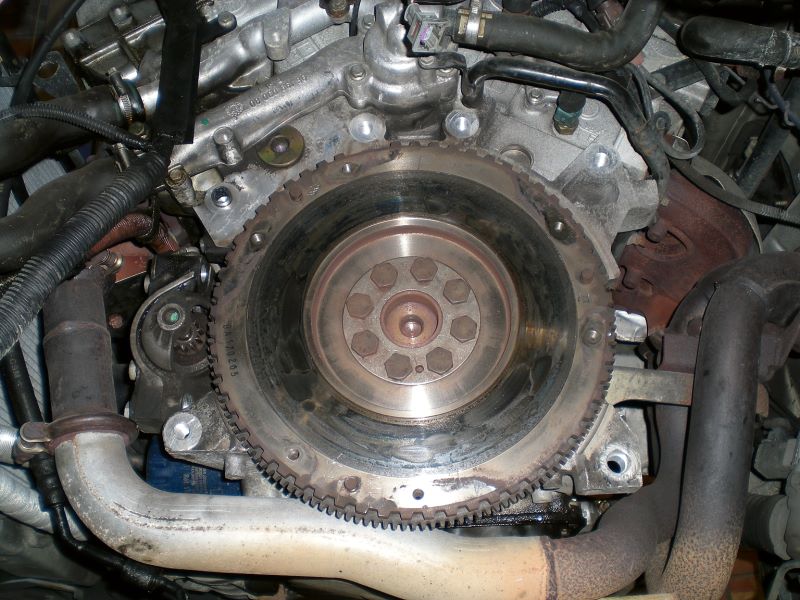
One flywheel. You should clean this with brake cleaner. Note there's 2 sets of teeth around the edge. The fine teeth are for the starter and the fat ones are for the flywheel sensor
Fit the new clutch friction and pressure plates. The friction plate needs to be PERFECTLY in the centre. There's several ways you can do this, but be aware your average clutch alignment tool won't work.
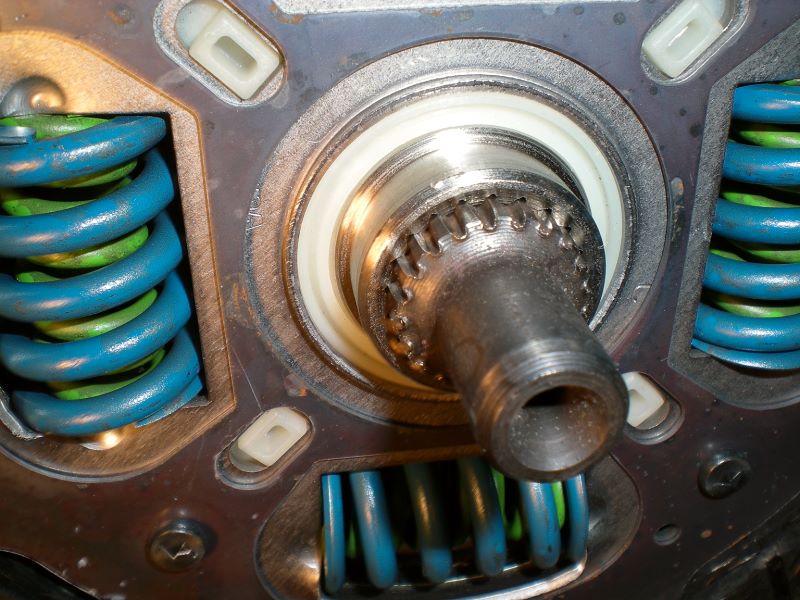
Put the release bearing onto the gearbox driveshaft so that the fork slides it in and out smoothly. It'll only go one way on. Make sure while you're re-fitting the gearbox that the release bearing is kept away from the clutch plates.
Once you've got the box on, use one of several methods to make sure it's meshed with the clutch friction plate ok. One is to manually select a gear on the box, then turn both driveshafts at the same time. Another is to put a wrench on the engine bottom pulley and turn it by hand (not easy on the V6
Now if you've got here, you should be perfectly capable of putting it all back together
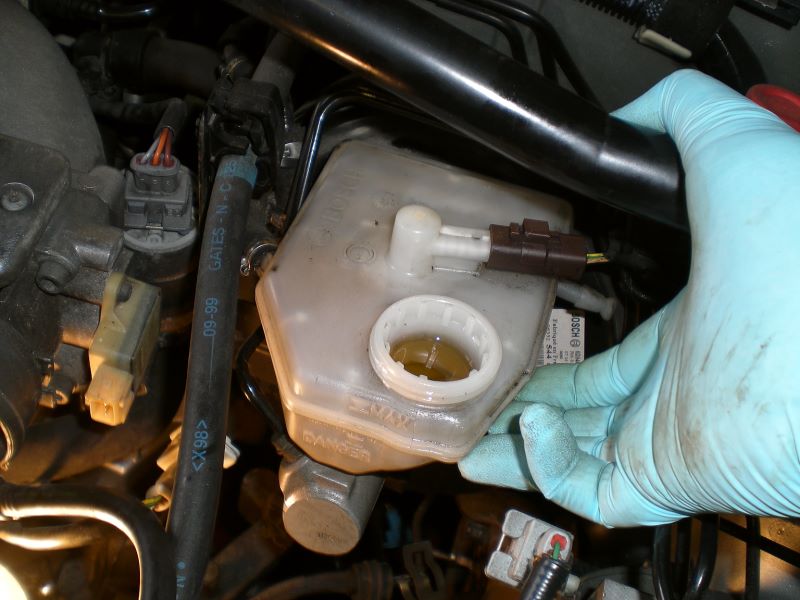
There's just one thing to go over - bleeding the clutch. Use the brake bleeder one-way valve and a bottle. Put a 13mm ring spanner over the nipple first, then use a 9mm spanner to open/close the bleed valve by levering against the 13mm spanner. NEVER do it without the 13mm spanner as the cylinder plastic will snap and you'll need a new one

When bleeding, you want to either have the nearside jacked about 1-2 foot higher than the offside, or do this after EVERY pump of the pedal otherwise you'll just take in air due to the ridiculous design of the reservoir.