I hope these notes will be helpful to some. They are by way of being a humble pendant to Jasper5's tutorial on handbrake adjustment (Knowledge Base section).
1. The adjuster at the base of the handbrake lever, shown in Jasper's first picture, is not always present. On my 1997 1.9TD there was only a hexagonal brass block which was soldered directly onto the cable end and did not turn. (Possibly the adjustment facility was introduced only on later cars.)
2. Moving to the rear end: - On drum brakes, the toothed adjuster is very similar to the disc-brake version shown in Jasper's fifth image, but it is mounted horizontally at the top of the assembly, between the ends of the shoes; there is a sort of black plastic shield in front of it, with a rectangular hole through which one can reach the teeth. (These so-called automatic adjusters may have long since given up their jobs. Mine needed two complete turns before the shoe clearance was brought down to a reasonable level; no wonder the handbrake had been non-existent!) You have to remove the drum (held by two star-head screws) in order to get at the adjuster, and setting it is a tedious matter of trial and error, moving the adjuster a few teeth at a time and then re-fitting the drum to test the result. I think I had to remove and replace the drum eight times.
3. As Jasper implies, the central adjuster - the one in Jasper's second image, above the exhaust pipe and usually hidden by a heat-shield - can degenerate into a useless mass of rust, and this was certainly true of mine; adjuster-nut, locknut and threads were all fused together into one shapeless lump. However, I found that there was a rough-and-ready way of taking up lost motion in the cable without resorting to the adjuster. I hope the drawings below will be clear enough.
Fig. 1 shows the yoke (if that is the right term), marked A, which connects the front cable (B) to the right-hand cable (C); it will be found just forward of the spare-wheel well (D) and about an inch to the right of the edge of the heat-shield. I found that there was free play of about 3mm between this yoke and the end of C. With the handbrake released, it is easy enough to pull A outward, towards the right-hand side of the car, and then unhook cable C from it; the yoke can then be swung aside and slid back from the end of B (fig. 2). Having got this far, I took a brass nut about 2mm thick, 5mm across (i.e. similar in diameter to the blocks at the ends of the cables), with a central hole more or less the same diameter as the cables themselves. I filed away one side of this nut to create a C-shaped spacer (fig. 3) and pushed it over the end of cable B so that it butted up against the block (fig. 4). After re-connecting everything, I found that I had reduced the travel of the brake lever by two clicks.
I do not know whether this approach would ever have resulted in MoT-acceptable braking, but it certainly brought my handbrake back from the dead and made the car usable again for the few months that remained before the clutch died (which is another story).
Oliver Mundy.
Handbrake adjustment: some notes & a constructive bodge
Moderator: Moderators
-
Menophanes
- 1.8 16v
- Posts: 55
- Joined: Tue Dec 13, 2011 3:22 pm
- Location: Redruth, Cornwall, U.K.
- Contact:
Handbrake adjustment: some notes & a constructive bodge
"Don't rush ahead when you can't see ahead. Ahead is the place collisions come from." (De Dion owner's manual, 1913)
-
steve_earwig

- Moderator
- Posts: 19813
- Joined: Thu Oct 04, 2007 6:09 pm
- Location: Jastrebarsko, Croatia http://www.jastrebarsko.hr/lokacija/
Re: Handbrake adjustment: some notes & a constructive bodge
Hey nice drawings dude! 
Service Box says there are two versions of the front adjuster, one at the top of the handbrake pulley (which I think must be the one in the KB thread) and one at the bottom but I've no idea if that means there's one people are missing or it just doesn't exist Service Box doesn't say which one a particular car has even using the VIN and, inevitably, there are two different handbrakes as well...
If you can't stretch to new cables then the bodge is fair enough. I have something similar on my D9's fuel flap release cable You could have soaked the adjuster in WD or something more corrosive like Coca Cola for a week but there's always a good chance it'll just snap when you try and turn it.
I always found with drum brake self-adjusters that they don't work if there's too much travel (whuh? ) so if you can get them close enough they'll start to work. Hopefully 
Service Box says there are two versions of the front adjuster, one at the top of the handbrake pulley (which I think must be the one in the KB thread) and one at the bottom but I've no idea if that means there's one people are missing or it just doesn't exist
If you can't stretch to new cables then the bodge is fair enough. I have something similar on my D9's fuel flap release cable
I always found with drum brake self-adjusters that they don't work if there's too much travel (whuh?
Unskilled meddling sin©e 2007
The submitted form was invalid. Try submitting again.
The submitted form was invalid. Try submitting again.
-
grasmere59
- 3.0 24v
- Posts: 1457
- Joined: Wed Jul 28, 2010 10:23 pm
Re: Handbrake adjustment: some notes & a constructive bodge
For what I can make out the adjuster for the front to back cable on earlier models is under the handbrake below the floor.
2011 "11" Mondeo TXS est 200ps in Grey
2003 "53" 110 hdi Executive Estate in Diablo Red
2001 "51" BMW 530i sport in Black
2012 "62" Yamaha XT1200
1974 "M" Honda CB500/4
1994 "M" Kawasaki Zephyr 1100
1998 "S" Honda XRV 750
2003 "53" 110 hdi Executive Estate in Diablo Red
2001 "51" BMW 530i sport in Black
2012 "62" Yamaha XT1200
1974 "M" Honda CB500/4
1994 "M" Kawasaki Zephyr 1100
1998 "S" Honda XRV 750
-
bangernom1cs
- 2.0 16v
- Posts: 182
- Joined: Wed Jul 09, 2008 4:00 pm
Re: Handbrake adjustment: some notes & a constructive bodge
yes, still got mine 360k and going still.
However another good bodge is to replace the hold down screw/spring arrangement
with some good quality stainess bolts and nylocs.Through from the shoe front and out to the backplates.
I had to do this when the rear back plate got a little too rusty and the hold downs
lost their grip on the backplate taking out the ABS sensors too. This usually is accompanied by a loud bang
and lots of squeaking and rattling. To reinforce the back plate and bolts I used some oversized stainles washers
on the back plates and also dished hold down plates and springs from a universal kit at the shoe end of the business.
I'll be taking off the rear discs in a day or two and try and show some pix.
The hand brake is now perfection itself.
T
Last edited by bangernom1cs on Tue Aug 20, 2013 5:43 pm, edited 1 time in total.
-
bangernom1cs
- 2.0 16v
- Posts: 182
- Joined: Wed Jul 09, 2008 4:00 pm
Re: Handbrake adjustment: some notes & a constructive bodge
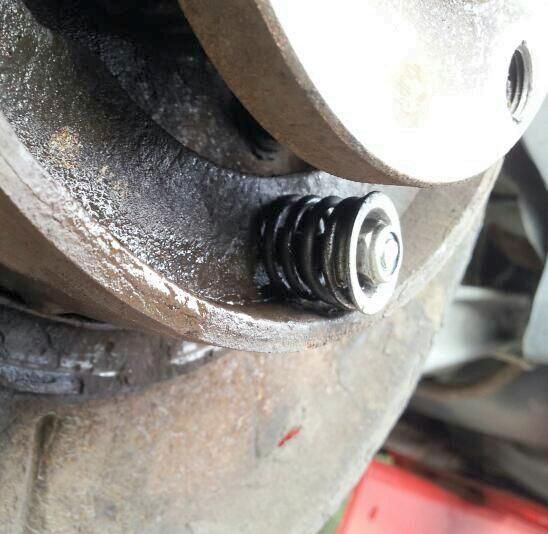
There you go. The sping when adjusted with a nyloc in a hold down cup makes them work just like normal handbrakes do.
T
-
jasper5
- 3.0 24v
- Posts: 3689
- Joined: Fri Nov 28, 2008 1:30 pm
Re: Handbrake adjustment: some notes & a constructive bodge
Well done everyone 
Very good constructive thinking
Reminds me of the old days (1970s) when doing such bodges were an everyday thing we had to do to keep cars on the road....parts were not always available like they are now.
Very good constructive thinking
Reminds me of the old days (1970s) when doing such bodges were an everyday thing we had to do to keep cars on the road....parts were not always available like they are now.
-
ColinCranwell
- 1.8 16v
- Posts: 63
- Joined: Mon Jan 05, 2009 12:53 pm
Re: Handbrake adjustment: some notes & a constructive bodge
Be a careful with this adjustment.
If Peugeot have got their sums correct, the maximum adjust/ stretch of the new cable they have allowed should be just before the small wires in the cable start breaking rapidly. If you are making the cable work at a longer stretch than it was design for by adding this nut, you could cause sudden cable (and handbrake failure) when under load (parked).
If the mechanic spots it, it will not pass the MOT. It would be difficult to spot though.
Regards,
Colin.
1996 1.9 TD Executive
250,000miles (August 2012)
250,000miles (August 2012)