I'm going to start stripping a D9 GTX estate in the near future.
While I'm at it I have the chance to get some pics and I thought that if anyone can think of a job/area that needs pics to show access, removal or location,
to improve a thread already in the knowledge base, or just your own curiosity, now is the time.
This is a limited time offer, so post your requests and I'll see what I can do.
stealthe
Photo opportunity!
Moderator: Moderators
-
Doggy

- Mod with a 2.2 HDi, De-Fapped!
- Posts: 10710
- Joined: Mon Oct 13, 2008 11:49 pm
- Location: Northants
Re: Photo opportunity!
Which engine and what age is the GTX, please stealthe?
2002 HDi 2.2 Exec Estate, (2008-12) (wonderful)
2003 HDi 2.2 6-speed Exec Estate (2012-19) (also a gem)
2009 Citroen C5 2.0 HDi VTR+ Estate (godawful heap)
2008 BMW E91 330i touring (great fun - murdered by a reversing SUV)
2007 BMW E91 325i touring (slower smoother quieter)
2003 HDi 2.2 6-speed Exec Estate (2012-19) (also a gem)
2009 Citroen C5 2.0 HDi VTR+ Estate (godawful heap)
2008 BMW E91 330i touring (great fun - murdered by a reversing SUV)
2007 BMW E91 325i touring (slower smoother quieter)
Re: Photo opportunity!
2000 plated, 110 hdi, guess I should have said.
stealthe
stealthe
-
waue1978

- HDi don't believe it!
- Posts: 2341
- Joined: Fri Jan 29, 2010 1:56 pm
- Location: Andover, Hampshire
Re: Photo opportunity!
I wouldn't mind knowing how easy it is to get the roof bars off. Got a bit of an idea for them. Have you got room for another load of bits along with all the bits from your old Exec?
2000/X Peugeot 406 110 HDi LX Family 93k to 2000/W BMW 530D SE Auto 84k to 2003/03 Peugeot Partner Hdi Escapade 98k to 2003/53 Vauxhall Zafira DTi Elegance 74k

Re: Photo opportunity!
waue1978 wrote:Have you got room for another load of bits along with all the bits from your old Exec?
I'll grab pics when I take the headlining out. I've got the bars from the exec knocking about so I may grab a pic of those first. I seem to recall thinking that putting them back on may be fiddly, I think they have plastic spacers.
stealthe
Re: Photo opportunity!
First few pics, feel free to use them if required
Left hand headlight bolt.
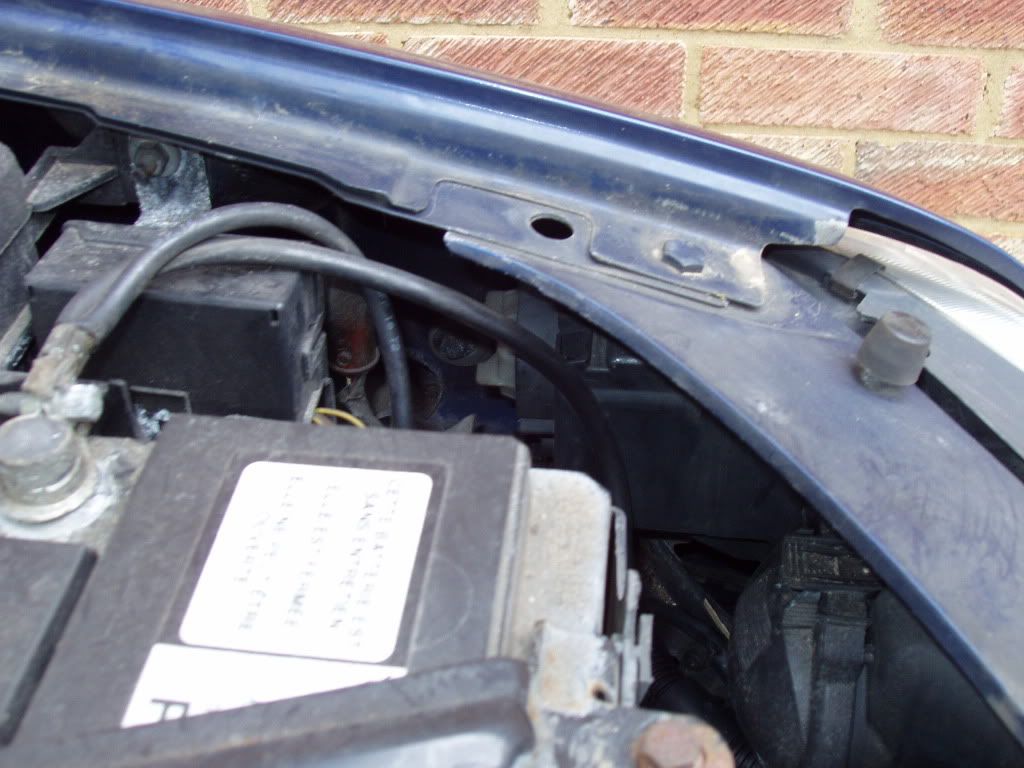
Easier to get at if you take the battery box out.
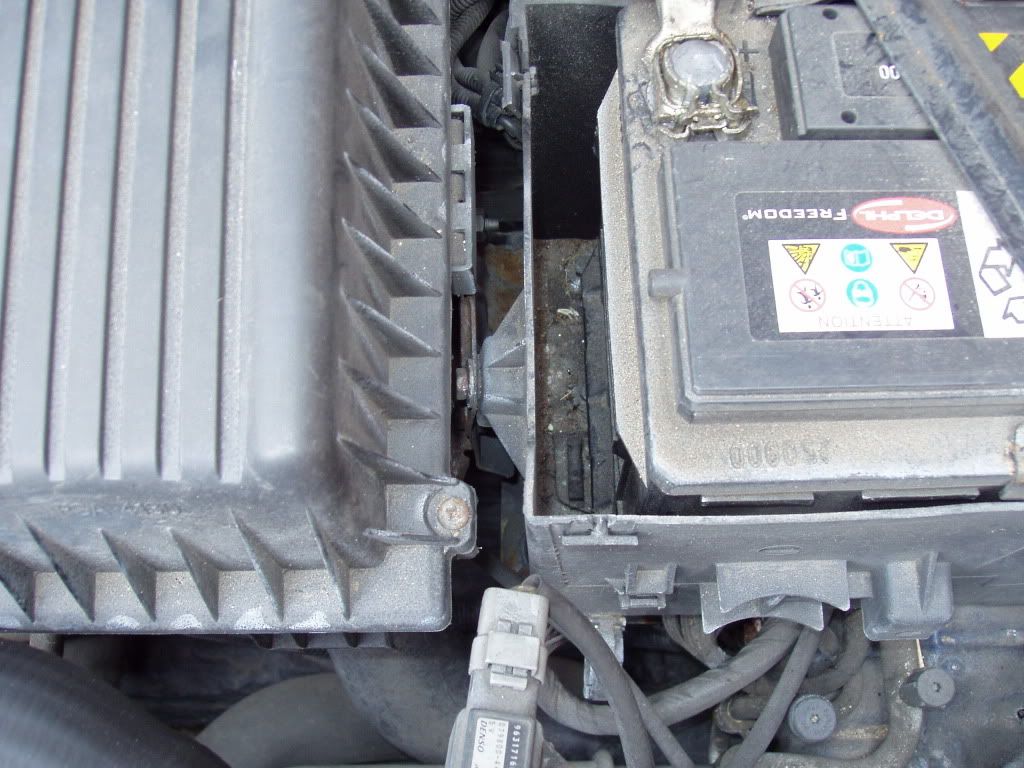
One bolt at the side, five in the base of the box. ( No, I didn't respray the car! )
Box removed, and you can get on to the headlight bolt easily. ( Bolt removed! )
stealthe
Left hand headlight bolt.
Easier to get at if you take the battery box out.
One bolt at the side, five in the base of the box. ( No, I didn't respray the car! )
Box removed, and you can get on to the headlight bolt easily. ( Bolt removed! )
stealthe
Re: Photo opportunity!
Need power for I.C.E, caravan, carpc etc?
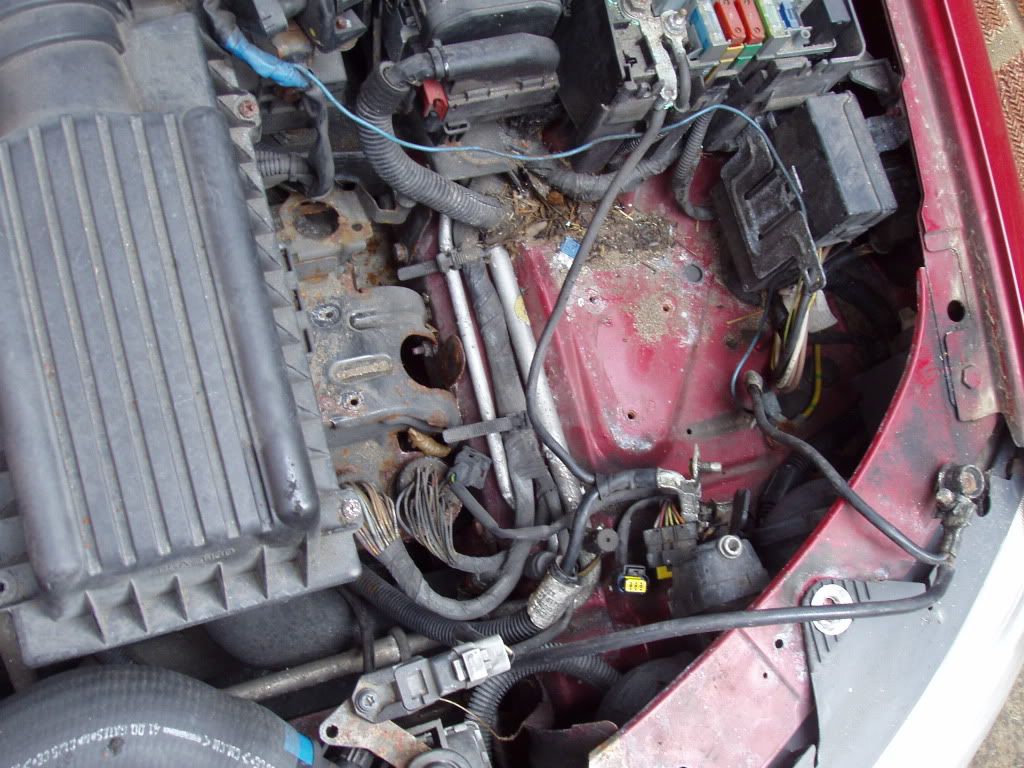
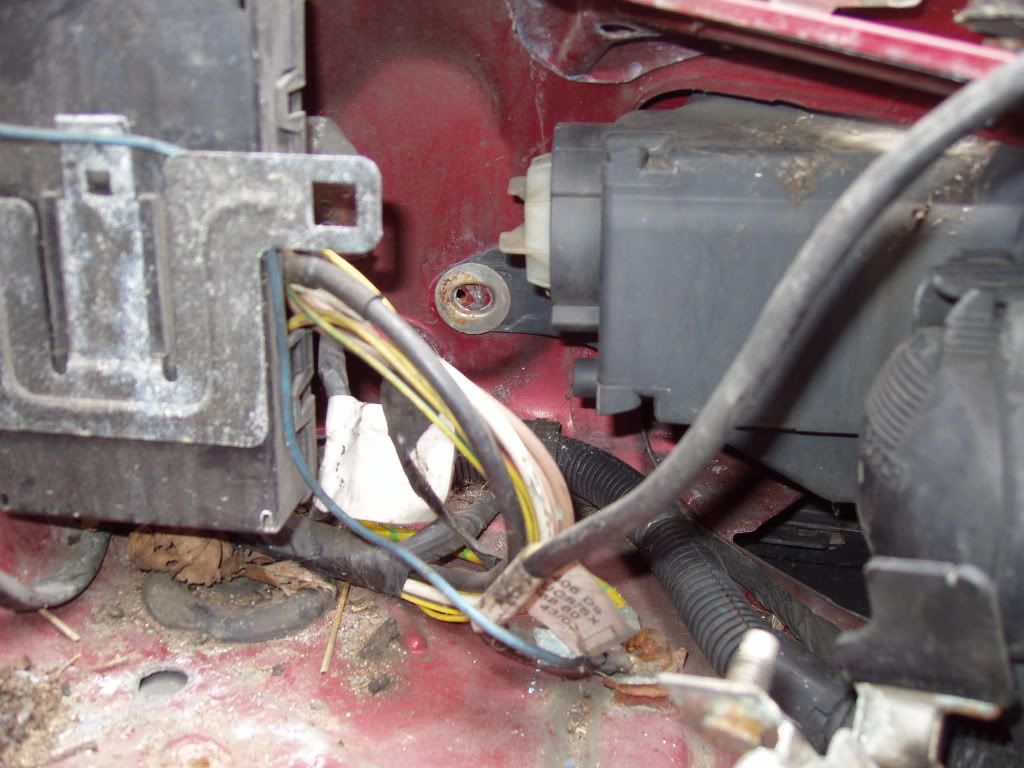
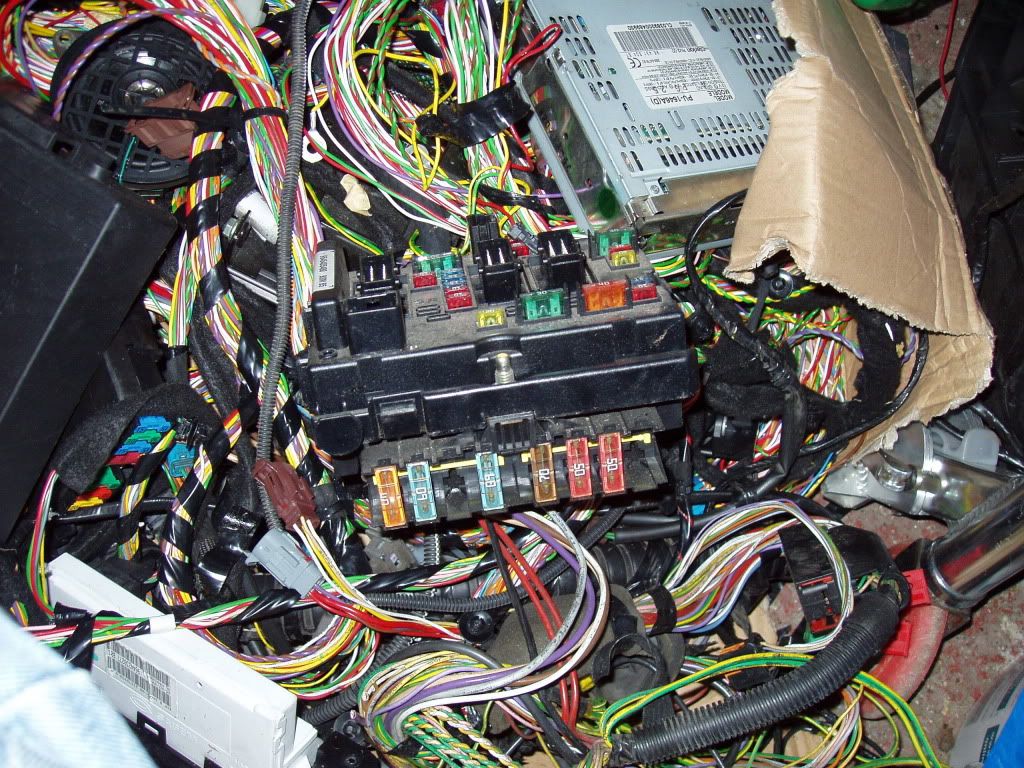
Engine bay fusebox.

Spare megafuse slots on the left, with entry and clips beside the ABS unit. 12v is also available on the two posts on the left.
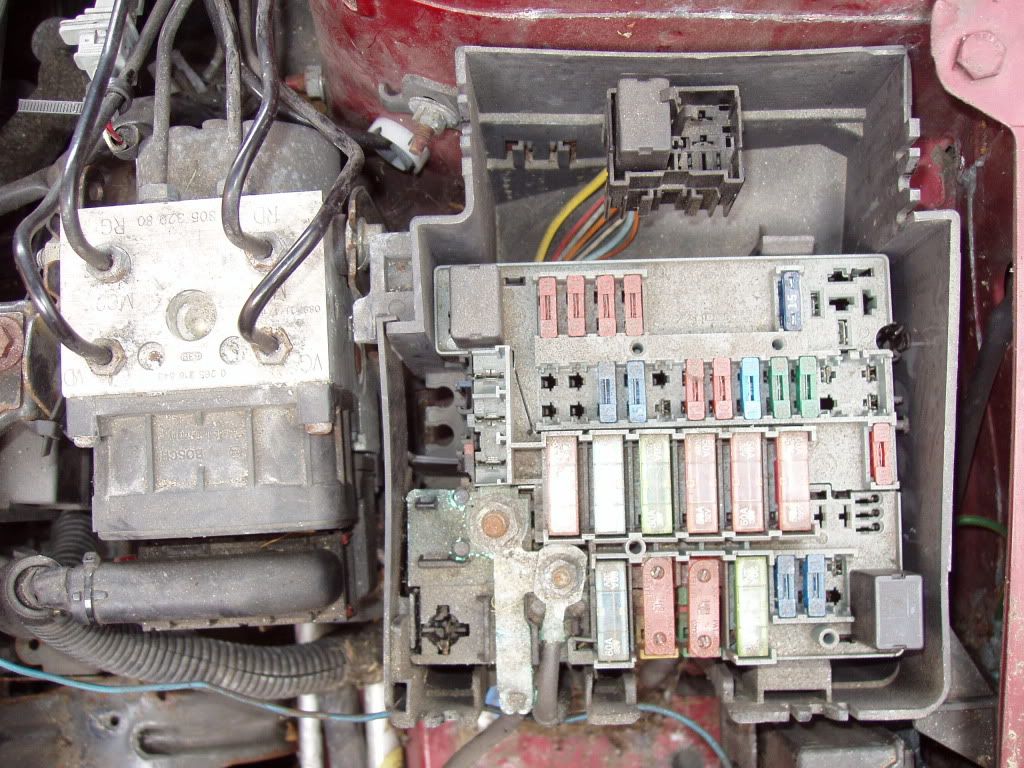
Megafuse in place!
Of course you have the grommet below the brake master cylinder to get your cable inside the car. Grommet pops out inside the car so you can easily thread a cable through it.
While the pic of the engine bay fuse box is here, I'll point out the relays at the top of the box in a nice clip on holder, and on opposite corners of the fuse holder.
These are all five pin relays and there are possibly more near the passenger cabin fuses, along with the holder. ( May be model specific, but if your near a breakers....)
I'm planning to use these to automate the folding mirrors on my exec ( a la 407! ), plans here! viewtopic.php?f=28&t=12652&p=142951#p142951
stealthe
Engine bay fusebox.
Spare megafuse slots on the left, with entry and clips beside the ABS unit. 12v is also available on the two posts on the left.
Megafuse in place!
Of course you have the grommet below the brake master cylinder to get your cable inside the car. Grommet pops out inside the car so you can easily thread a cable through it.
While the pic of the engine bay fuse box is here, I'll point out the relays at the top of the box in a nice clip on holder, and on opposite corners of the fuse holder.
These are all five pin relays and there are possibly more near the passenger cabin fuses, along with the holder. ( May be model specific, but if your near a breakers....)
I'm planning to use these to automate the folding mirrors on my exec ( a la 407! ), plans here! viewtopic.php?f=28&t=12652&p=142951#p142951
stealthe
Last edited by stealthe on Thu May 05, 2011 8:23 pm, edited 2 times in total.
-
FarmerPug
- 2.0 HDI 110
- Posts: 9656
- Joined: Tue Jun 01, 2010 5:42 pm
- Location: The Countryside, Northern Ireland
- Contact:
Re: Photo opportunity!
hi there, can you pop out the sill end holes behind the front wheel arches, just to see how they are taken out and if they can be put back in.
If you see any particular rust traps let me know but i think i found most of them the time i was breaking the car.
Good idea though making a guide as you break it, i regret not taking enough photos.
If you see any particular rust traps let me know but i think i found most of them the time i was breaking the car.
Good idea though making a guide as you break it, i regret not taking enough photos.
Re: Photo opportunity!
I think calling it a guide is implying its more than it is!
I'm just offering the opportunity, while I'm stripping it down, to get some pics and maybe some insight on how its done.
I'll take a look at the arch liner/undertray area during the week and grab some pics.
stealthe
I'm just offering the opportunity, while I'm stripping it down, to get some pics and maybe some insight on how its done.
I'll take a look at the arch liner/undertray area during the week and grab some pics.
stealthe

Re: Photo opportunity!
GTX Badges for just above the strip on teh front wings 
I have 'GT' on one side as the 'X' has come off and for some reason have 'GLX' on the other?
One would do as I could mix'n'match the letters - but would like both sides as I want to put a 'GTX' badge on the boot lip.
Let me know if you have them available and if so how much?
Cheers
JERRY
I have 'GT' on one side as the 'X' has come off and for some reason have 'GLX' on the other?
One would do as I could mix'n'match the letters - but would like both sides as I want to put a 'GTX' badge on the boot lip.
Let me know if you have them available and if so how much?
Cheers
JERRY
Returned from the dark side and back to a 406
2.0 16v GTX HPi Saloon - China Blue Pearlescent 106k - One Owner from New - Full dealer History

2.0 16v GTX HPi Saloon - China Blue Pearlescent 106k - One Owner from New - Full dealer History
Re: Photo opportunity!
Headlining..... (here's one I removed earlier!)
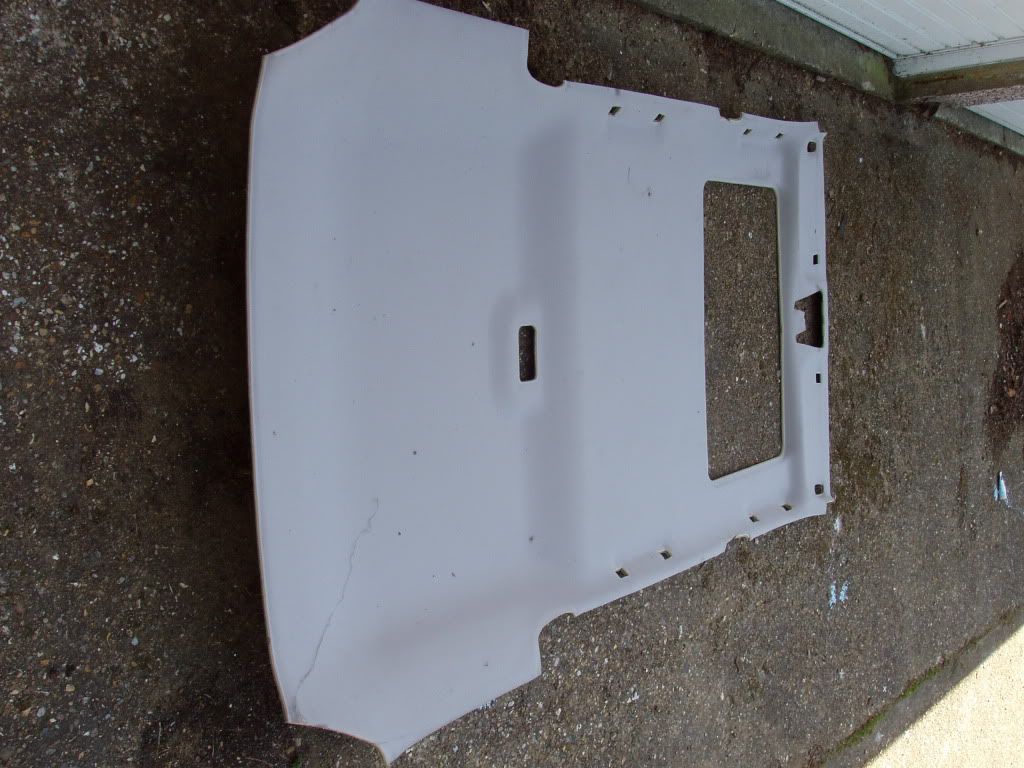
All the holes had a fitting or trim in them.
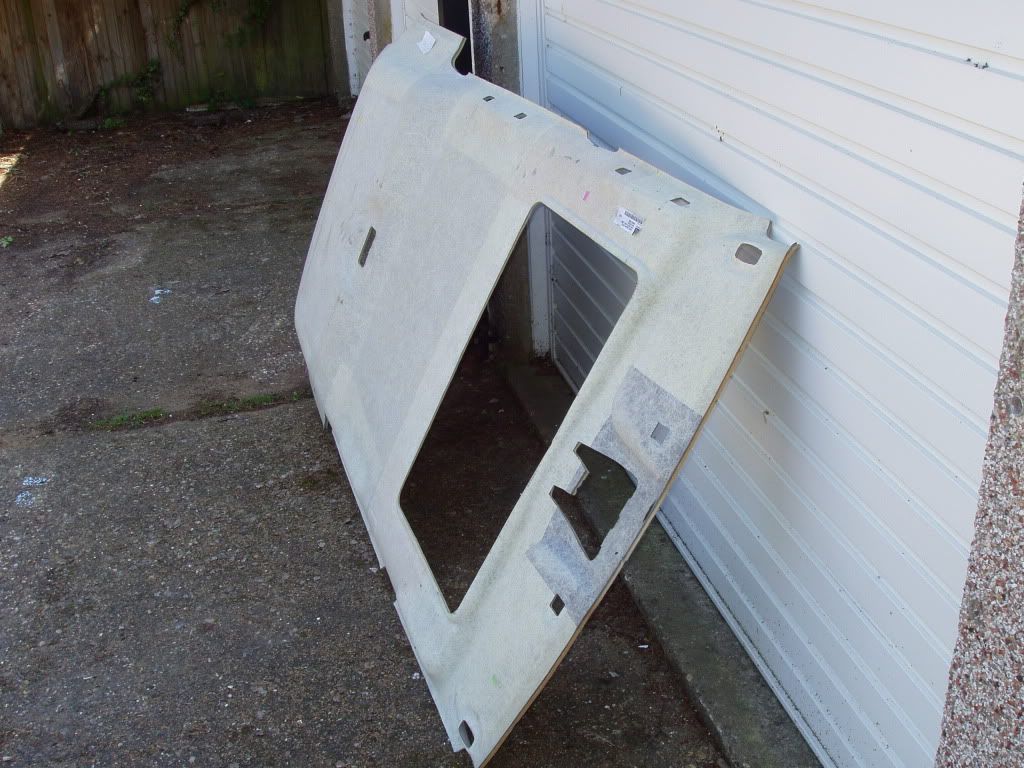
As I recall I had all the trim removed, the grab handles, lights and visors off, just the door rubbers holding the headlining.
I peeled back the front door rubbers, then went to the tailgate and did the same.
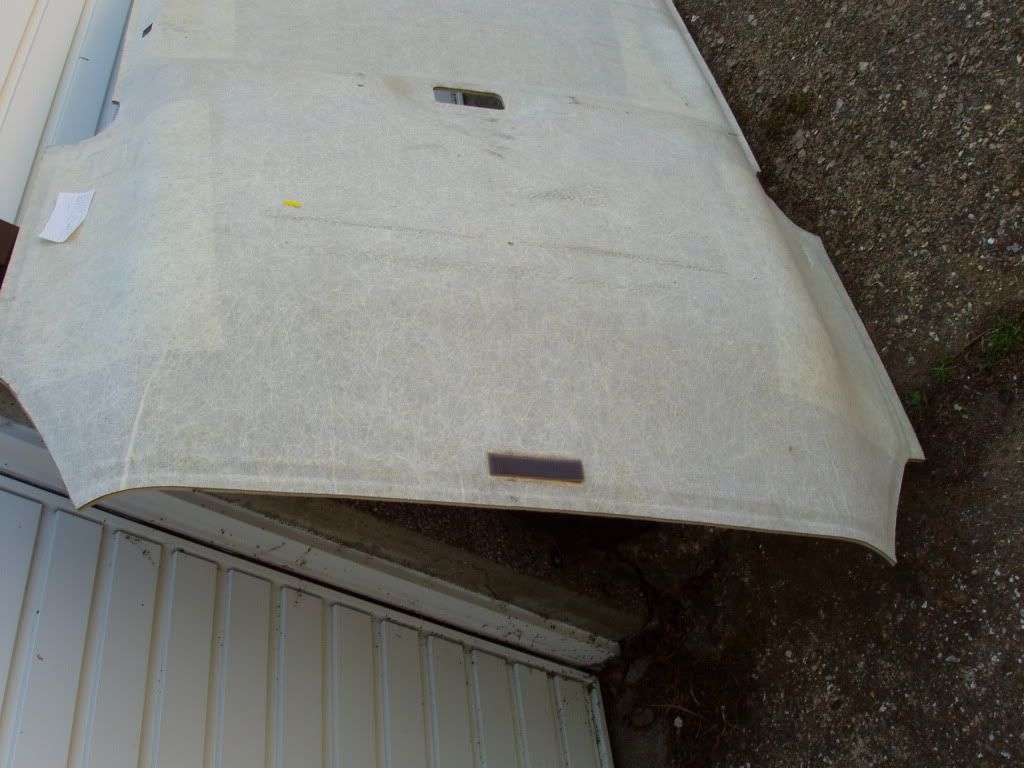
The grey patch in the centre is velcro that supports the rear of the lining. Sitting in the middle of the rear seat, I peeled back the rear door seals and lowered the headlining on to the seat backs.
Removal from the car required the rear seats to be folded and the headlining to be tilted slightly to get it out the back.
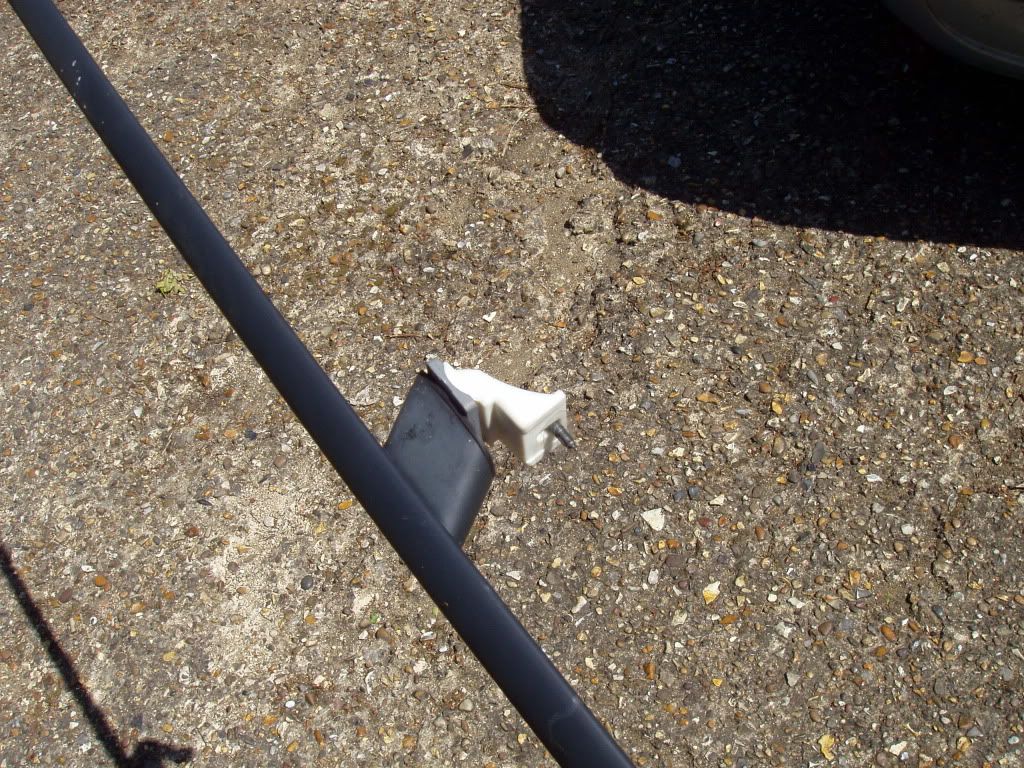
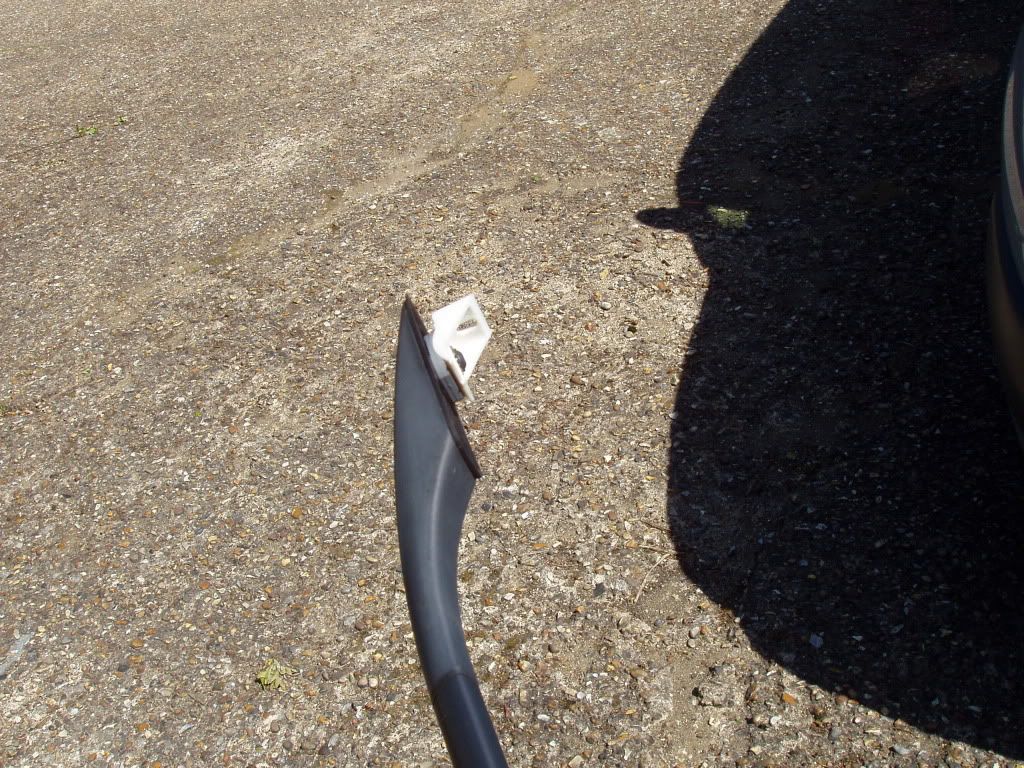
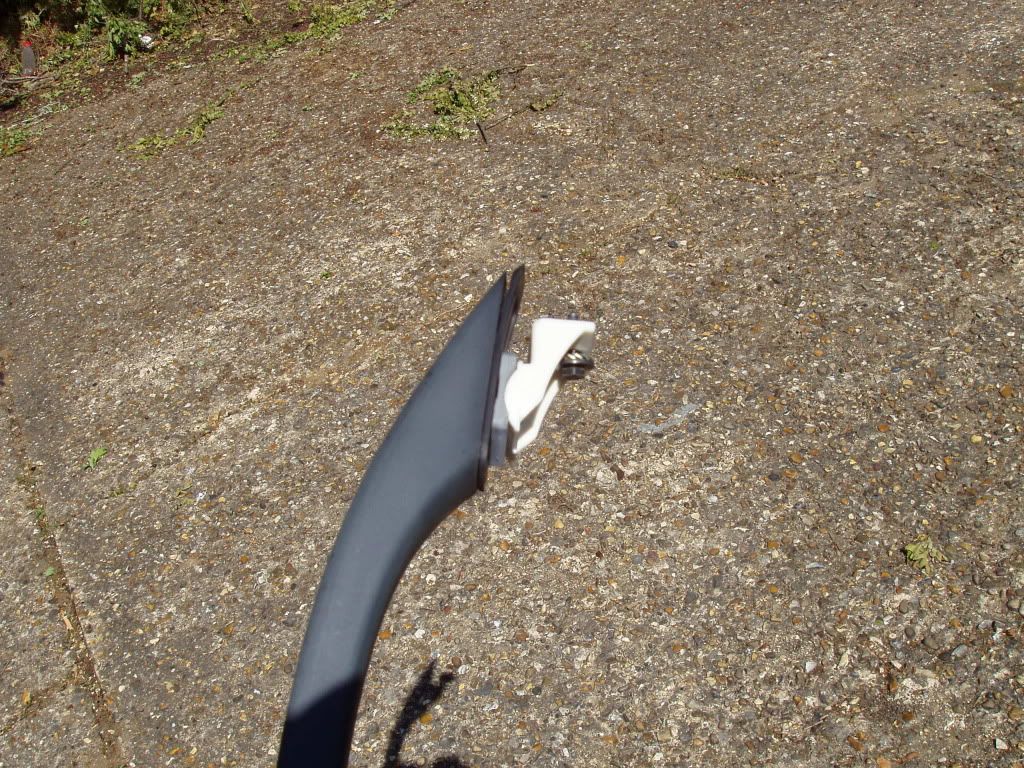
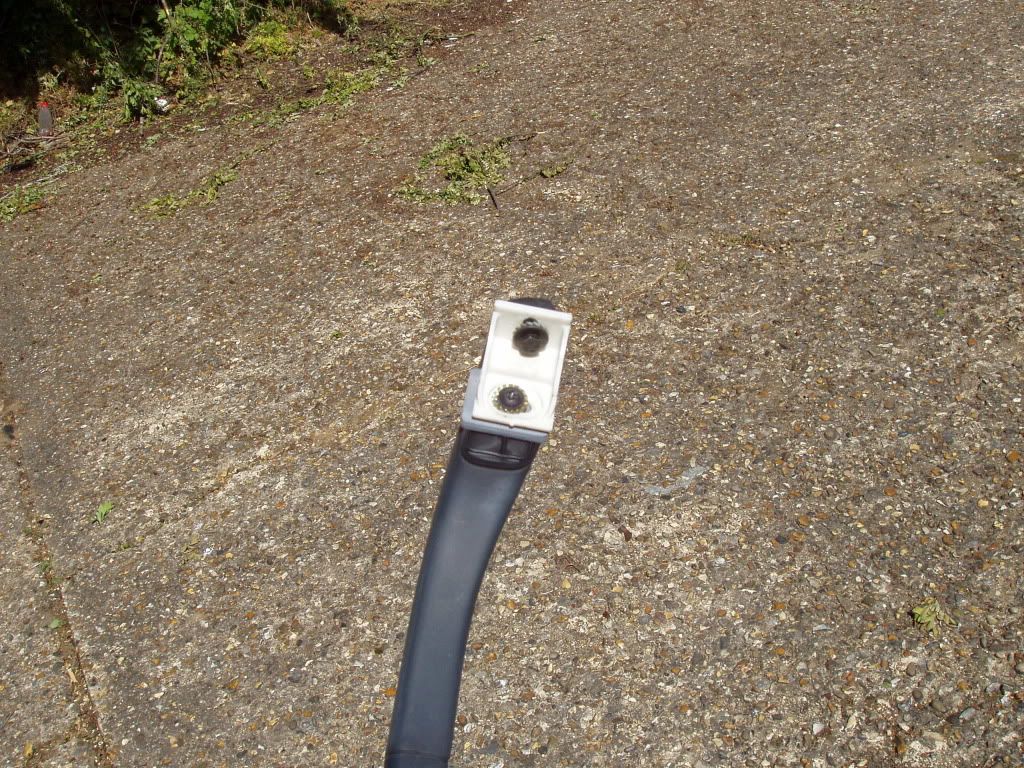
Roofbars, these are the fittings for the centre, and ends of the bars.
stealthe
All the holes had a fitting or trim in them.
As I recall I had all the trim removed, the grab handles, lights and visors off, just the door rubbers holding the headlining.
I peeled back the front door rubbers, then went to the tailgate and did the same.
The grey patch in the centre is velcro that supports the rear of the lining. Sitting in the middle of the rear seat, I peeled back the rear door seals and lowered the headlining on to the seat backs.
Removal from the car required the rear seats to be folded and the headlining to be tilted slightly to get it out the back.
Roofbars, these are the fittings for the centre, and ends of the bars.
stealthe
Re: Photo opportunity!
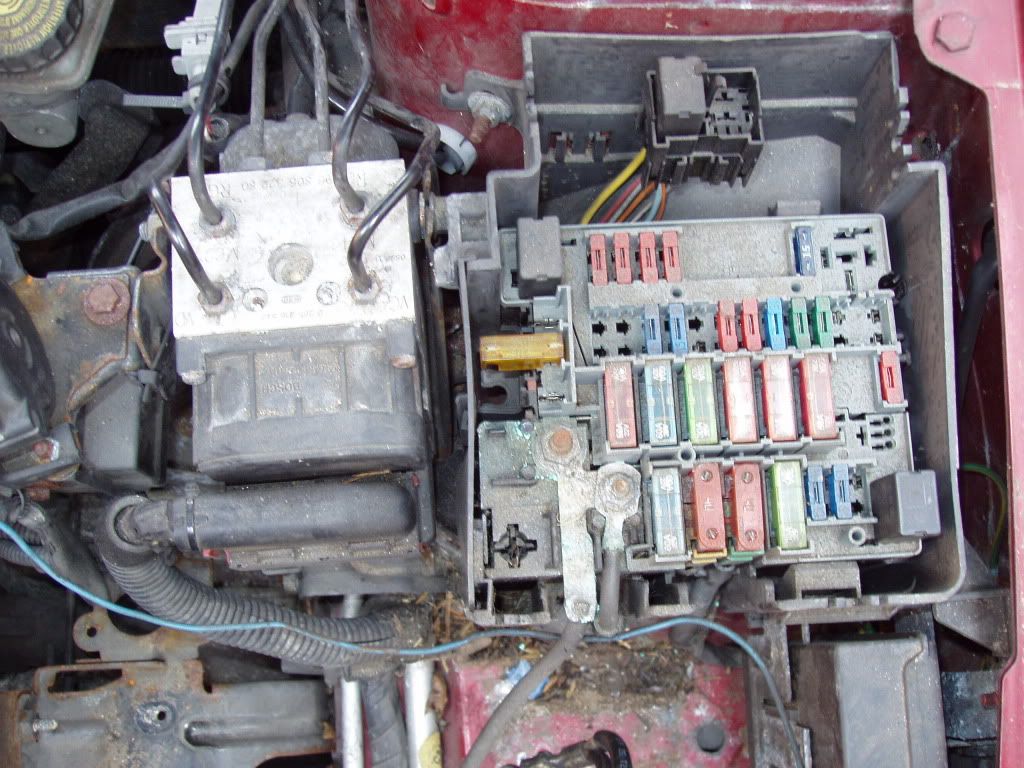
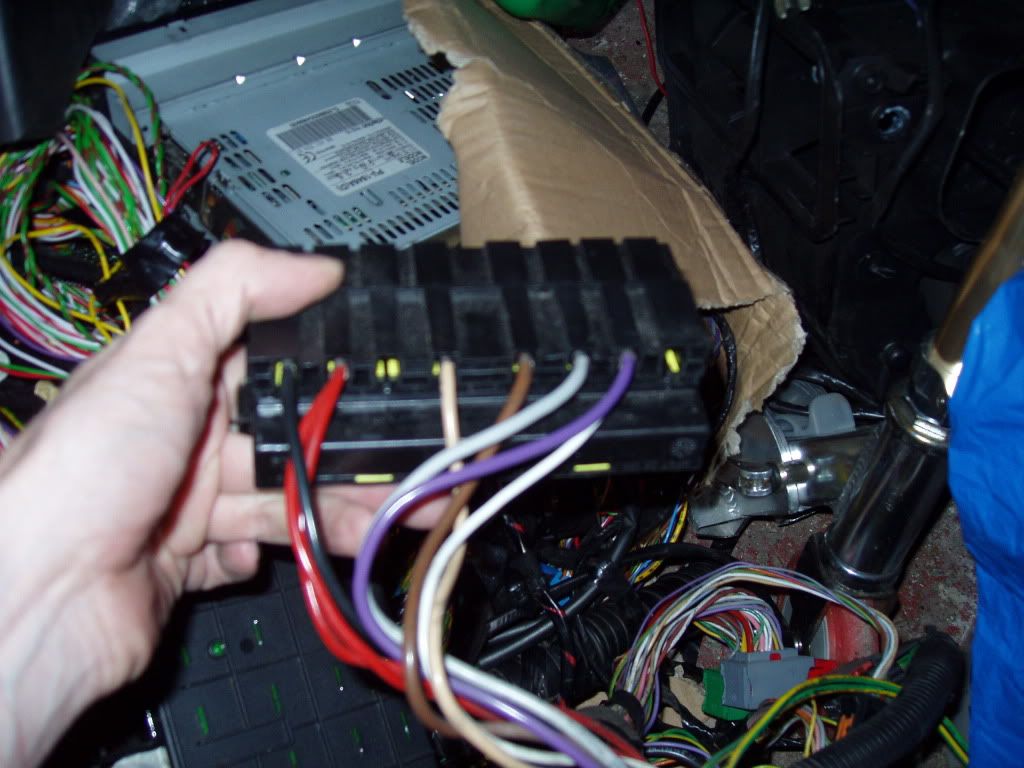
Got one of those shiny late model D9's and thinking "my fusebox is totally different to the one up there?".
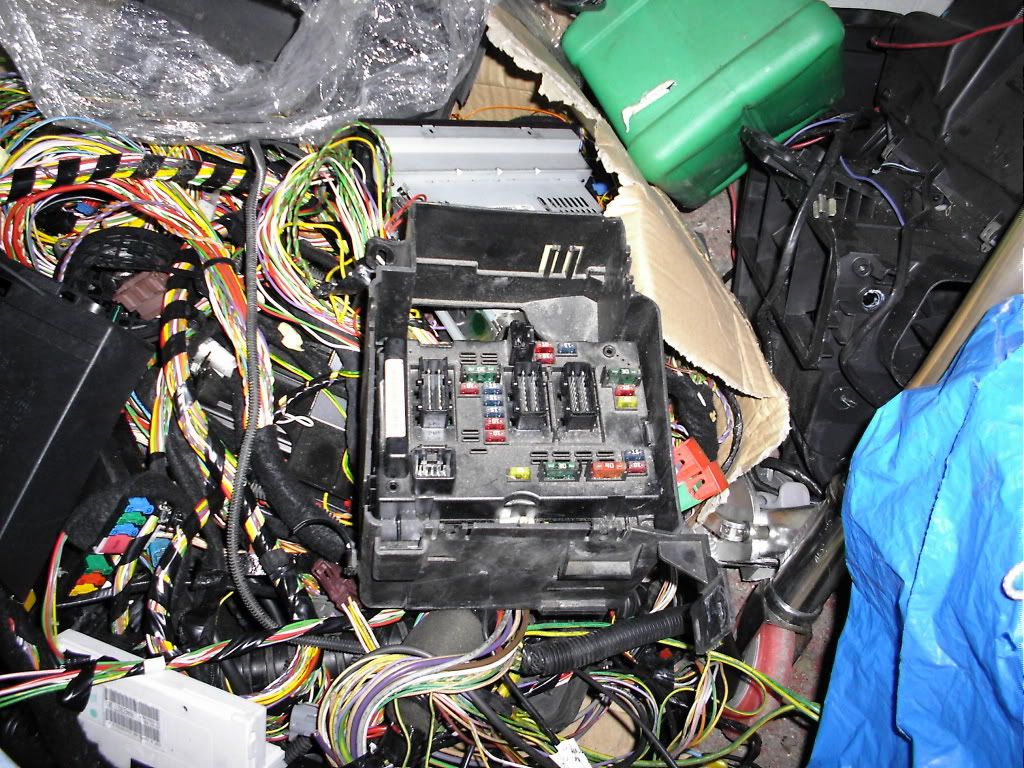
Its held into the box by clips at the sides. Underneath, Megafuses!
Remove the nut from the post, release the clips at each end and
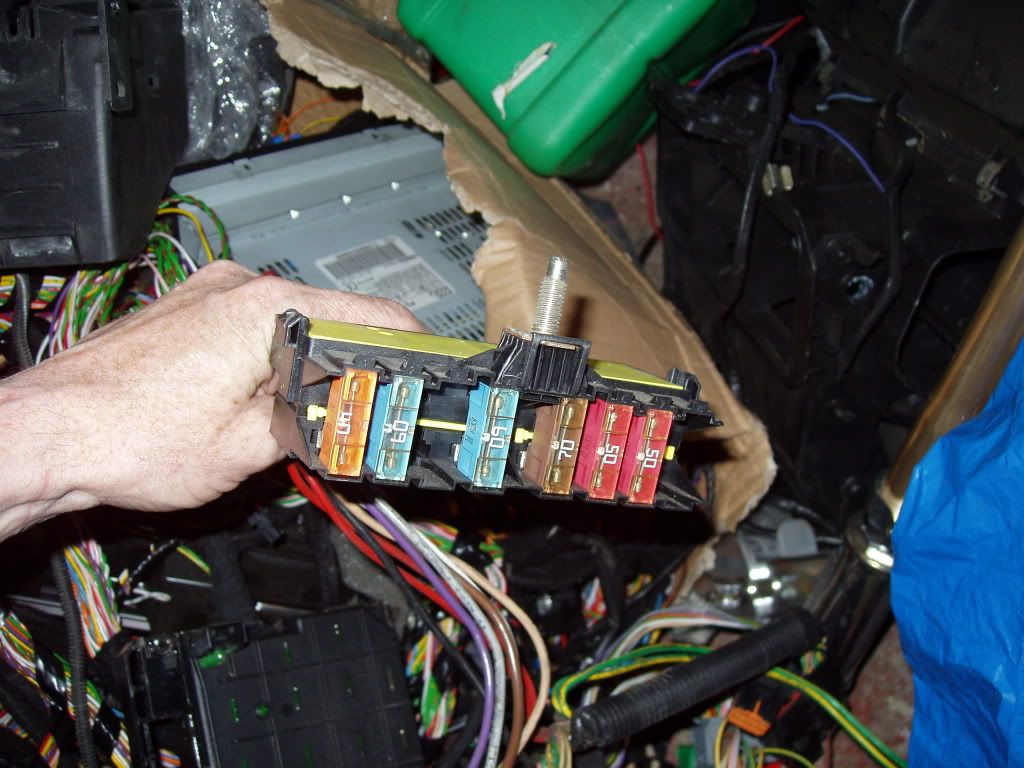
One bank of fuses and a couple of spaces.
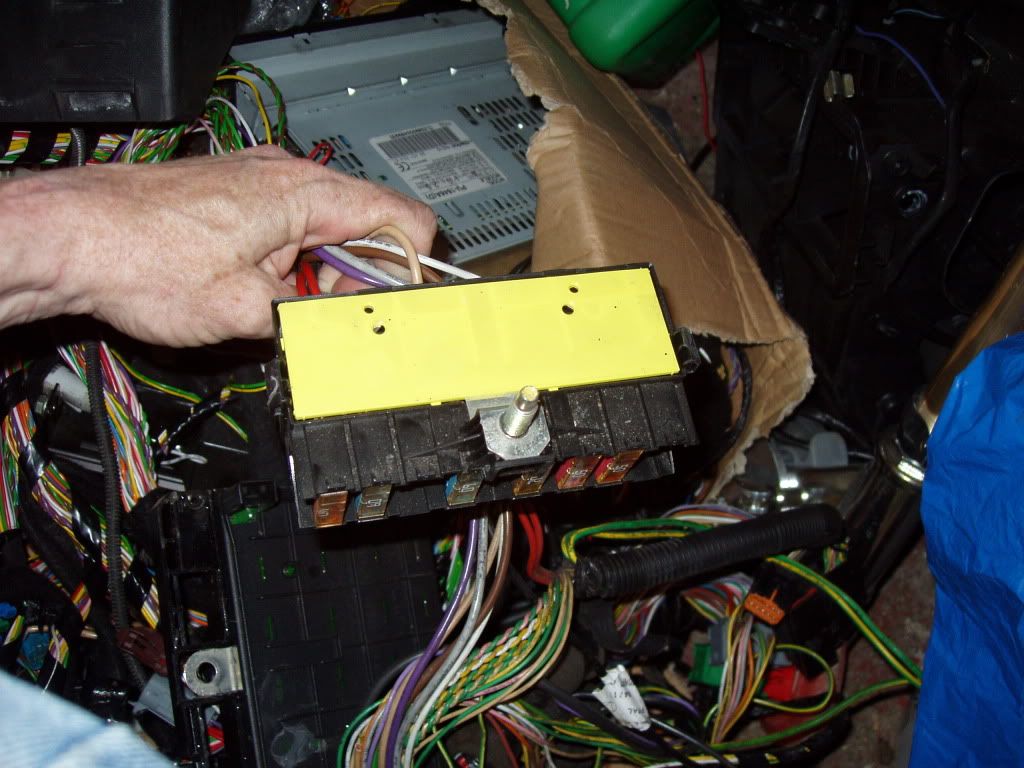
Cables feed in from below, with plenty of space.
stealthe
Its held into the box by clips at the sides. Underneath, Megafuses!
Remove the nut from the post, release the clips at each end and
One bank of fuses and a couple of spaces.
Cables feed in from below, with plenty of space.
stealthe

Re: Photo opportunity!
are you selling any bits off this car mate,
ineed the heater resistor pack thingy off a d9 ?
ineed the heater resistor pack thingy off a d9 ?
Re: Photo opportunity!
I wasn't going to turn this thread into a sale thread. I will be flogging bits off eventually.
If your in the area.....
stealthe
If your in the area.....
stealthe
Re: Photo opportunity!
ok mate sorry for asking ishouid of thought ,stealthe wrote:I wasn't going to turn this thread into a sale thread. I will be flogging bits off eventually.
If your in the area.....
stealthe
iwill buy one off ebay,
thanks tho