Photo opportunity!
Moderator: Moderators

Re: Photo opportunity!
in your first pics, whats that blue cable around the fuse box ? that goes into that black box next to the headlight ? why is it there ?
2000/May 406 Estate 2.0 HDI 110bhp DW10ATED now with 205k km & now with cruise control & now remaped @ 134bhp 
Re: Photo opportunity!
It was a quick repair for the earth on the throttle position sensor. The rusty bracket had rubbed through the loom and shorted out the wiring.
A temporary repair that lasted 4 years. It goes down the side of that box and joins the earth point below it.
stealthe
A temporary repair that lasted 4 years. It goes down the side of that box and joins the earth point below it.
stealthe
Re: Photo opportunity!
Here is my photo opportunity, invited by stealthe himself 


Retrofitting cruise into the steering column cowl !


Retrofitting cruise into the steering column cowl !
2000/May 406 Estate 2.0 HDI 110bhp DW10ATED now with 205k km & now with cruise control & now remaped @ 134bhp
Re: Photo opportunity!
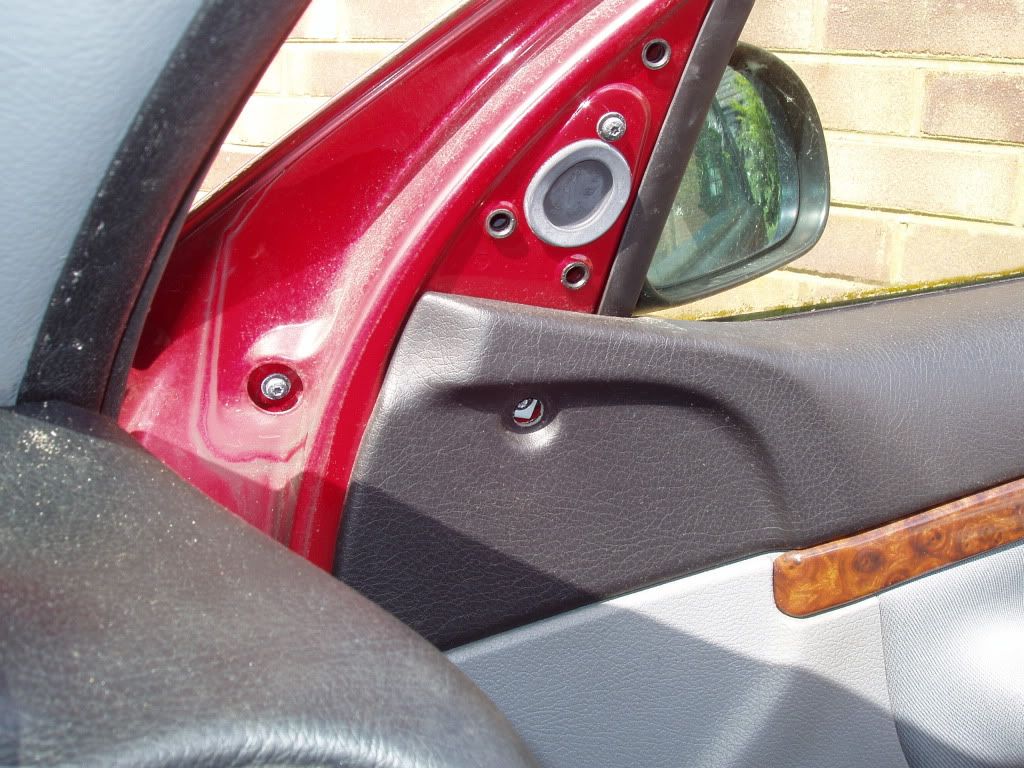
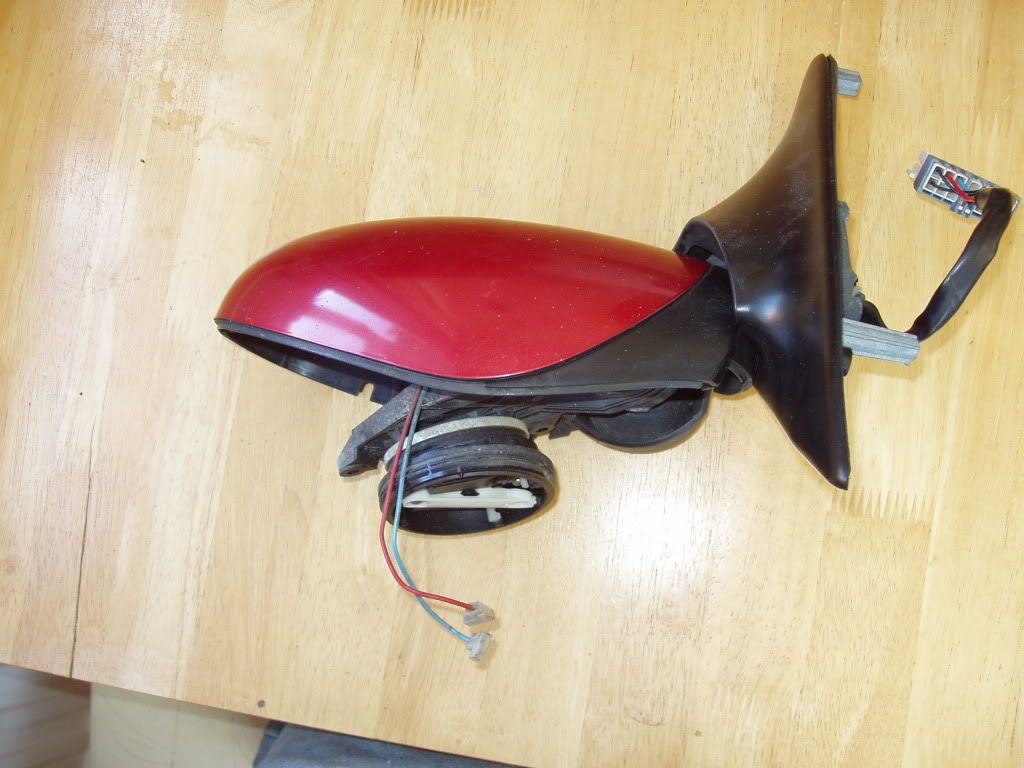
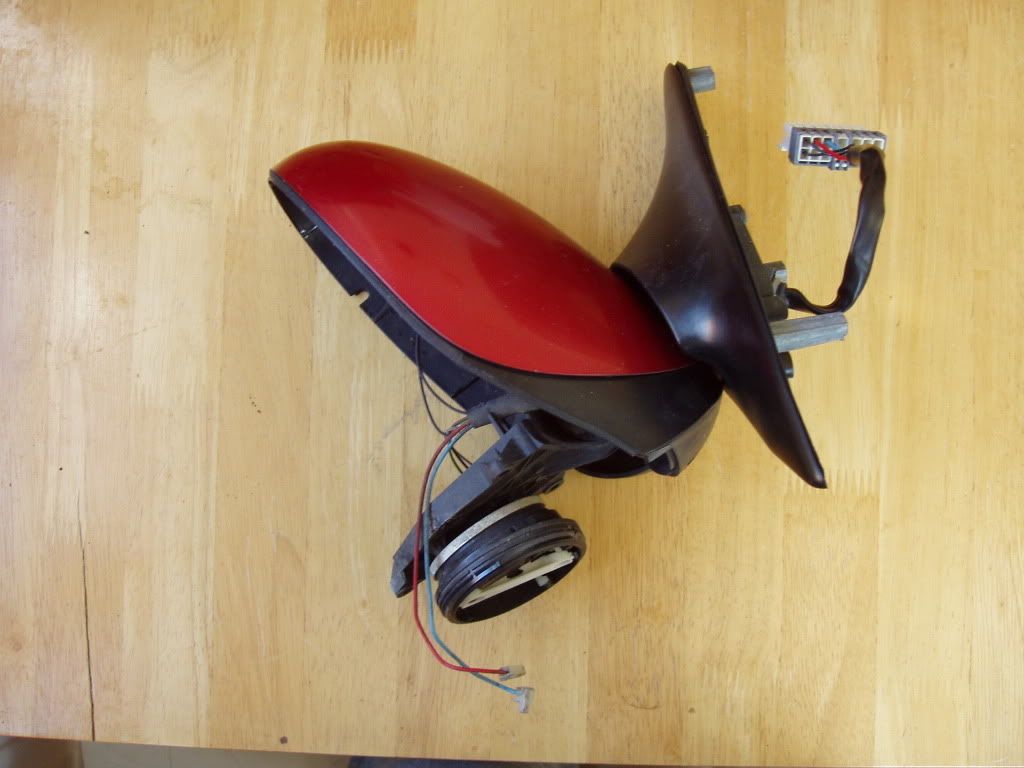
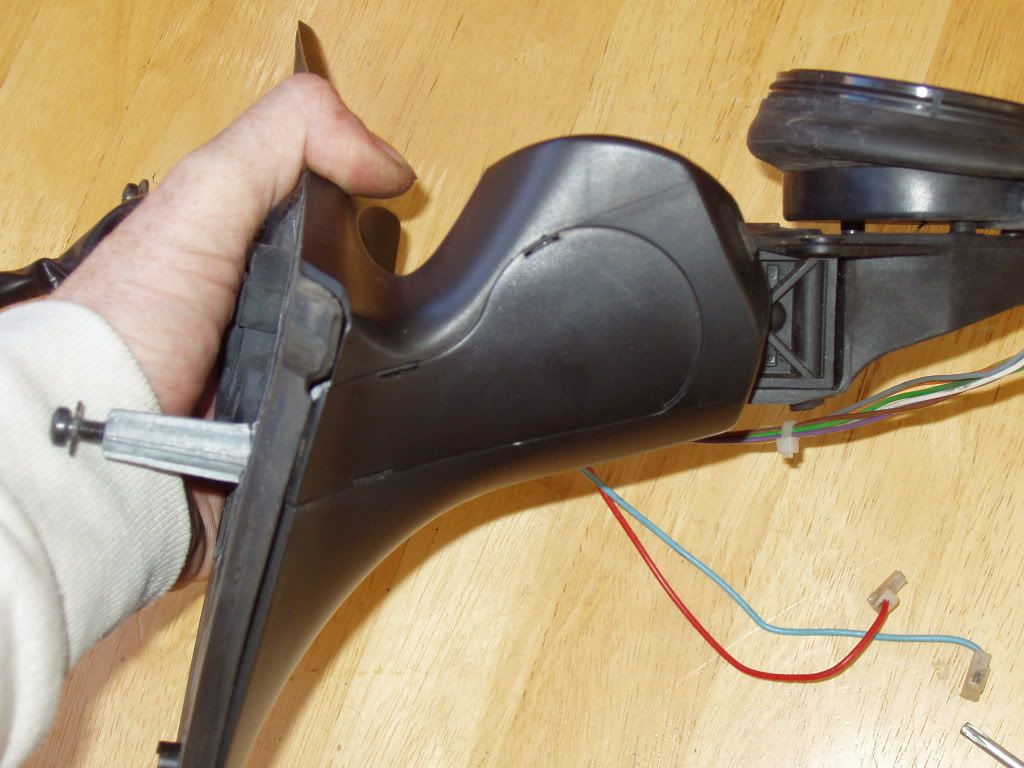
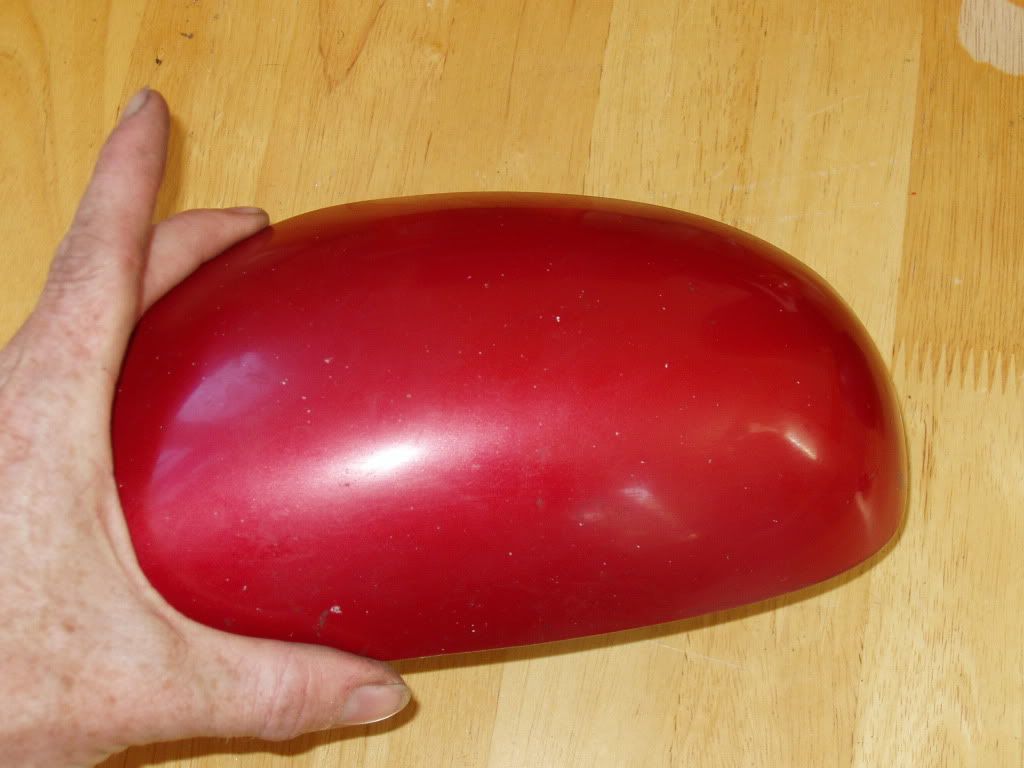
Taking your mirrors apart, most of the screws are torx t20.
There are three fixing the mirror to the door.
After removing the glass,by pressing the wire clip,
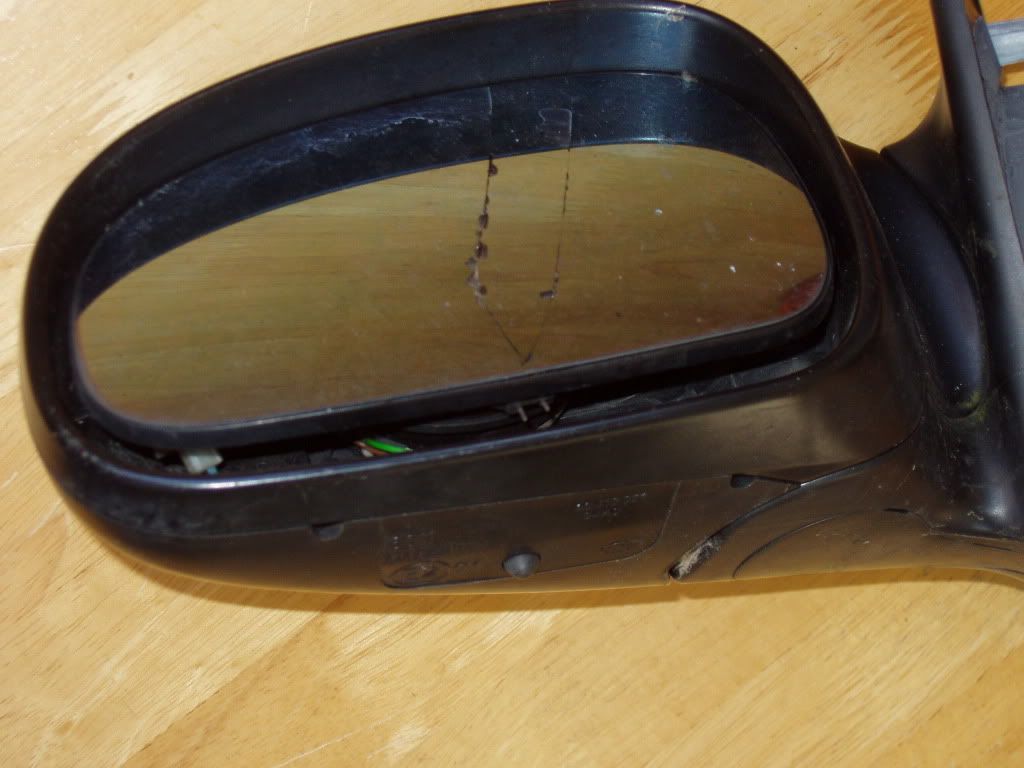
there are three screws that hold the surround and motor together.
Once they are out the surround has a clip on the inside of the hinge, out of sight,
a little wiggle and pull straight back and mine separated.
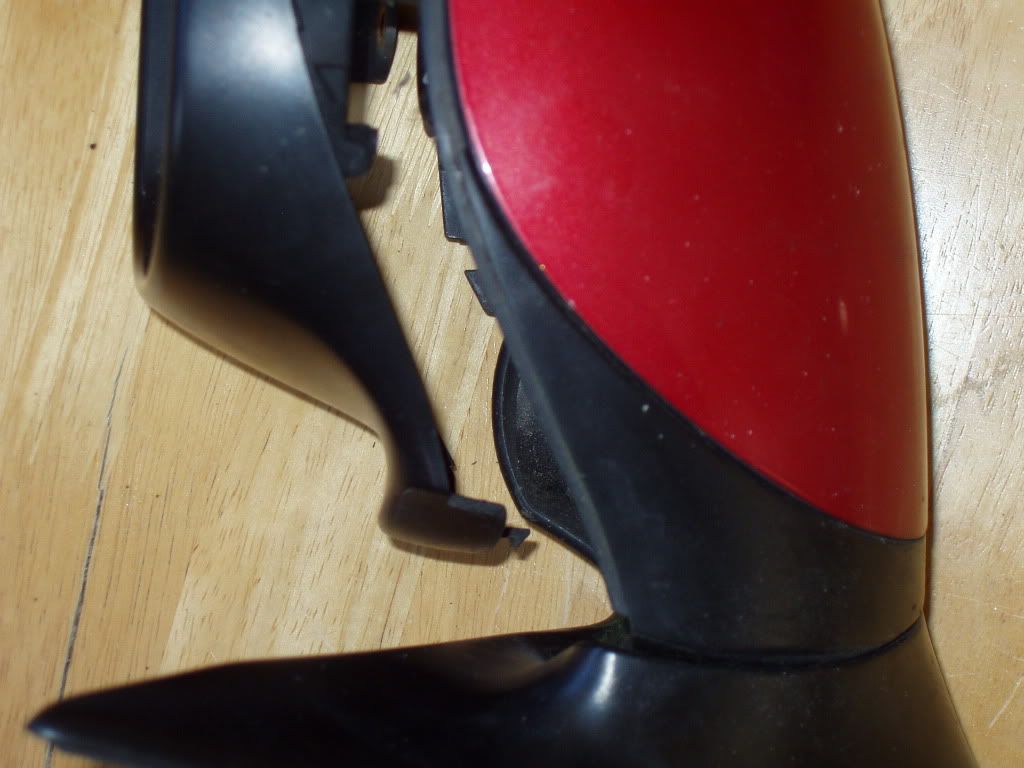
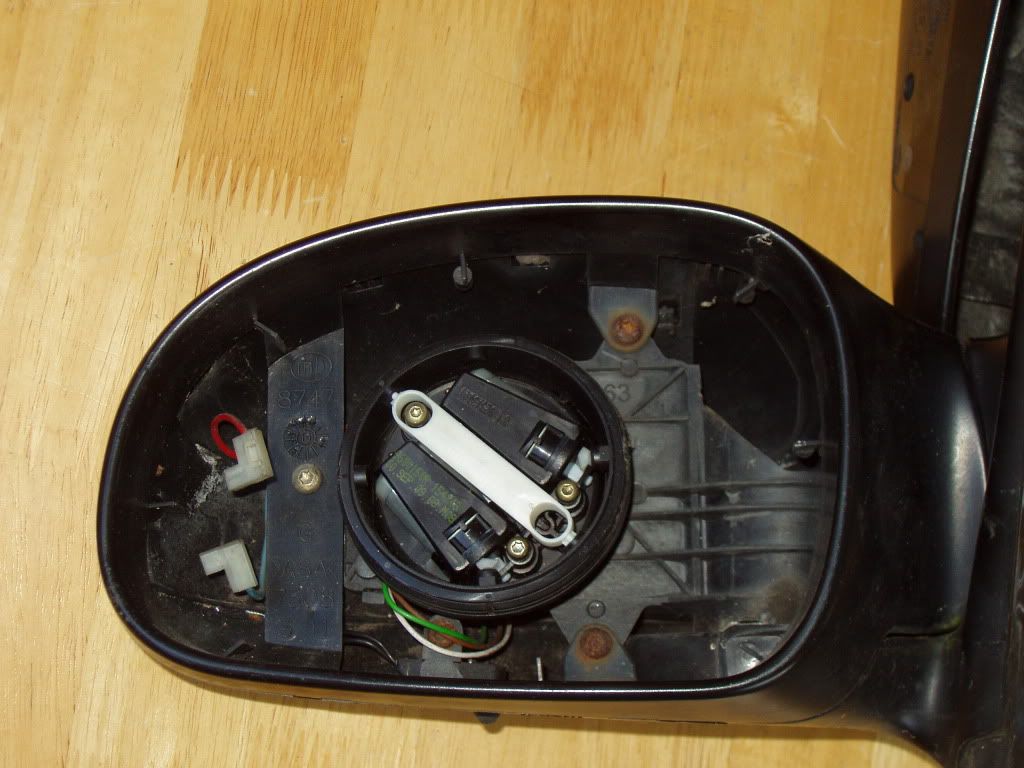
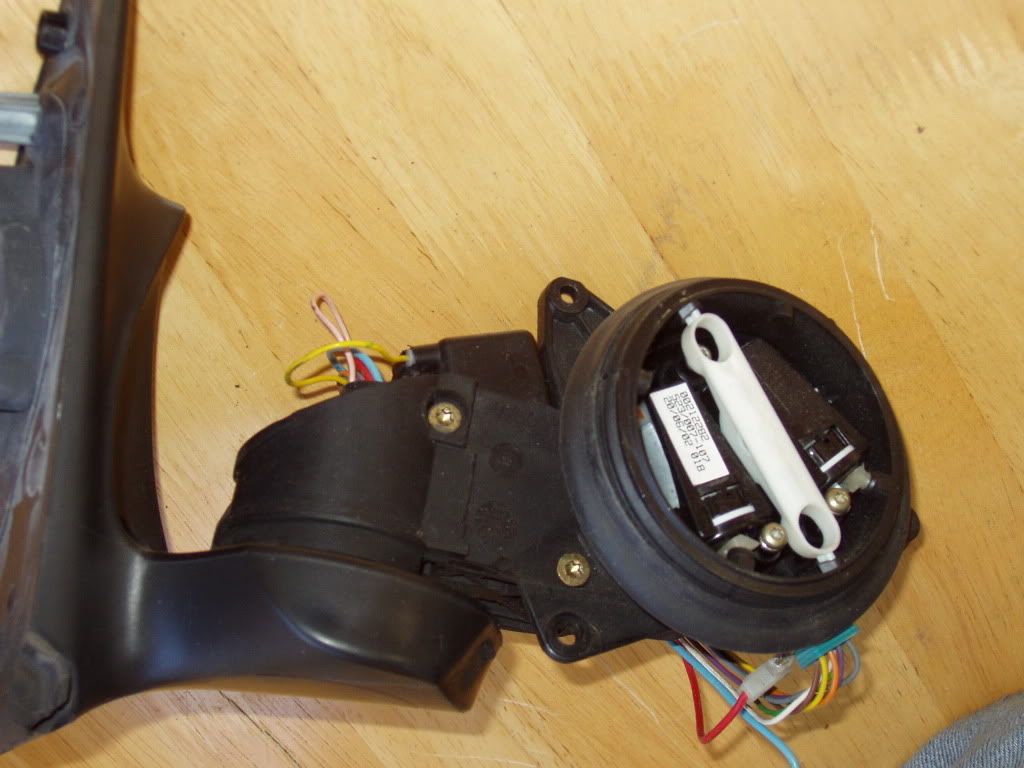
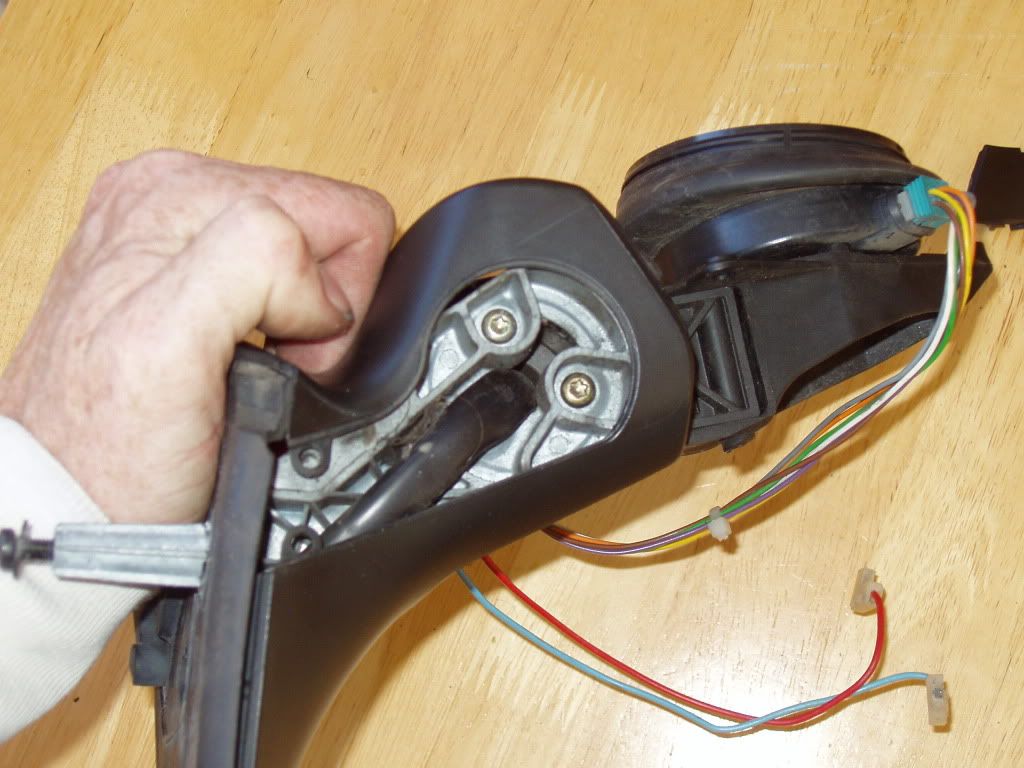
Behind the circular mirror mount, at about the 2 or 10o'clock position is a clip holding the front shell.
Unclip it and rotate the shell forwards 90 degrees and it will lift up off the frame of the mirror.
This is for info only, I can't see any need to do it as these parts, if broken require a new mirror.
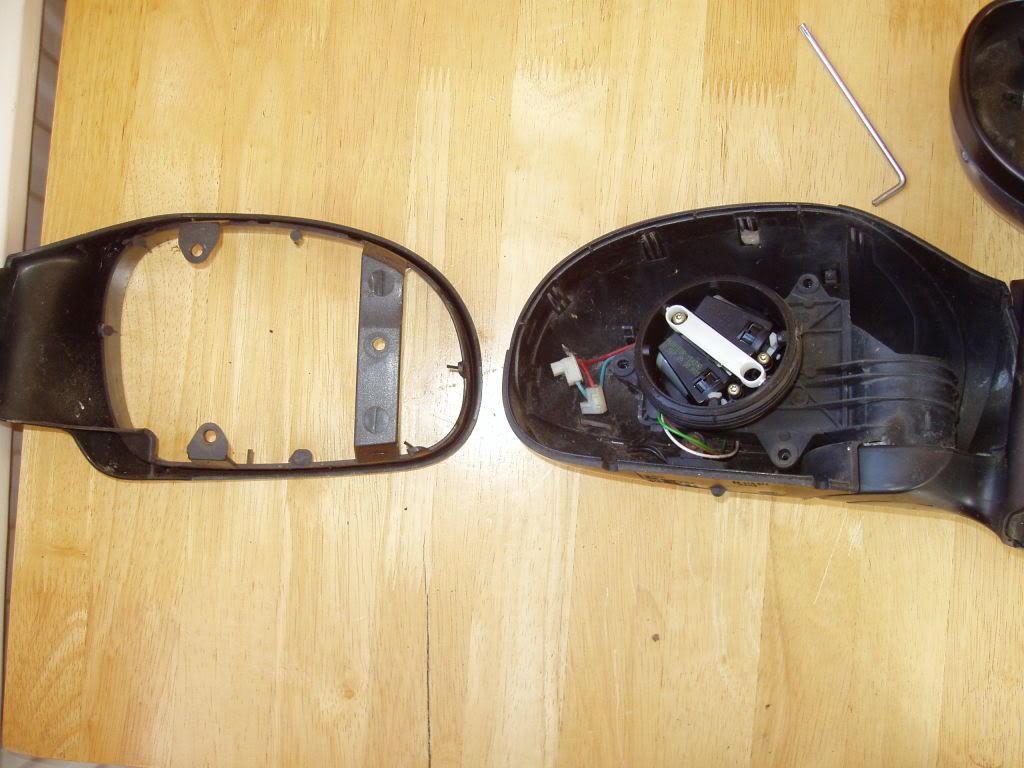
There are two gold coloured screws holding the frame to the fold motor/gearbox. Take them out and lift the frame up.
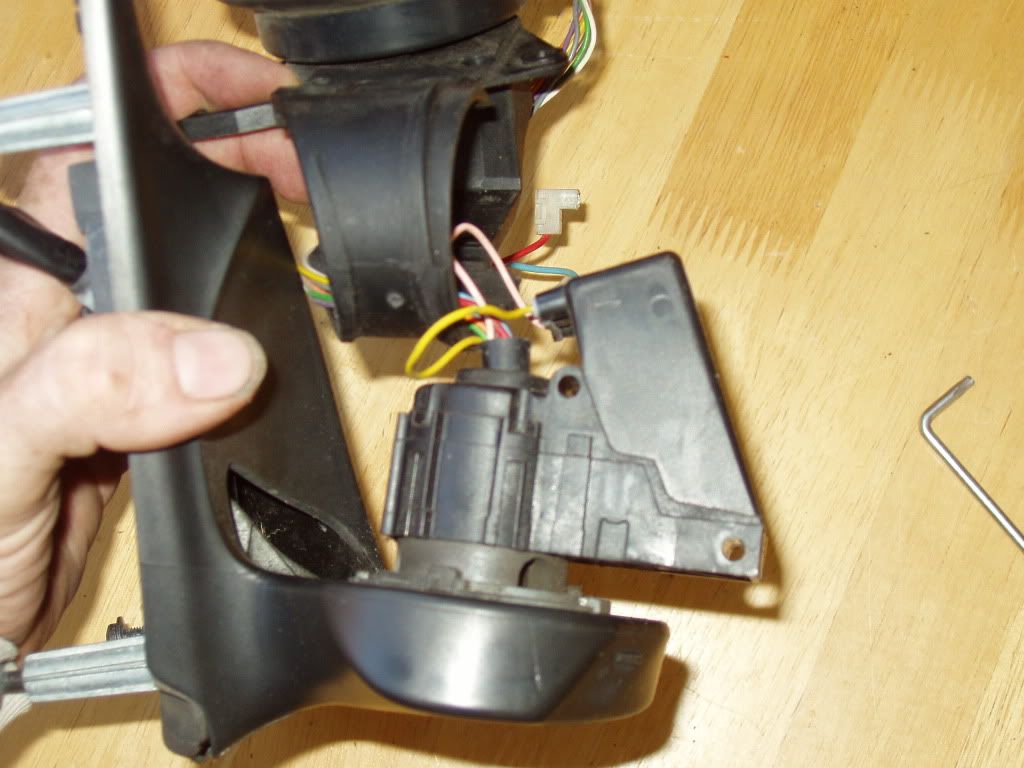
On the underside of the door mount is a clip on panel covering three more screws holding the gearbox to the door mount.
The motor/gearbox looks to be welded or glued rather than screwed or clipped, I didn't try to separate them.
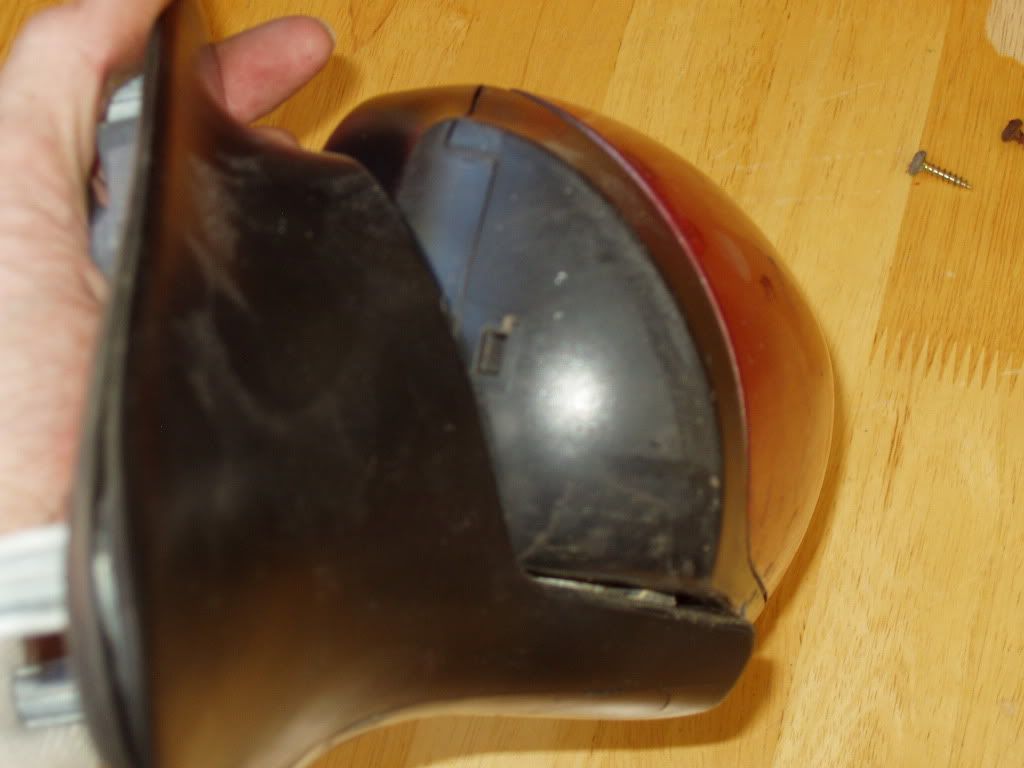
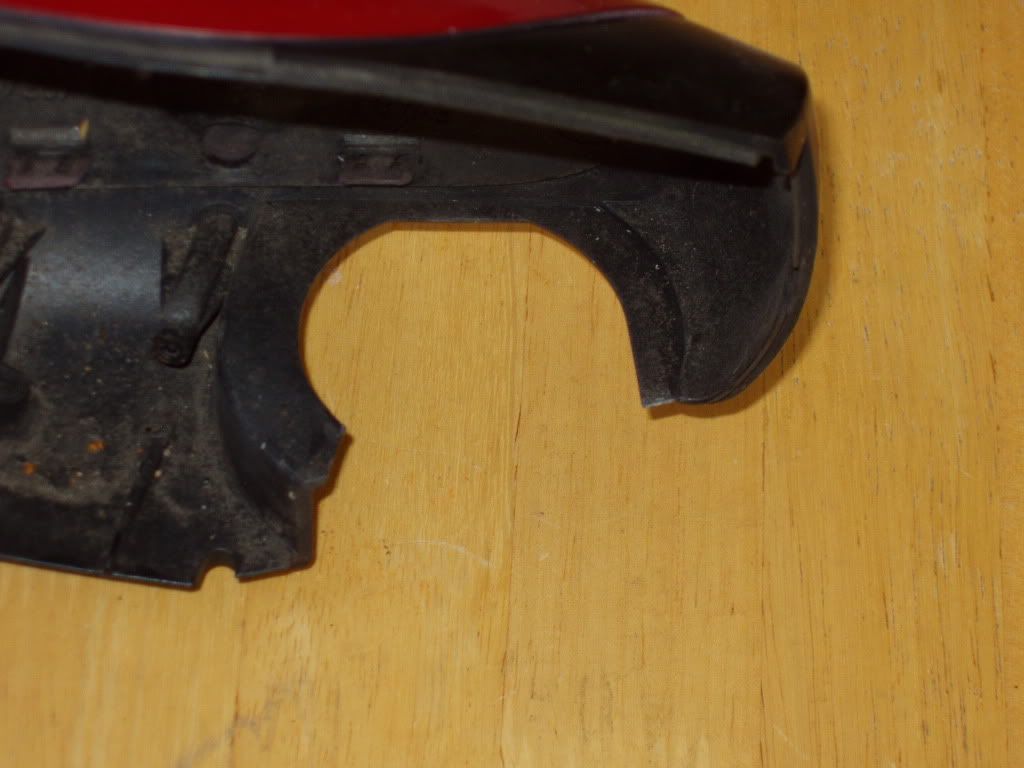
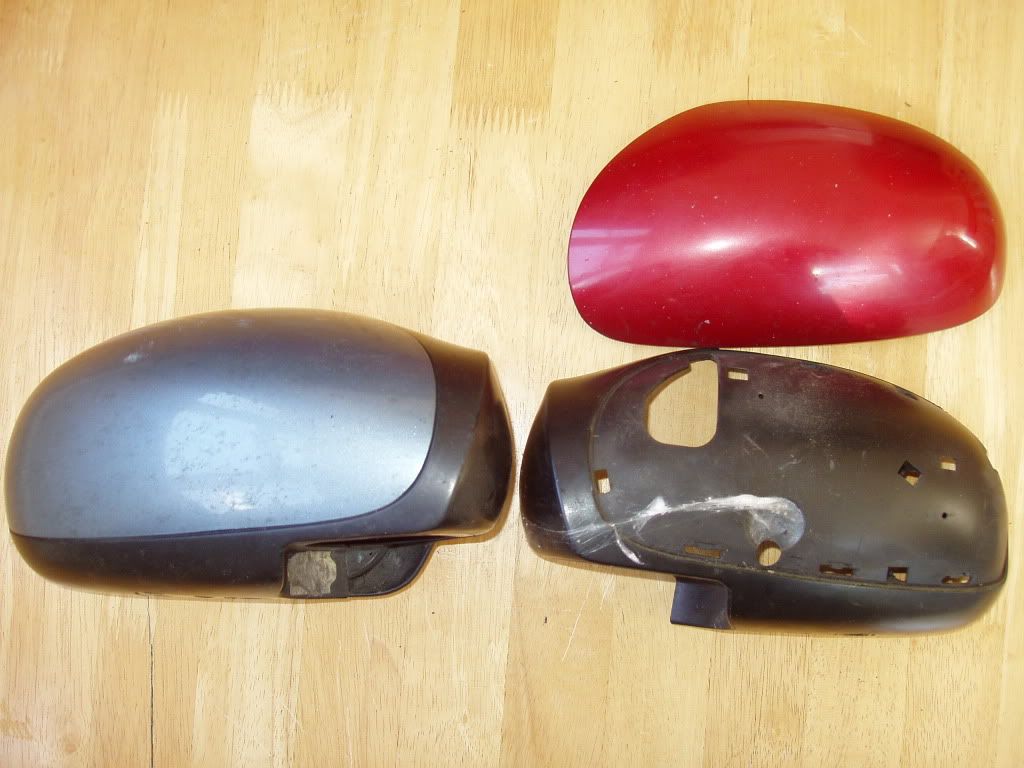
The painted section of the front shell can be separated fairly easily once the shell is off the frame, so you can swap them on replacement mirrors, or for repainting.
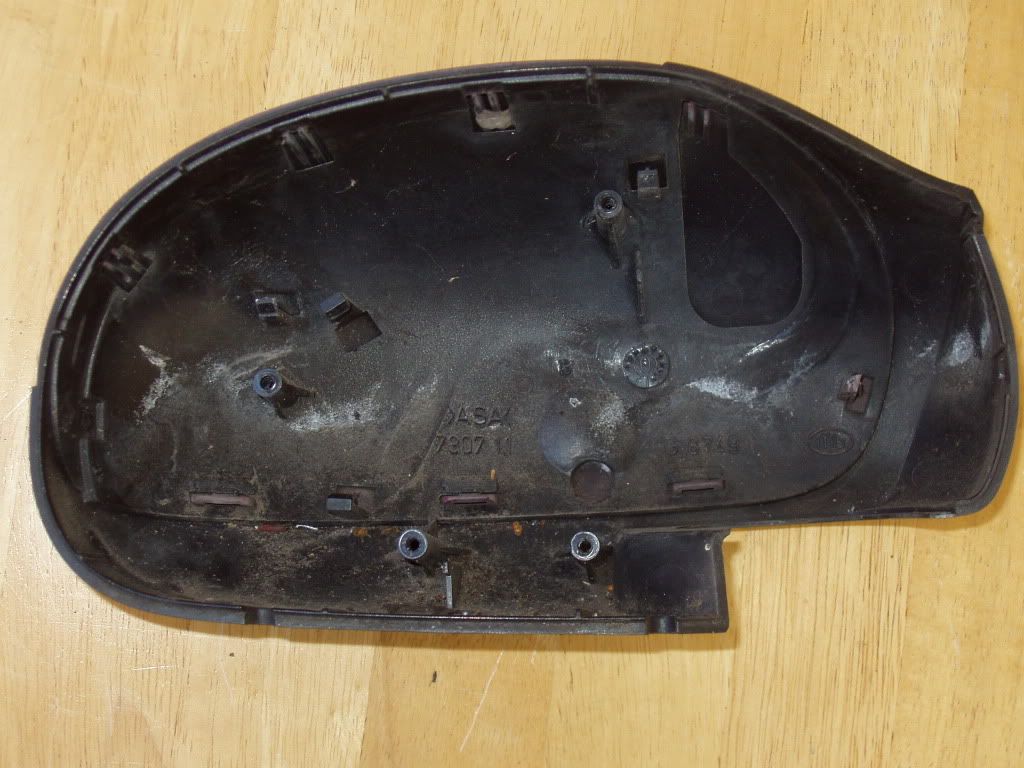
There are three flat clips along the bottom, and three taller clips higher up. The top bits are for alignment.
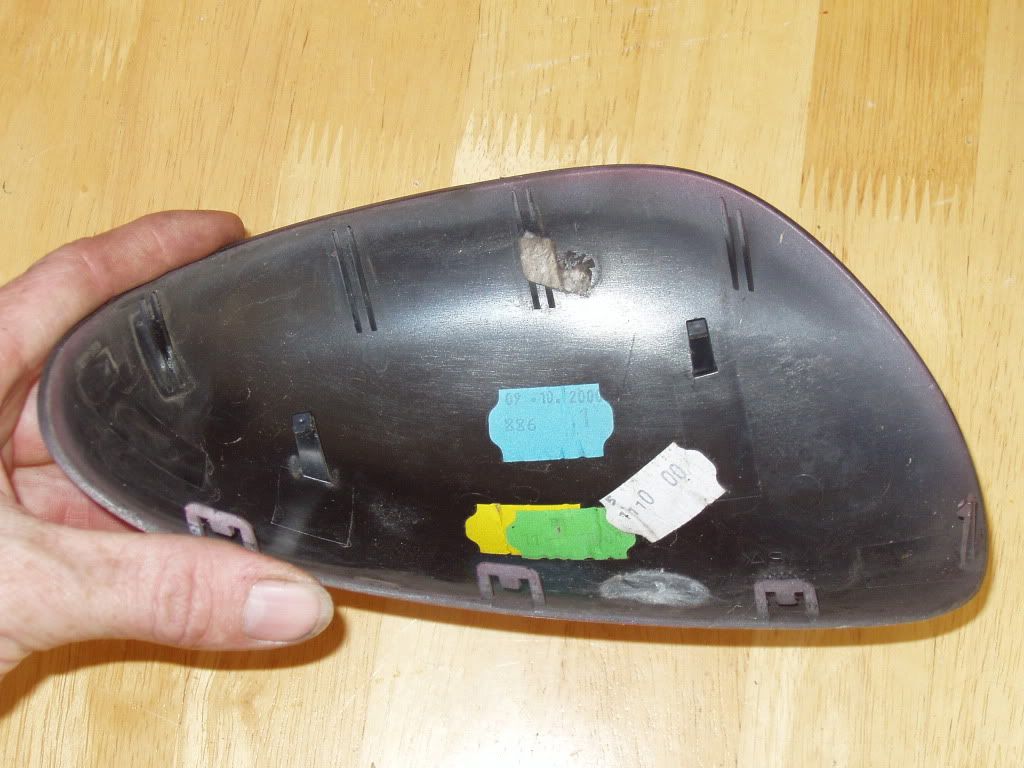
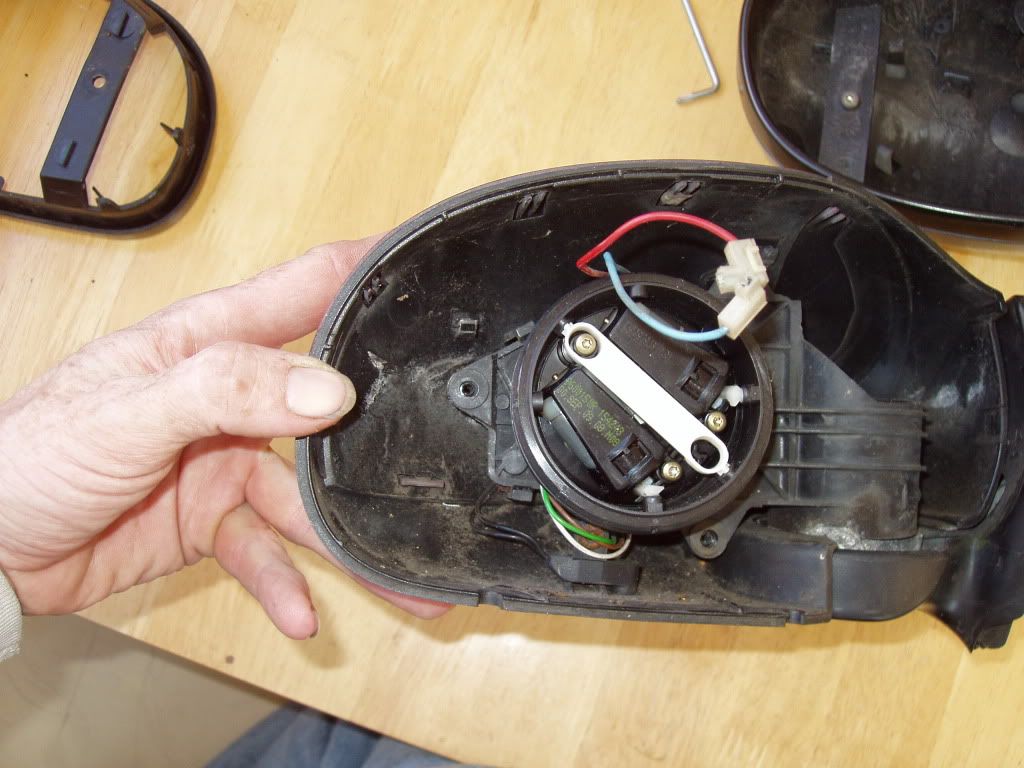
The temp. sensor is fitted in the left hand shell.
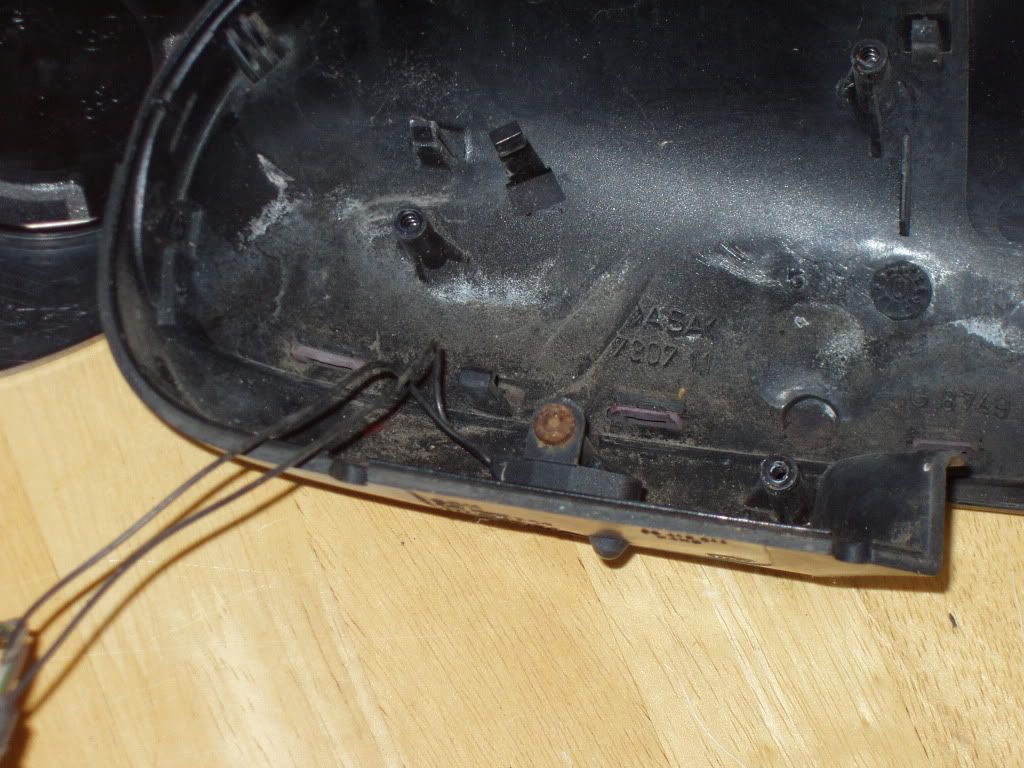
Remove the screw.

And rotate the sensor,
to release.

The wiring passes through the hinge,
and the frame, under the rubber pad,

to the plug.

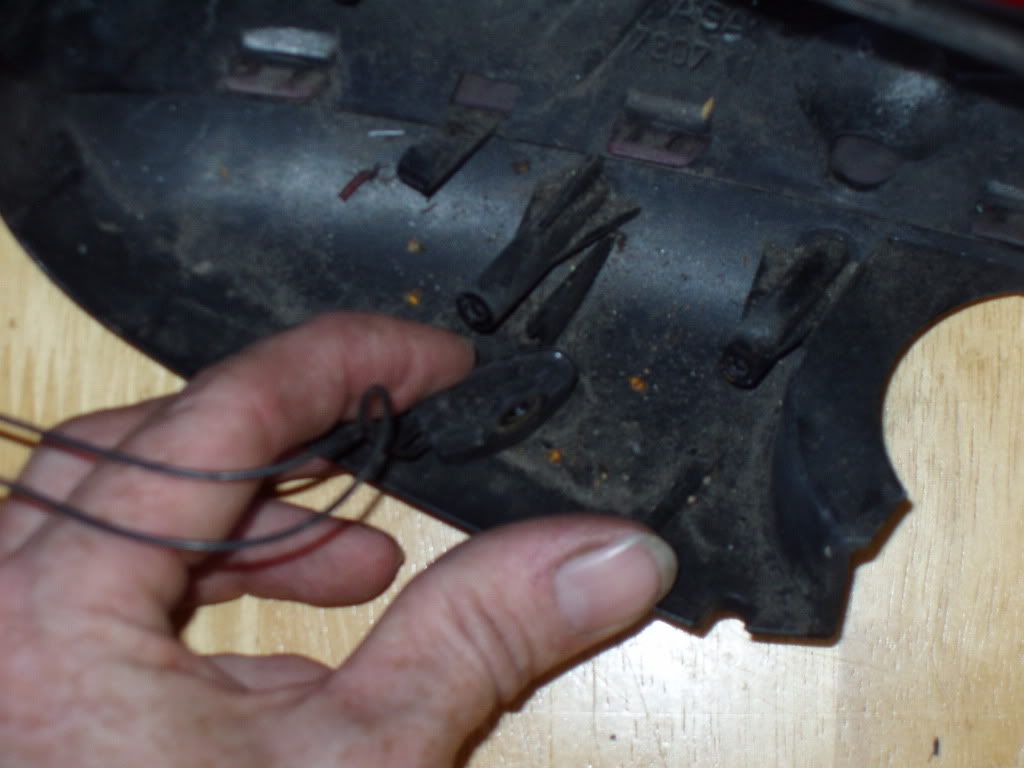
Carefully separate the grey and white sections of the plug, there is a clip on the opposite side to the plug release clip.
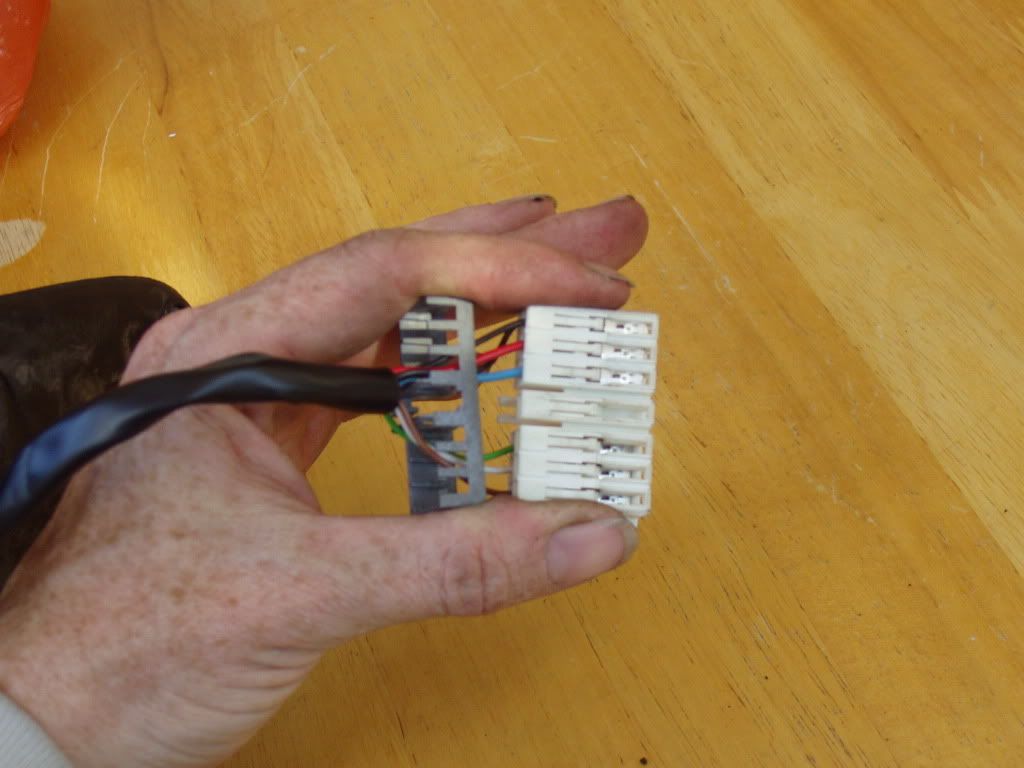
Now there are two clips holding the connector into the plug, an easy one on the outside, and the tricky one in the centre.
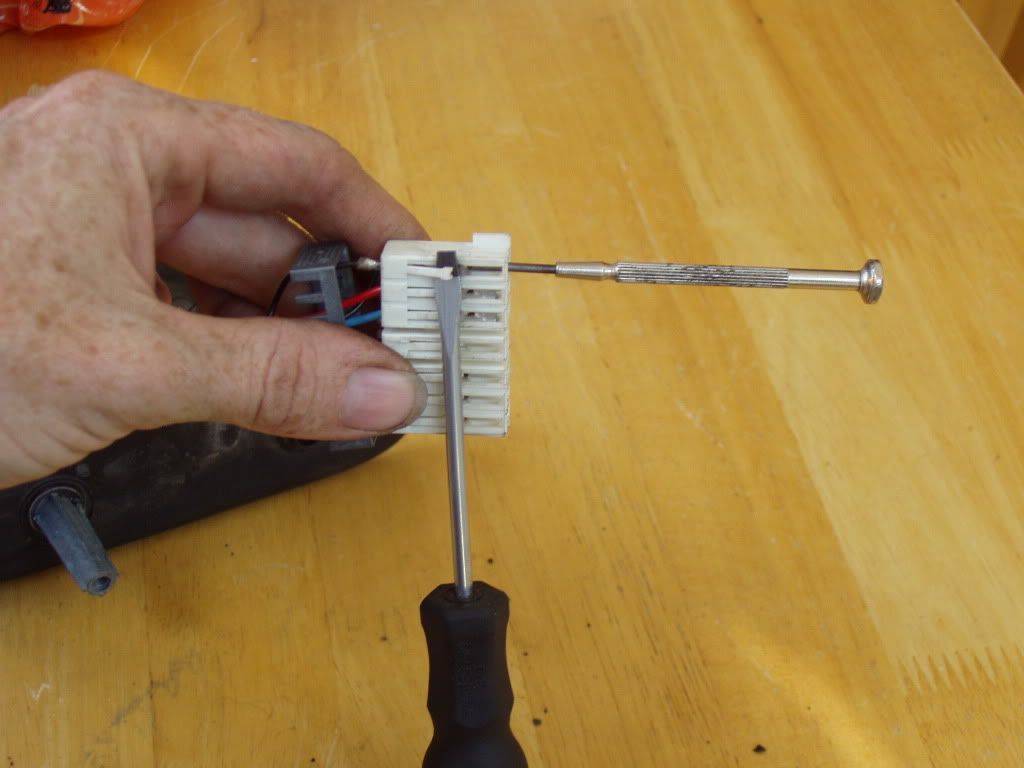
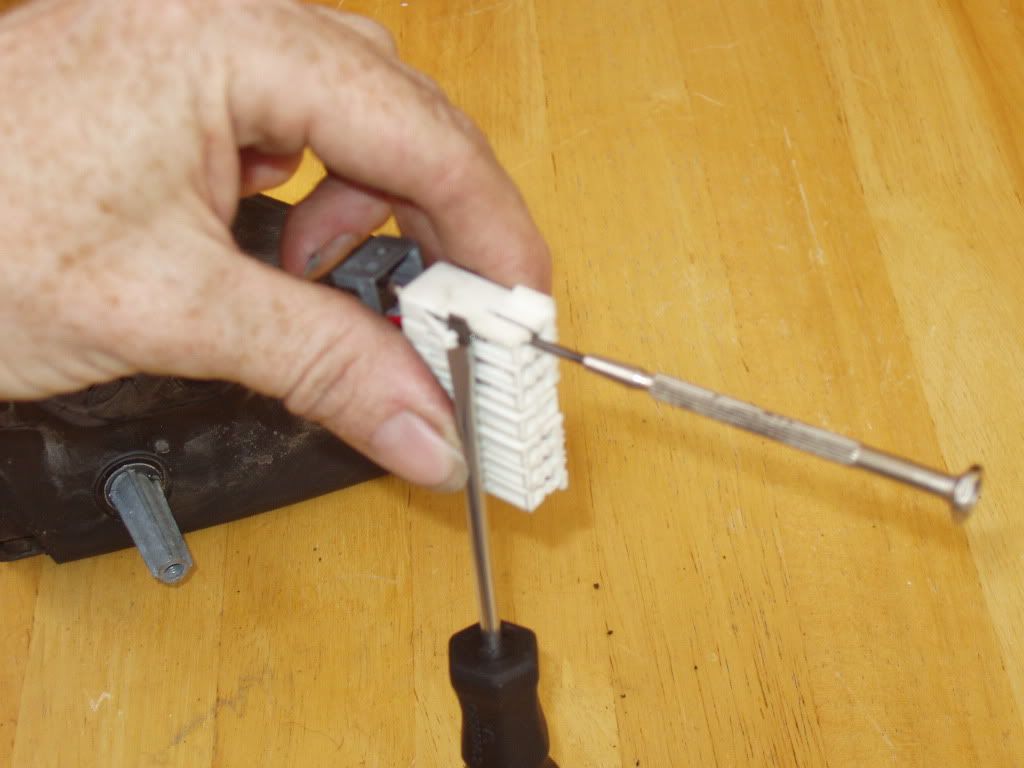
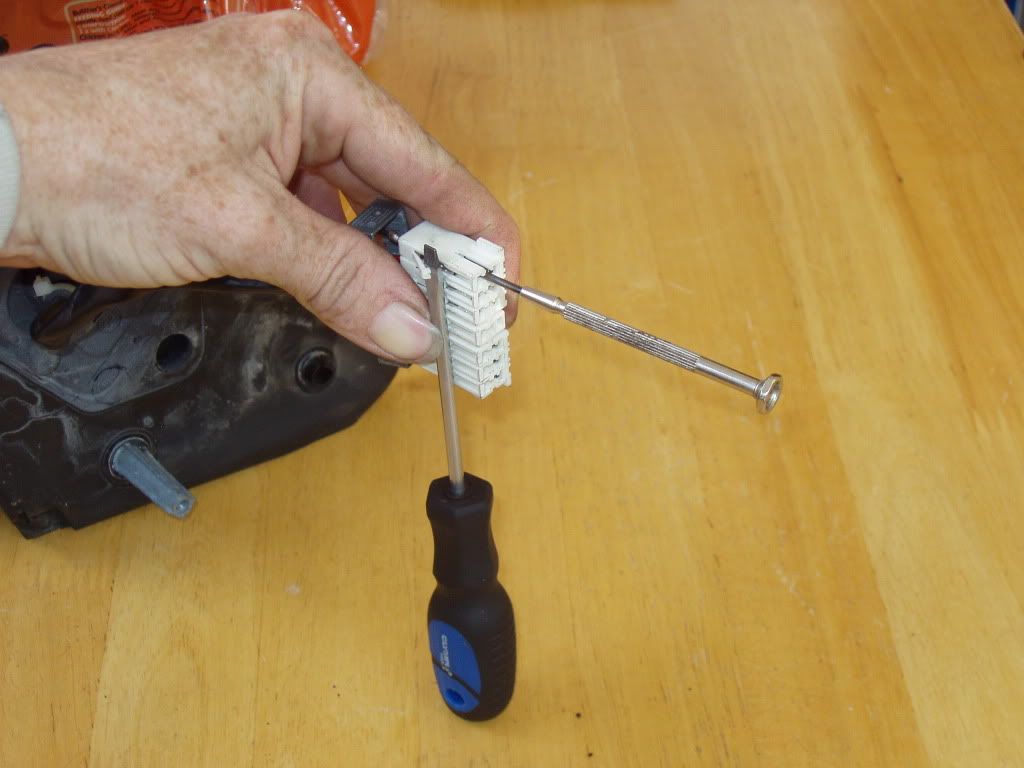
Gently remove the connector from the plug.

You should be able to carefully unthread the wires from the sleeve.
Reassembly is a reversal of the above!
There are three fixing the mirror to the door.
After removing the glass,by pressing the wire clip,
there are three screws that hold the surround and motor together.
Once they are out the surround has a clip on the inside of the hinge, out of sight,
a little wiggle and pull straight back and mine separated.
Behind the circular mirror mount, at about the 2 or 10o'clock position is a clip holding the front shell.
Unclip it and rotate the shell forwards 90 degrees and it will lift up off the frame of the mirror.
This is for info only, I can't see any need to do it as these parts, if broken require a new mirror.
There are two gold coloured screws holding the frame to the fold motor/gearbox. Take them out and lift the frame up.
On the underside of the door mount is a clip on panel covering three more screws holding the gearbox to the door mount.
The motor/gearbox looks to be welded or glued rather than screwed or clipped, I didn't try to separate them.
The painted section of the front shell can be separated fairly easily once the shell is off the frame, so you can swap them on replacement mirrors, or for repainting.
There are three flat clips along the bottom, and three taller clips higher up. The top bits are for alignment.
The temp. sensor is fitted in the left hand shell.
Remove the screw.
And rotate the sensor,
to release.
The wiring passes through the hinge,
and the frame, under the rubber pad,
to the plug.
Carefully separate the grey and white sections of the plug, there is a clip on the opposite side to the plug release clip.
Now there are two clips holding the connector into the plug, an easy one on the outside, and the tricky one in the centre.
Gently remove the connector from the plug.
You should be able to carefully unthread the wires from the sleeve.
Reassembly is a reversal of the above!
Last edited by stealthe on Sun May 08, 2011 8:54 pm, edited 1 time in total.
-
steve_earwig

- Moderator
- Posts: 19813
- Joined: Thu Oct 04, 2007 6:09 pm
- Location: Jastrebarsko, Croatia http://www.jastrebarsko.hr/lokacija/
Re: Photo opportunity!
Fantastic stuff yung maan! 
Just a quick Q: I'm always worrying that the mirror folding doo-dahs will wear out for a lack of a blob of grease but then I could break them trying to get them apart, is there an easy way of getting in there or don't they need anything?
Also, under the fully multiplex engine fuse box, is there just the mahahassive fuses or is there a shed load of relays too?
Keep up the good work!
Unskilled meddling sin©e 2007
The submitted form was invalid. Try submitting again.
The submitted form was invalid. Try submitting again.
Re: Photo opportunity!
In the pic below you can just see a shiny bit at 2 o'clock on the mirror section (not the door part.) It's the only place that I've noticed that could possibly be packed with grease.steve_earwig wrote:Fantastic stuff yung maan!
Just a quick Q: I'm always worrying that the mirror folding doo-dahs will wear out for a lack of a blob of grease but then I could break them trying to get them apart, is there an easy way of getting in there or don't they need anything?
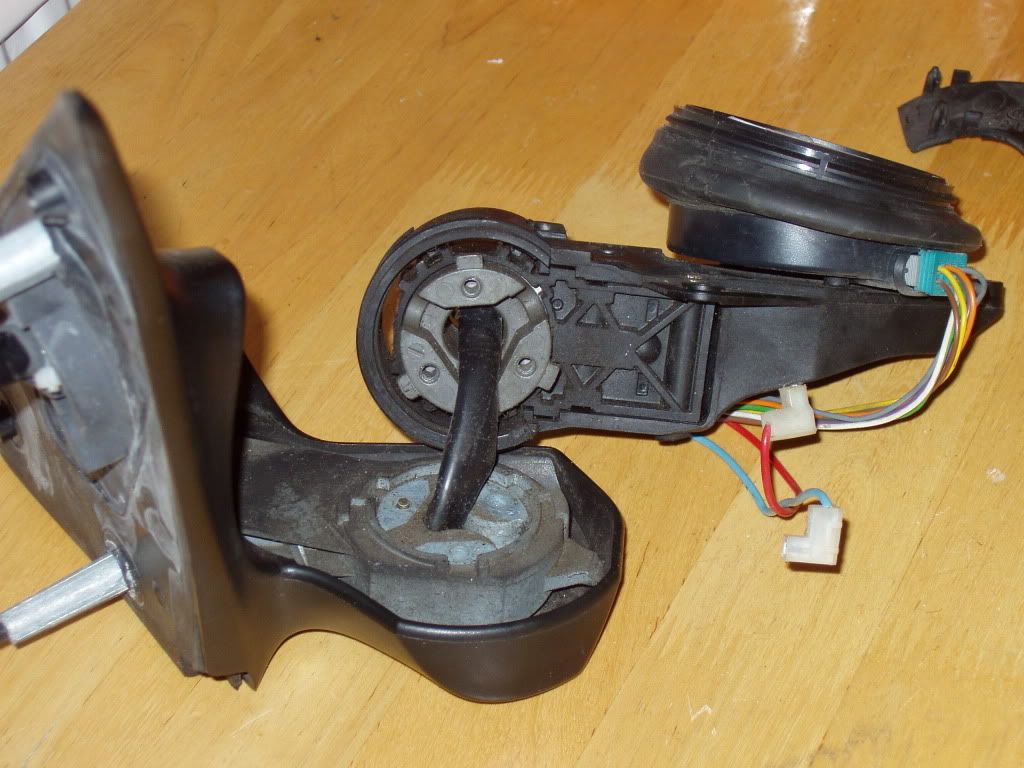
Of course, dirt sticks in grease, so you may hasten the demise of the fold mech. I don't think the motor/gearbox is designed to be serviced.
If someone were to butcher a dead one, it may be possible to tell if they are nicely sealed, or if a spot of grease would help prolong their life.
If you knew the internal layout it may be possible to drill a hole, pack with grease and then put a grommet or similar in to seal it up?
Just the fuses, there were some relays near the pass. fusebox/bsi. (which I was going to use for my folding mirror project, but have misplaced.steve_earwig wrote:Also, under the fully multiplex engine fuse box, is there just the mahahassive fuses or is there a shed load of relays too?
Keep up the good work!
stealthe
-
steve_earwig
- Moderator
- Posts: 19813
- Joined: Thu Oct 04, 2007 6:09 pm
- Location: Jastrebarsko, Croatia http://www.jastrebarsko.hr/lokacija/
Re: Photo opportunity!
I was just wondering, with all things French and electric it's probably best to have a back up plan Btw I was thinking about your folding mirrors and what happens if they get ice or snow on them. I think the real thing "times out" somehow  so if you're using that it all should be ok.
Btw these seats have completely transformed the car, I'm still chuffed up to me wotsits every time I get in it I just need to get on and pull the front ecu connector apart to see if I can find the right wire for the cruise (no rush for that one though)
There's a stack of relays under the fuse panel on the C5 so I was wondering what the 406 had. It turns out I need one of them micro relays for the heated seats, it's looking like they're hard to get hold of here but I think I can wait a wee while to find one of them too
Btw these seats have completely transformed the car, I'm still chuffed up to me wotsits every time I get in it
There's a stack of relays under the fuse panel on the C5 so I was wondering what the 406 had. It turns out I need one of them micro relays for the heated seats, it's looking like they're hard to get hold of here but I think I can wait a wee while to find one of them too
Unskilled meddling sin©e 2007
The submitted form was invalid. Try submitting again.
The submitted form was invalid. Try submitting again.
Re: Photo opportunity!
I have the 2 relays under the BSI, and the two of them have wires connected to it but not relays connected only 2 pieces of plastic like i have shown on the picture, but you say one is for the heat seats ( why only one ? does one control the 2 seats ? ), and the other is for what ?steve_earwig wrote:I was just wondering, with all things French and electric it's probably best to have a back up plan
Btw these seats have completely transformed the car, I'm still chuffed up to me wotsits every time I get in it
There's a stack of relays under the fuse panel on the C5 so I was wondering what the 406 had. It turns out I need one of them micro relays for the heated seats, it's looking like they're hard to get hold of here but I think I can wait a wee while to find one of them too

2000/May 406 Estate 2.0 HDI 110bhp DW10ATED now with 205k km & now with cruise control & now remaped @ 134bhp
Re: Photo opportunity!
This place does timed and latching fuses, with a little thought it should be possible to latch from the locking circuit and time the operation of the mirrors.steve_earwig wrote:I was just wondering, with all things French and electric it's probably best to have a back up plan
However, it would make the whole project far more complex and give more opportunity to interference with/from the bsi and/or a failure jamming the mirrors in the folded position.
Obviously the UK doesn't suffer particularly bad winter weather, so I've never experienced a problem on the 407 or the 406, but if there is concern that freezing may be an issue, it is possible to add timing as a safeguard.
Can I interest you in some black lower dash panels to match your lovely leather interior?steve_earwig wrote:Btw these seats have completely transformed the car, I'm still chuffed up to me wotsits every time I get in it
The 2000 plate GTX has three under the bonnet, and two inside by the fusebox. The '52 Exec, IIRC had four near the bsi/fusebox.steve_earwig wrote:There's a stack of relays under the fuse panel on the C5 so I was wondering what the 406 had. It turns out I need one of them micro relays for the heated seats, it's looking like they're hard to get hold of here but I think I can wait a wee while to find one of them too
stealthe
Re: Photo opportunity!
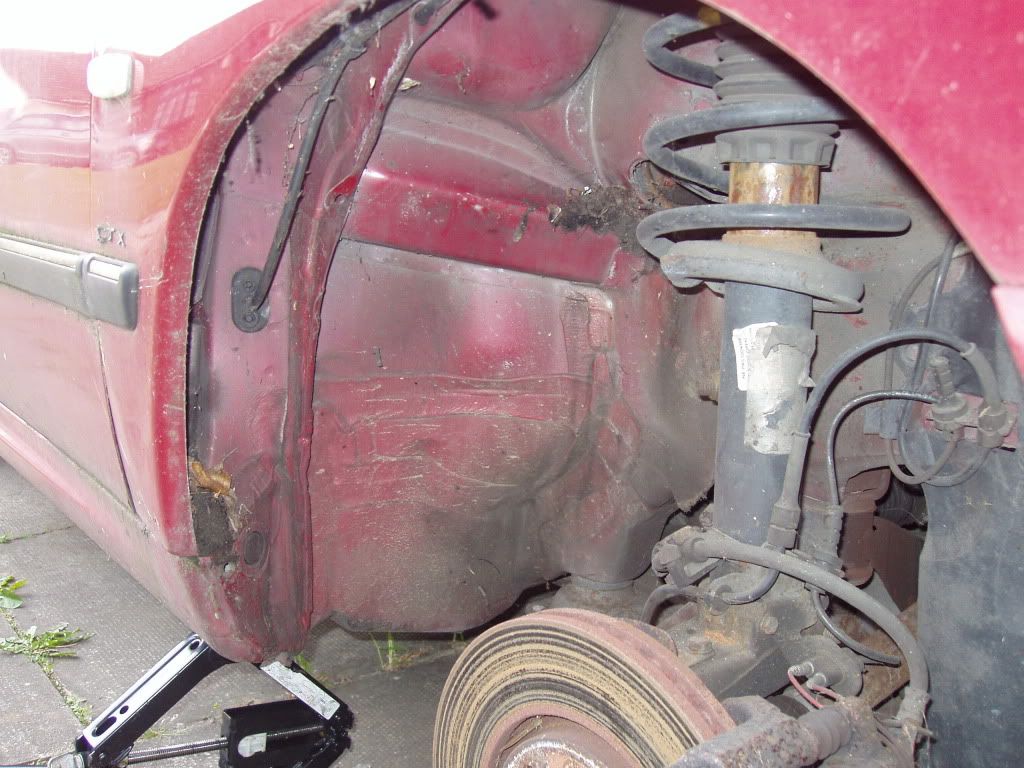
Front arches.FarmerPug wrote:hi there, can you pop out the sill end holes behind the front wheel arches, just to see how they are taken out and if they can be put back in.
If you see any particular rust traps let me know but i think i found most of them the time i was breaking the car.
Good idea though making a guide as you break it, i regret not taking enough photos.

The plastics are mostly held with these.
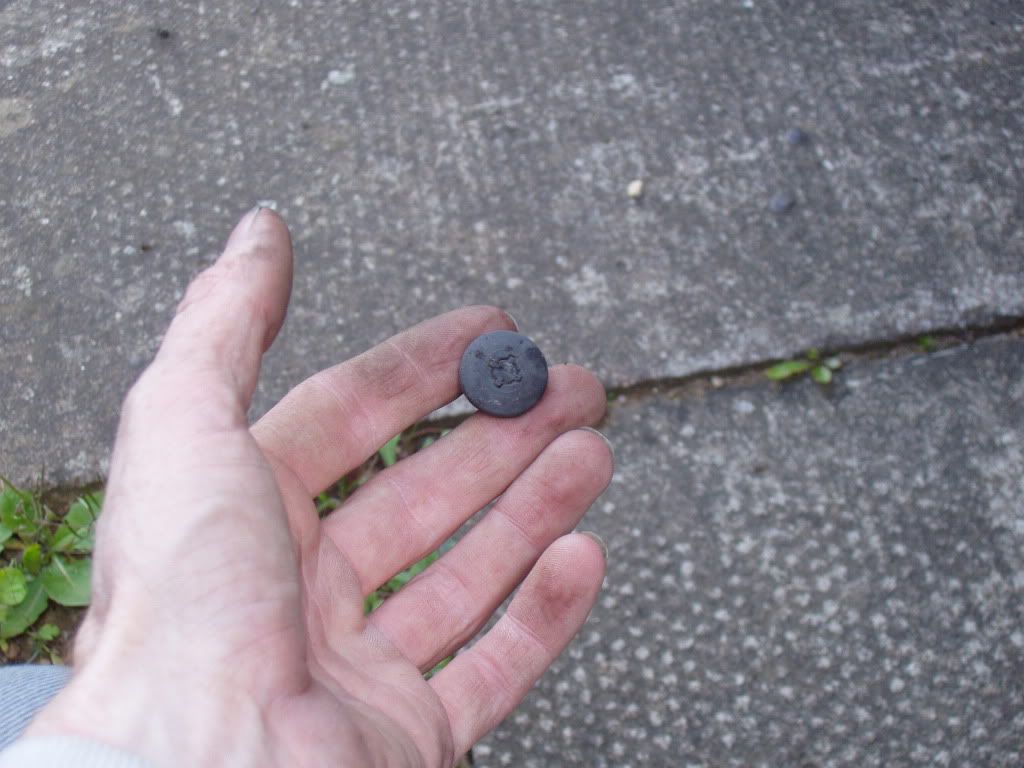
Push the centre in to release them.
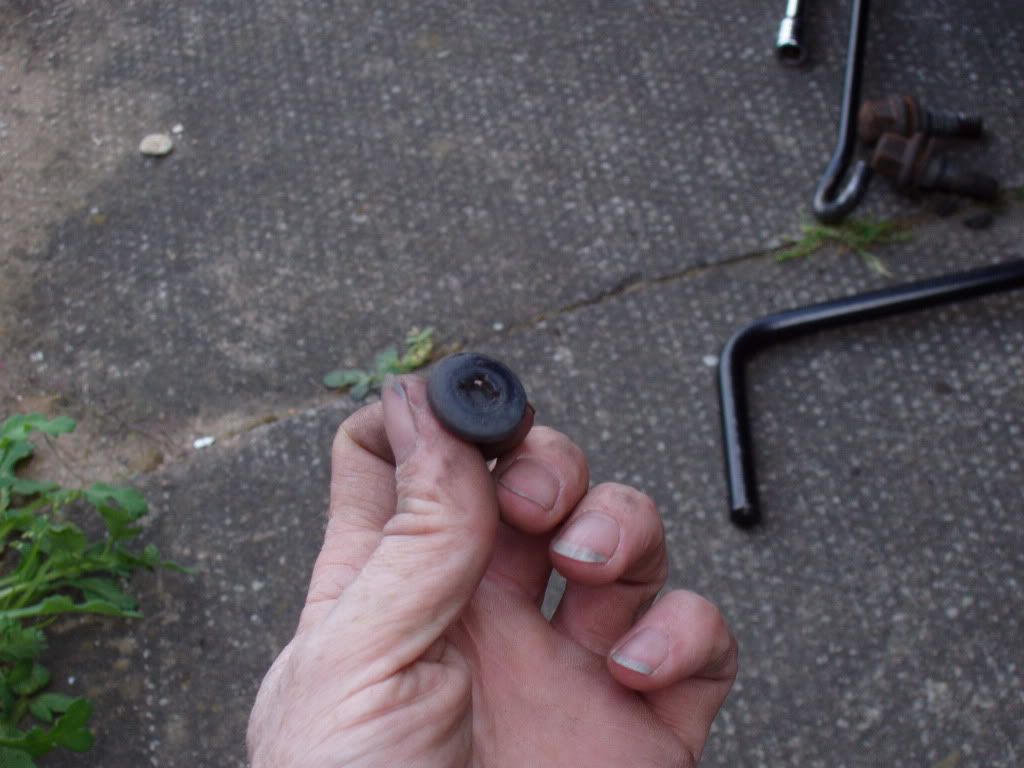
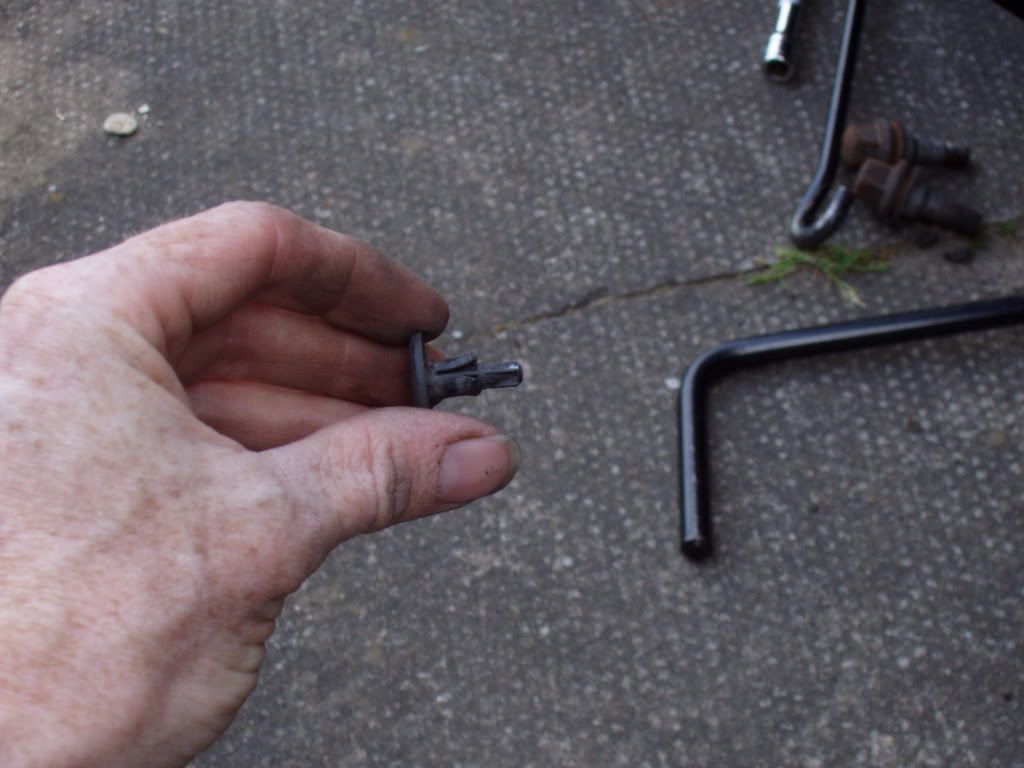
To re-install them, pull the pin out, push them in to the mounting hole and push the pin home.

I find that if you get the bottom of the plastic free from the wing, then you can slide them down to remove them from the car.
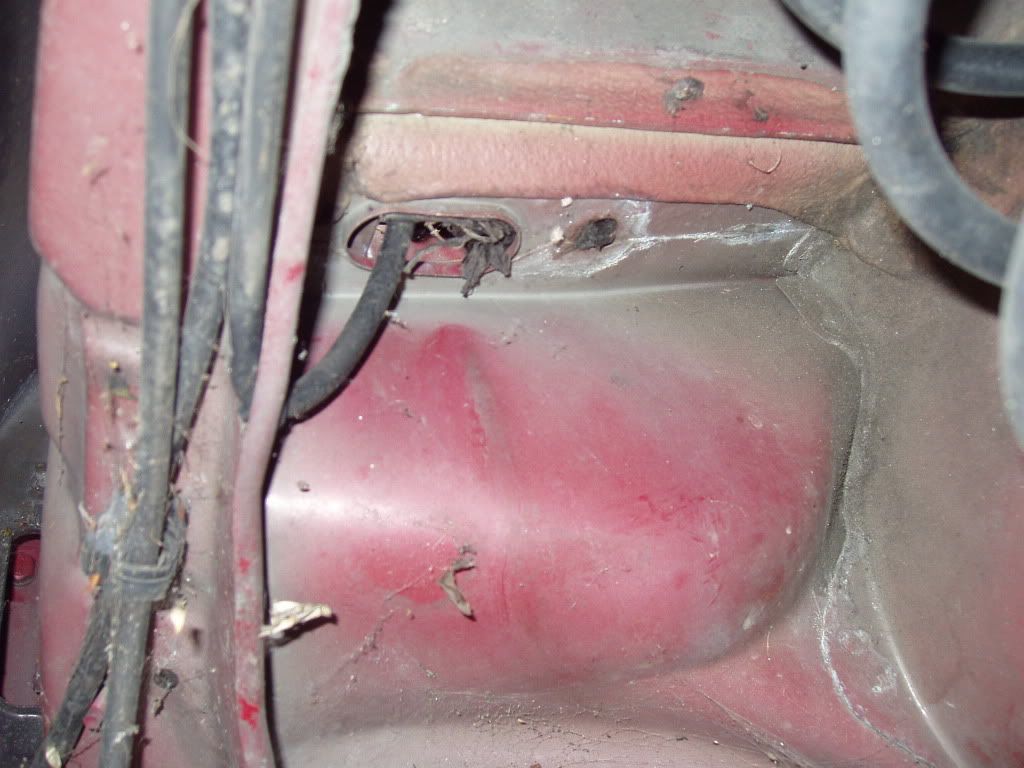
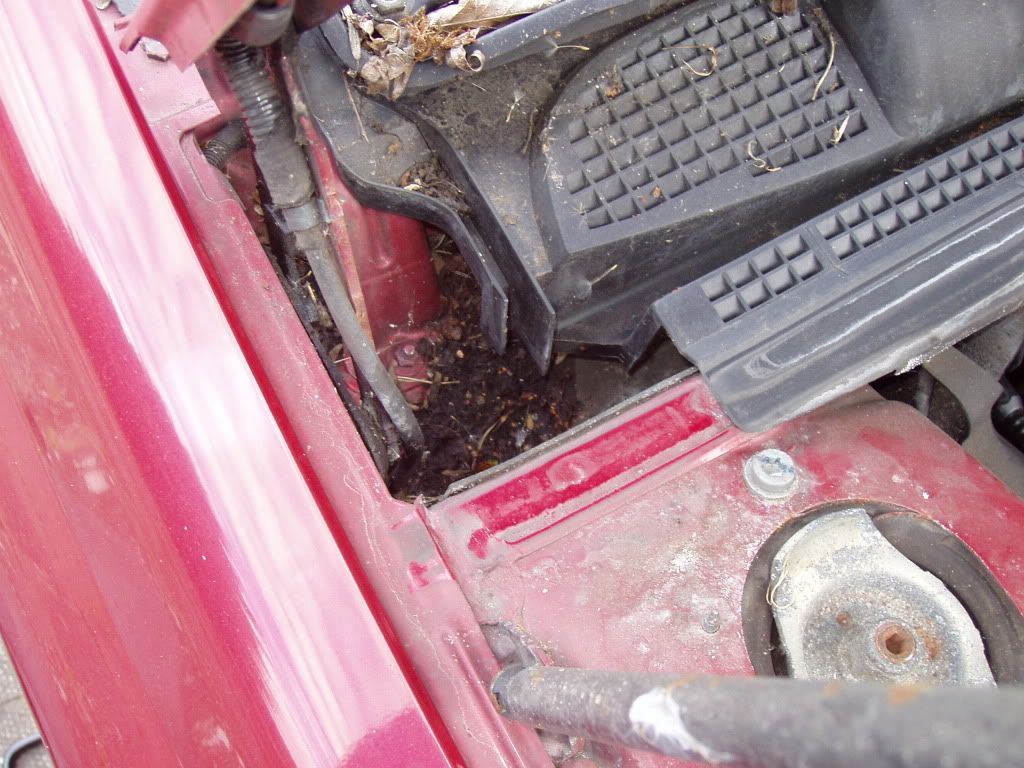
Notice the dirt collected here,
and here,

and the drain hole here from the vent area.
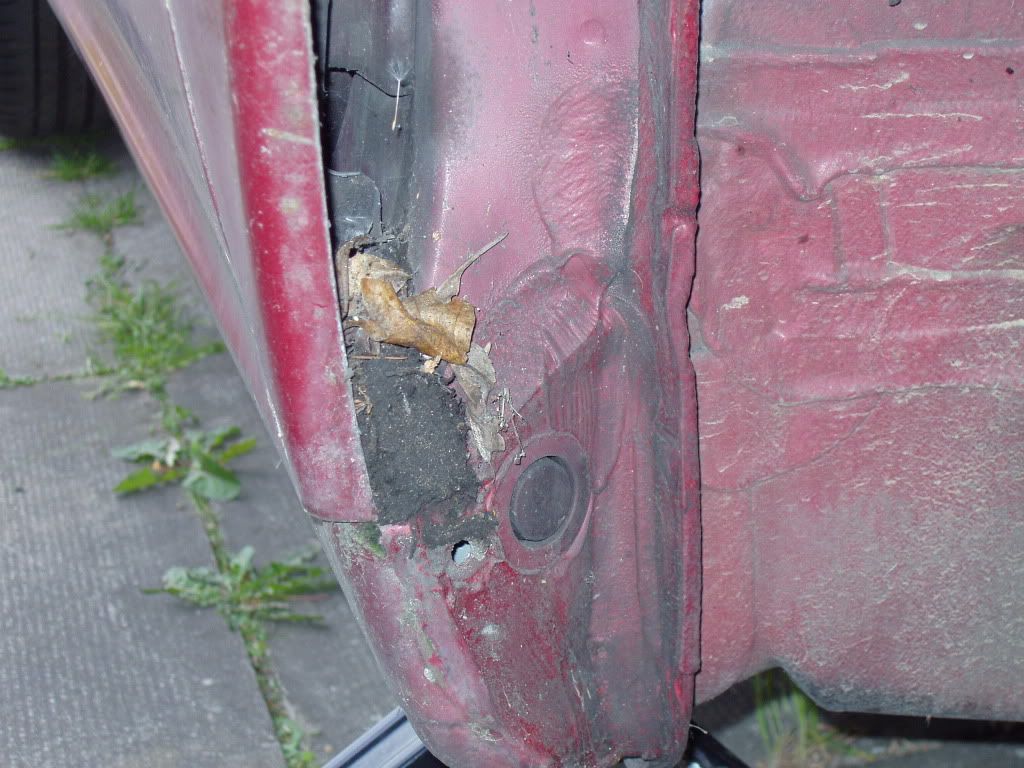
The sill access plug, plastic not rubber, lets you see virtually nothing.
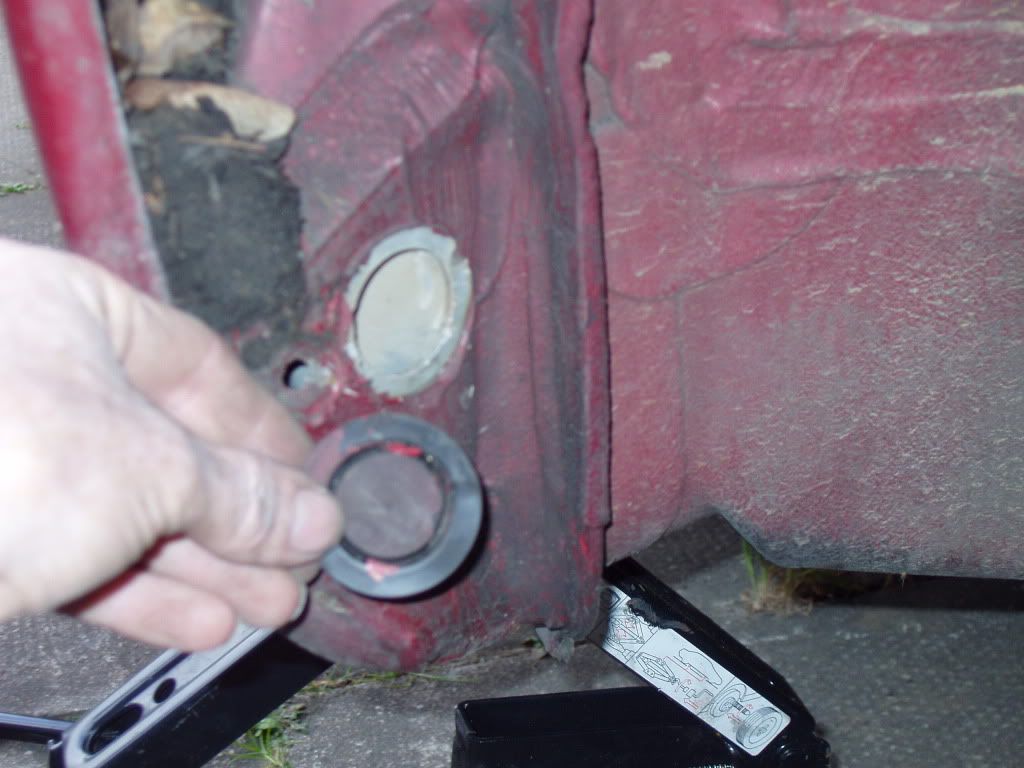
The hole next to it may be more use?

The front half is secured to the bumper with torx screws.
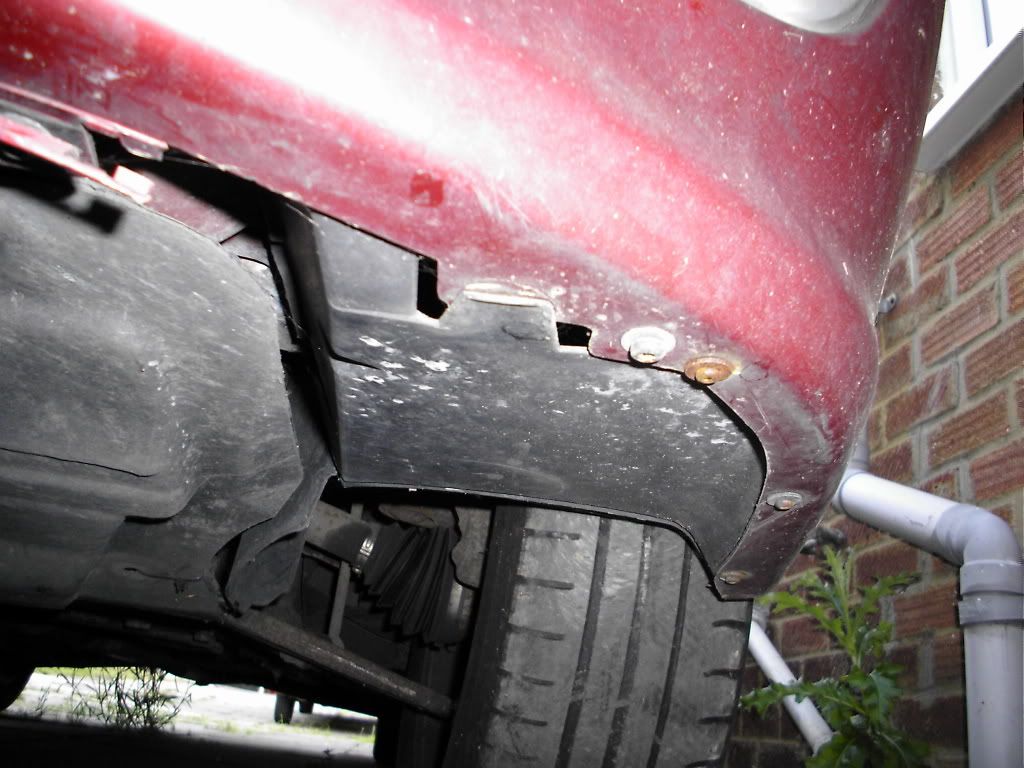
There are a couple of the plastic clips, and very likely some cable ties/zip ties at random places.
Be aware that the ABS and brake pad wear wires are clipped to this section.
The washer bottle is under the right hand side.
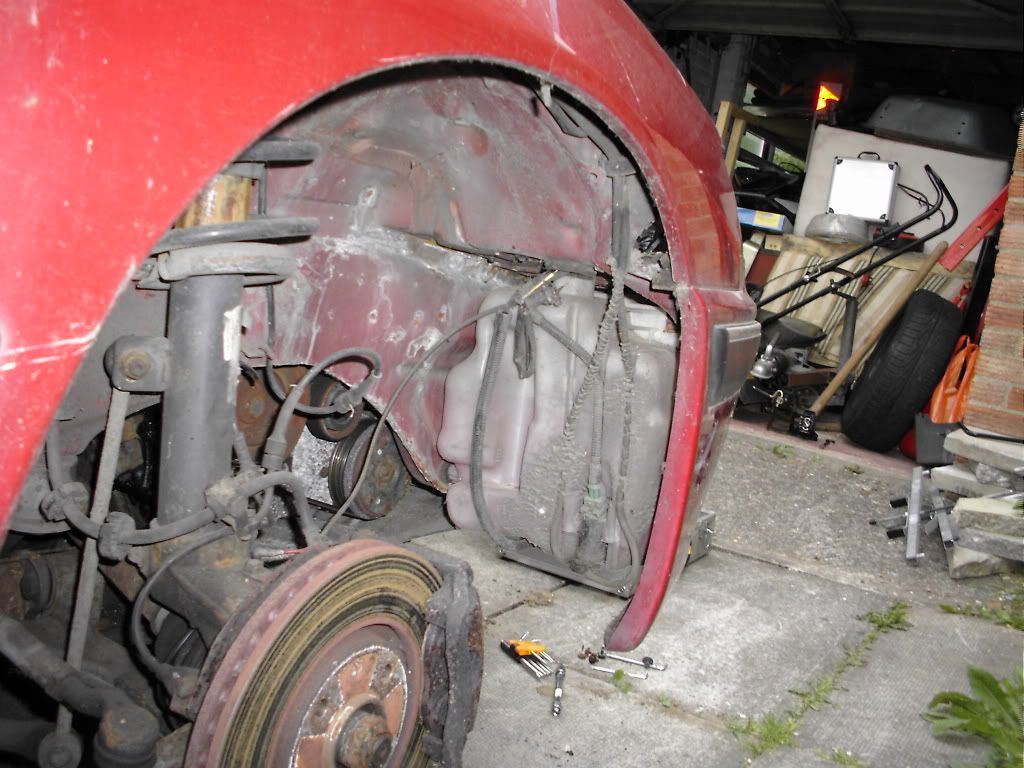
It is secured by this bolt and a peg into the chassis rail.

The pump is a push fit into the reservoir, so it can be replaced without removing the tank, and on the estate feeds the front and rear washers.
To remove the tank, disconnect the wiring and plumbing, and unclip the loom from the bottom of the tank. Unscrew the filler neck.
Remove the bolt and swing the bottom of the tank out to release the peg.
stealthe
-
steve_earwig
- Moderator
- Posts: 19813
- Joined: Thu Oct 04, 2007 6:09 pm
- Location: Jastrebarsko, Croatia http://www.jastrebarsko.hr/lokacija/
Re: Photo opportunity!
Judging by the way one of mine stuck half open once because I started the car while they were still in motion there is timing there already, but I don't suppose Pug would have done anything convenient like put it in the motor end of the circuitstealthe wrote:This place does timed and latching fuses, with a little thought it should be possible to latch from the locking circuit and time the operation of the mirrors.
However, it would make the whole project far more complex and give more opportunity to interference with/from the bsi and/or a failure jamming the mirrors in the folded position.
Obviously the UK doesn't suffer particularly bad winter weather, so I've never experienced a problem on the 407 or the 406, but if there is concern that freezing may be an issue, it is possible to add timing as a safeguard.
I'll bear it in mind if I ever decide to convert it to RHDCan I interest you in some black lower dash panels to match your lovely leather interior?
The one at the other end of the sill is big enough to stick a camera in thoughstealthe wrote:The sill access plug, plastic not rubber, lets you see virtually nothing.
Image
Unusually convenient for PSA, the usual sort looses the pin into a box sectionstealthe wrote:Push the centre in to release them.
Unskilled meddling sin©e 2007
The submitted form was invalid. Try submitting again.
The submitted form was invalid. Try submitting again.